Nmap
Introduction
Live host discovery is crucial as going directly into port scanning can waste time and create unnecessary noise if trying to scan offline systems.
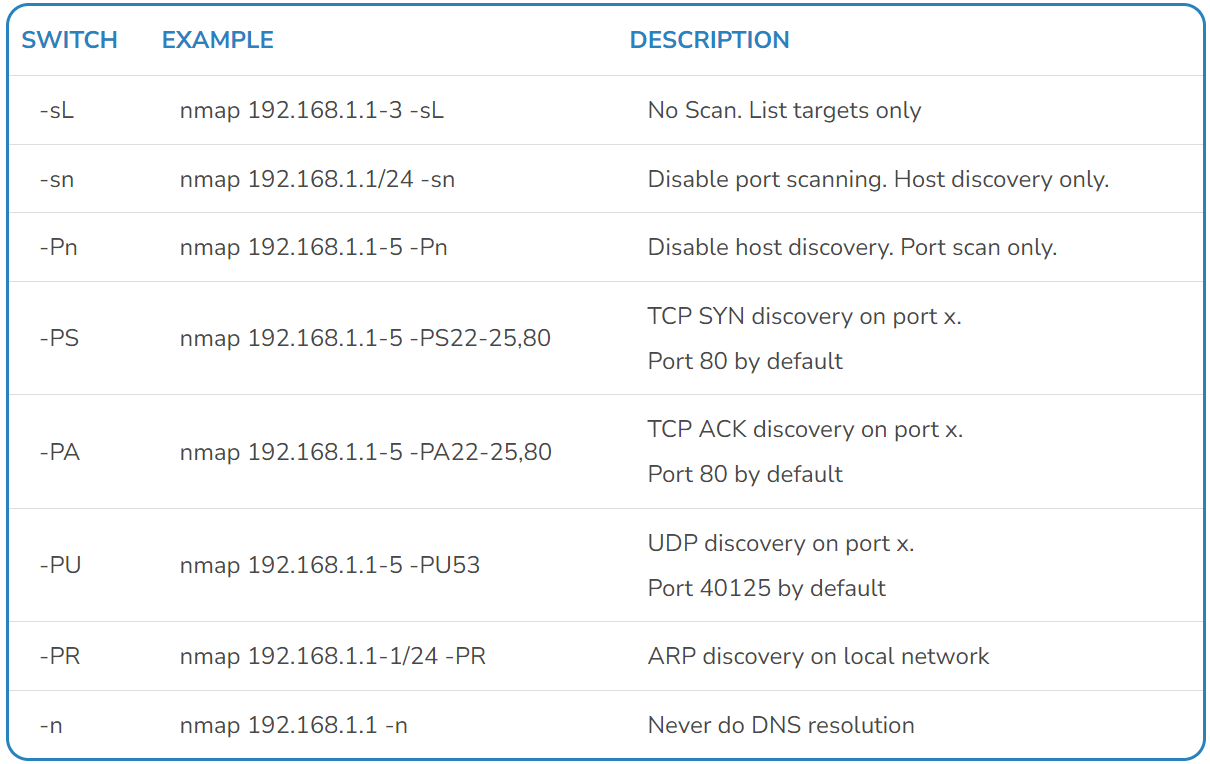 Commands related with Live Host Discovery
Host discovery
When no host discovery options are set, nmap follows the approaches shown below (in that order):
| User | Network | Method(s) |
|---|---|---|
| Privileged | LAN | ARP requests |
| Privileged | WAN | ICMP echo, TCP ACK (80), TCP SYN (443), ICMP timestamp |
| Unprivileged | WAN | TCP 3-way handshake via TPC SYN (80, 443) |
To confirm nmap’s behaviour with and without the use of a privileged account, we can trying scanning a random IP address from the same subnet as ours:
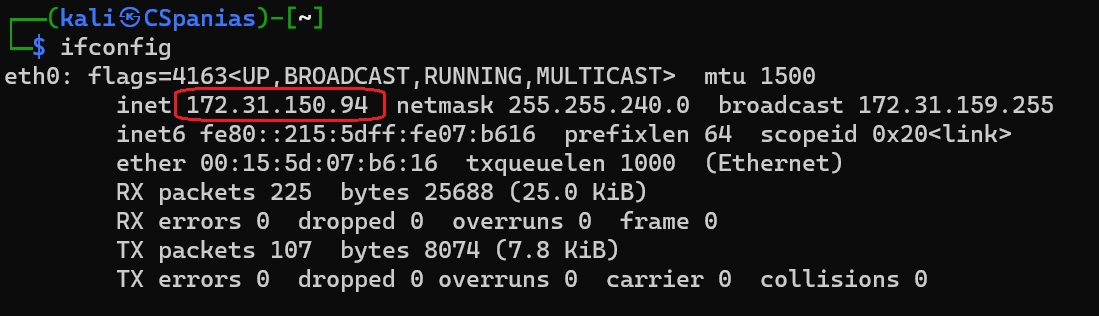 Using
Using ifconfig to note down our IP address
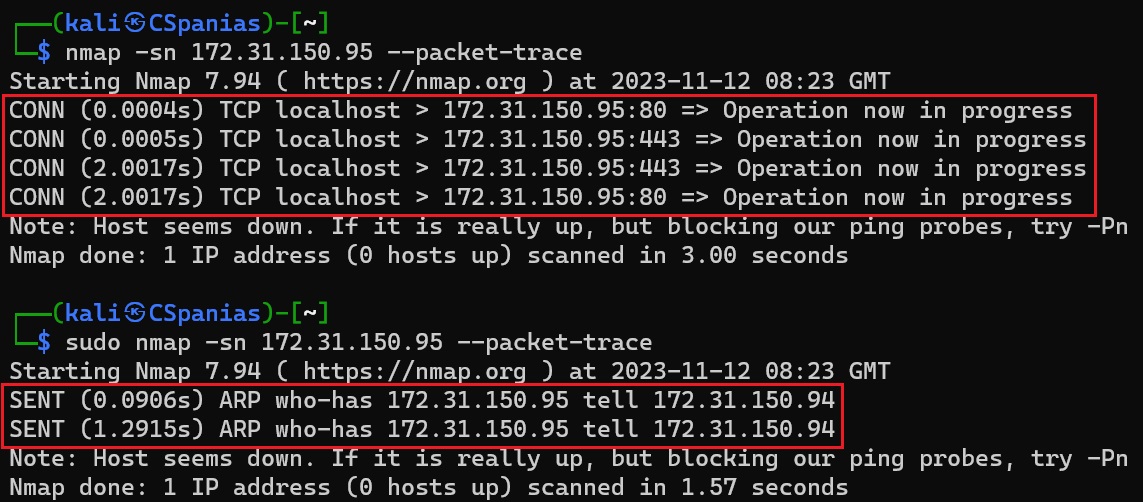 Default Live Host Discovery scan with and without the use of a privilieged account
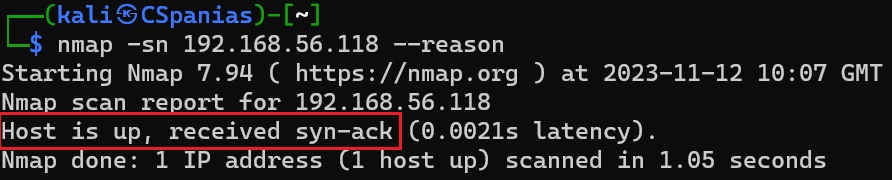
When we execute the command without sudo, it skips both the ARP and ICMP scans, and goes straight for a full TCP scan. However, when we use sudo it performs an ARP scan as expected, since the target host is on the same subnet as us.
If we gain an initial foothold with a low-privileged user on a target host and we try to enumerate the network from within using
nmap, it will use a full TCP scan which will generate a lot of traffic and probably a system alert.
ARP scan
Requirements:
- Privileged account.
- Same subnet.
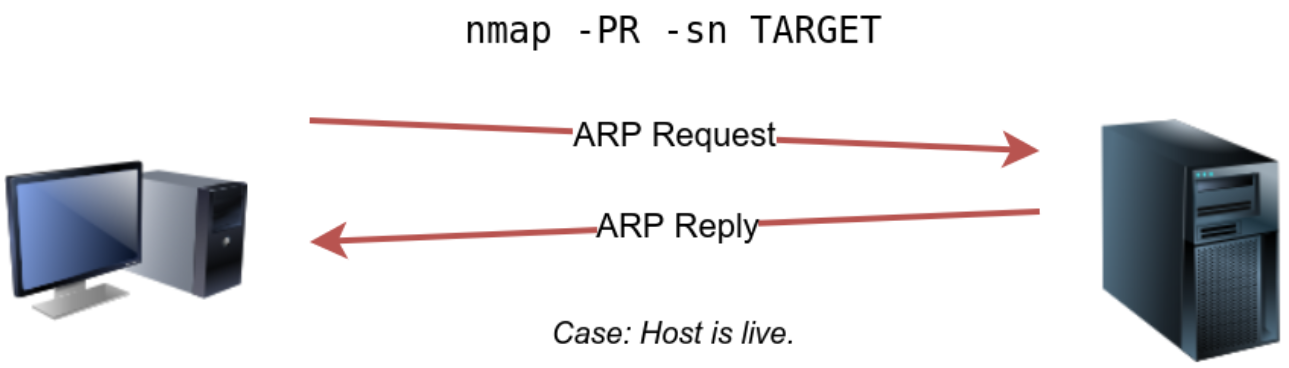 Schematic diagram of an ARP request
ICMP echo scan
Requirements:
- Privileged account.
If the target is on the same subnet, an ARP request will precede the ICMP echo request. We can disable ARP requests using
--disable-arp-ping.
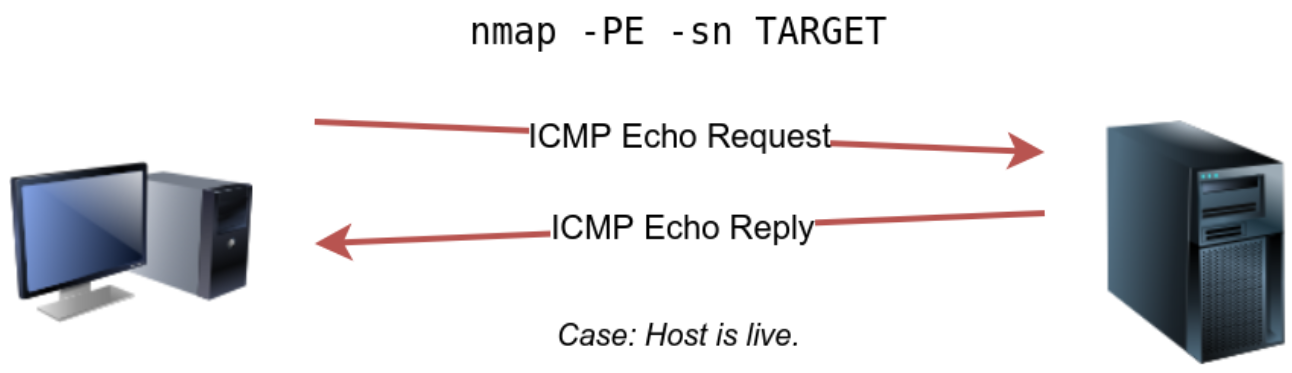 Schematic diagram of an ICMP echo request
New Windows versions as well as many firewalls block ICMP echo requests by default:
 Windows Defender Inbound rules related to the ICMPIPv4 protocol
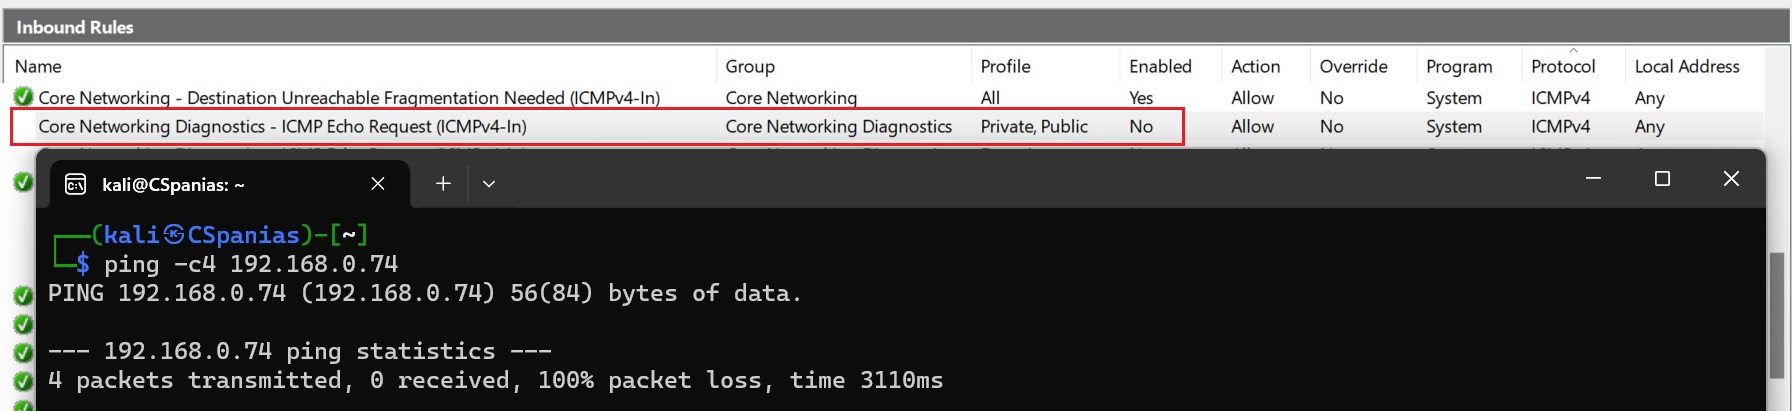 ICMP echo requests not allowed
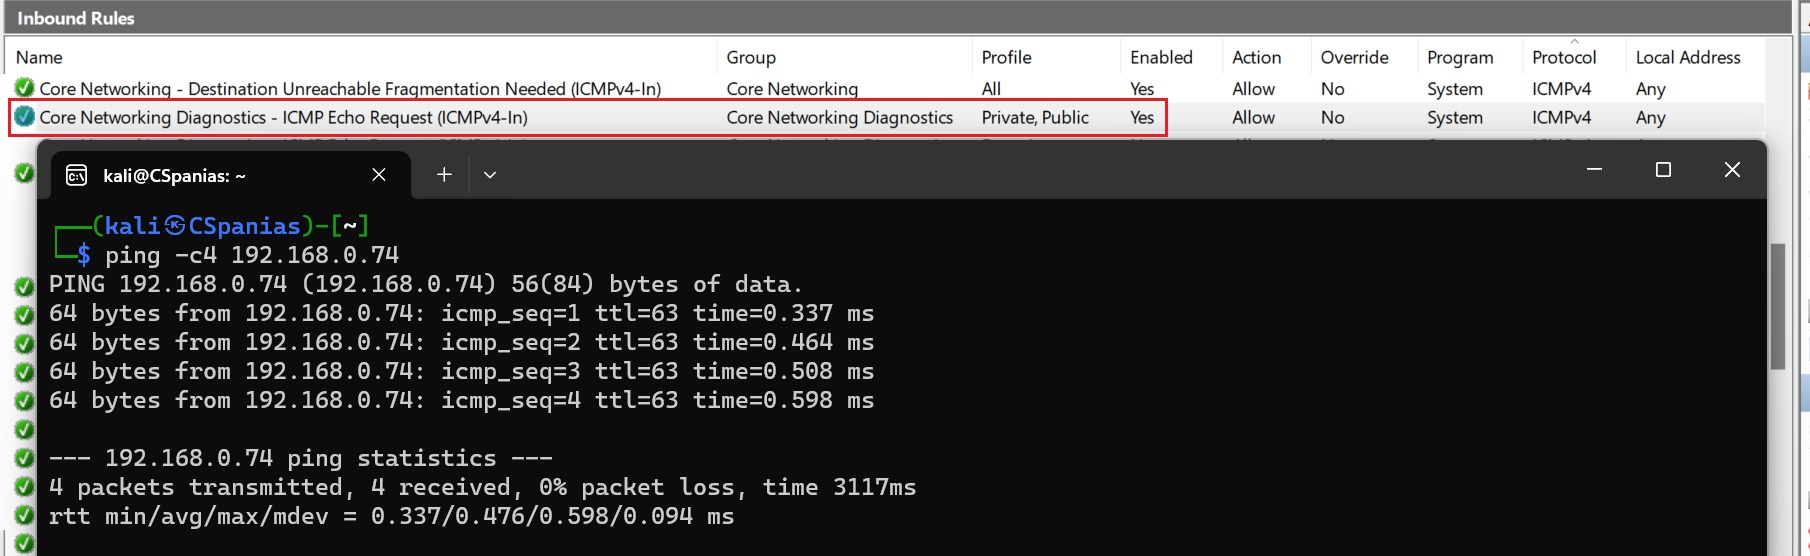 ICMP echo requests permitted
To see what happens in practice, we can scan a live host residing on a different subnet:
 Packet tracing during an ICMP echo request
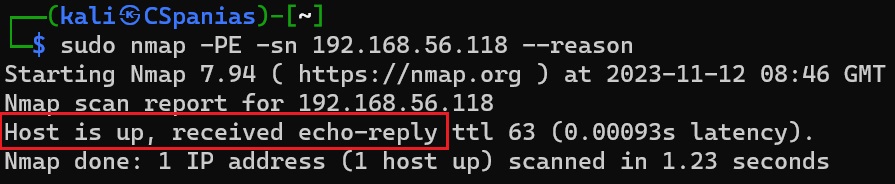 Reasoning of why nmap marked the host as alive after an ICMP echo request
We see that nmap sent an ICMP echo request and it received an ICMP echo reply back, thus, it marked the host as online. If we try to replicate that for a host that is not up, nmap will send two ICMP echo requests before it gives up and mark the host as offline. The second is just making sure that nothing went wrong with the first one:
 Packet tracing of a dead host with an ICMP echo request
The TTL (time-to-live) value can helps us in identifying the target OS. The default initial TTL value for Linux/Unix is 64, and TTL value for Windows is 128.
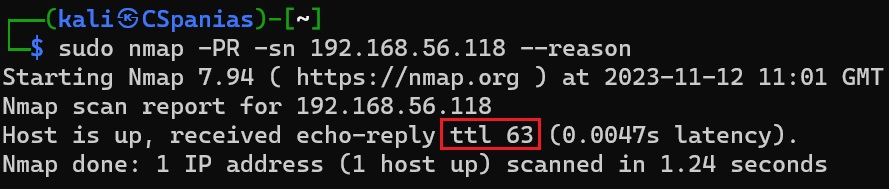 TTL value of 63 pointing towards a Linux OS
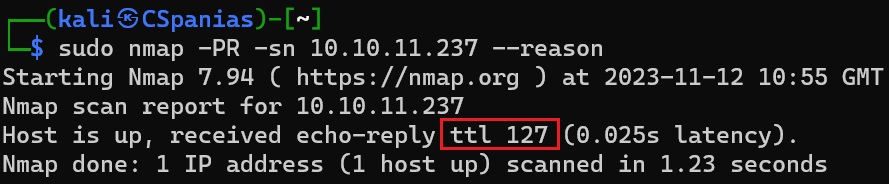 TTL value of 127 pointing towards a Windodws OS
As ICMP echo requests tend to be blocked, we can consider sending an ICMP Timestamp (
-PP) or an ICMP Address Mask (-PM) request, and expect for a Timestamp or an Address Mask reply, respectively.
TCP scans
TCP full scan
Unprivileged users can only scan using the full TCP 3-way handshake method.
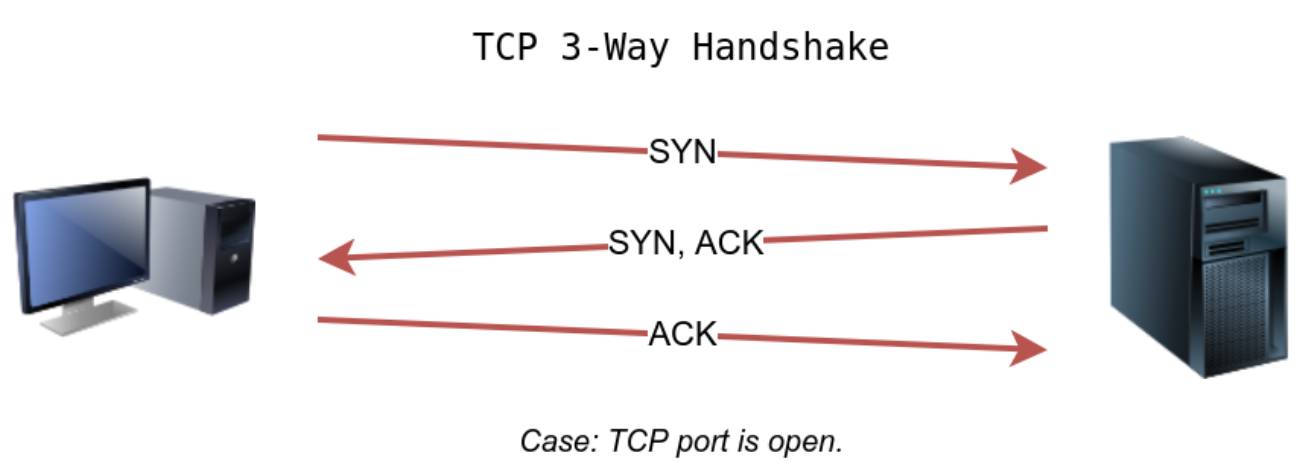 Schematic diagram of a full TCP 3-way handshake scan
That’s is how the process looks like:
 Packet tracing of a full TCP 3-way handshake scan
 Reasosing of a live host after a full TCP 3-way handshake scan
TCP SYN scan
Requirements:
- Privileged account.
Privileged users don’t need to complete the TCP 3-way handshake even if the port is open (TCP SYN scan), but unprivileged ones have no choice but wait for its completion (TCP full scan).
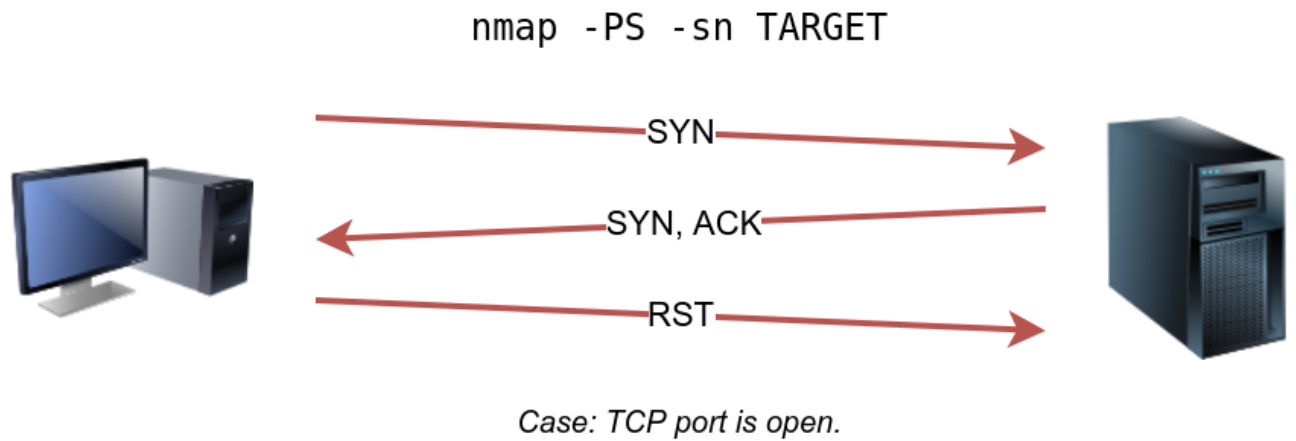 Schematic diagram of a TCP SYN scan
 Packet tracing of a TCP SYN scan
TCP ACK
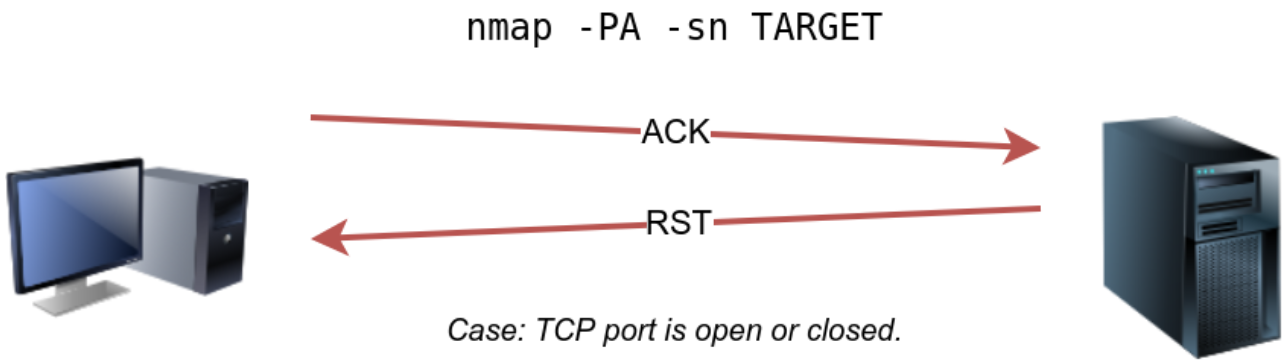 Schematic diagram of a TCP ACK scan
As we can see below, since the reset flag was received, nmap marked the host as alive:
 Packet tracing of a TCP ACK scan
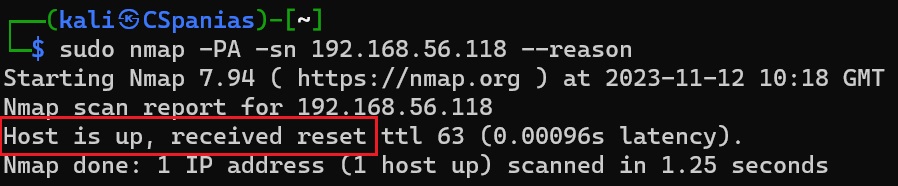 Reasosing of a live host after a TCP ACK scan
Footnote
- The majority of the material comes from TryHackMe’s Nmap and HackTheBox’s Network Enumeration with Nmap modules.
- The scan diagrams come exclusively from TryHackMe’s Nmap module.